 User Manual
CognitixERP User Manual
Welcome to the official CognitixERP help documentation. This guide explains how to use the modular ERP platform — from company setup and accounting to sales, inventory, POS, HR, CRM, recruitment, employee self-service, workplace, projects, banking, and compliance.
Introduction
CognitixERP is a production-ready, modular enterprise resource planning (ERP) system for growing businesses that need accounting, sales, purchasing, inventory, point of sale, human resources, employee self-service, recruitment, workplace, projects, customer relationship management, and banking in one unified platform.
Built with Blazor WebAssembly and an ASP.NET Core REST API on .NET 10, CognitixERP delivers a fast, modern browser experience backed by a clean, maintainable server architecture. Business rules — posting, tax, FX conversion, stock valuation, and general ledger integration — always run on the backend; the web client focuses on presentation and workflows.
Whether you are a finance manager, operations lead, HR administrator, or business owner, CognitixERP gives you real-time visibility, role-based access control, and integrated workflows across modules so you can make confident, data-driven decisions.
Platform Overview
CognitixERP is organized as a Modular Monolith using Clean Architecture. Each business area (Billing, Financials, Inventory, and so on) is a separate module with its own domain logic, while a single API host and one web application provide a seamless user experience.
Client & Server
| Component | Description |
|---|---|
| Cognitix.WebApp | Blazor WebAssembly SPA — dashboards, forms, reports, and module pages in the browser. |
| Cognitix.API | ASP.NET Core REST API — authentication, business logic, PDF/Excel exports, and module endpoints. |
| Database | SQL Server, PostgreSQL, or MySQL — one logical database with module-specific schemas managed by EF Core migrations (Setup Wizard). |
Architecture Principles
- Backend business logic — calculations, posting, tax, FX, and stock rules stay in Application/Domain layers.
- UI decoupling — the WebApp uses shared DTOs only; it never references domain entities directly.
- Cross-module workflows — e.g. approved sales invoices create balanced journal entries; POS sales update stock and GL.
- Multi-branch isolation — non-admin users see only data for their assigned branch unless granted broader access.
- Role & permission gates — every sensitive page and API action is protected by page-level permissions.
Supported Environments
- Server: Windows 10/11, Windows Server 2019+, or Linux with .NET 10; SQL Server 2019+ / Express / Azure SQL, PostgreSQL 14+, or MySQL 8+ / MariaDB.
- Browser: Latest Chrome, Edge, or Firefox with WebAssembly support.
- Optional: Cognitix.BiometricAgent (Windows) for HRM biometric attendance devices.
Key Capabilities
CognitixERP includes the following platform-wide capabilities across all modules:
Multi-Branch Operations
Company setup, branch switcher, and branch-scoped data for sales, stock, finance, and HR.
Multi-Currency & FX
Configurable decimal places (e.g. JPY 0, KWD 3), exchange rates, and currency revaluation.
Role-Based Access
Admin, Manager, Sales, Purchase roles with customizable page and action permissions.
Dark & Light Theme
Readable UI in both themes across Billing, Financials, POS, CRM, and other modules.
PDF & Excel Reports
QuestPDF-based PDF, Excel, and CSV exports from Manufacturing-style report hubs in every operational module.
Localization Ready
Shared localization resources with support for English, Bengali, Arabic, and French (RTL for Arabic).
Company Branding
Display name, logo, favicon, slogan, and timezone from Company Setup — reflected in UI and login.
Setup Wizard
First-run web installer for database, admin user, and license activation — no CLI required.
Open Setup Wizard Guide →Audit & Security
JWT authentication, refresh tokens, account lockout, and audit trail for sensitive actions.
Compliance Profiles
Regional tax compliance (GST, ZATCA, NBR) with e-invoice gates and compliance reports.
Modules at a Glance
CognitixERP ships with 18 integrated business modules. Use the links below to jump to each module section. Each guide includes screen-by-screen instructions, screenshot placeholders, and clear usage examples so you can complete real workflows end-to-end.
Branching & Company
Company profile, branding, branches, and multi-branch operational isolation.
Open module guide →Financials & Accounting
Chart of accounts, journal entries, trial balance, balance sheet, P&L, cash flow, tax, FX.
Open module guide →Tax & Compliance
GST (India), ZATCA (Saudi), NBR (Bangladesh), e-invoice submission, audit trail, and tax reports.
Open module guide →Users & Security
Users, roles, permissions, login, password policy, license settings, and preferences.
Open module guide →HRM
Employees, attendance, leave, payroll, shifts, loans, appraisals, onboarding, and HR reports.
Open module guide →CRM
Leads, contacts, customers, opportunities, pipeline, tickets, forecasts, and CRM analytics.
Open module guide →Inventory
Product masters — UoM, categories, brands, products, reorder policies, alerts, and master reports.
Open module guide →Stock
Quantities and movements — opening stock, branch stock, transfers, adjustments, thresholds, valuation.
Open module guide →WMS
Warehouses, zones, racks, bins, putaway, picking lists, stock moves, and warehouse reports.
Open module guide →Billing (Sales)
Quotations, sales orders, invoices, credit notes, receipts, AR aging, customer statements.
Open module guide →Point of Sale (POS)
Counter sales, sessions, coupons, cash-up, and POS reports with stock and GL posting.
Open module guide →Procurement
Supplier quotations, purchase orders, GRN, purchase invoices, supplier payments, AP aging.
Open module guide →Manufacturing
Work centers, bill of materials, manufacturing orders, work orders, quality checks, scrap, cost sheets.
Open module guide →Recruitment
Job requisitions, public careers page, candidates, applications, interviews, offers, and hiring reports.
Open module guide →Employee Self Service
Personal dashboard, attendance, expenses, travel, documents, policies, announcements, and ESS reports.
Open module guide →Workplace
Training programs, company assets, surveys, and workplace analytics (PDF / Excel / CSV).
Open module guide →Project Management
Projects, tasks, timesheets, budgets, milestones, client portal, and project reports.
Open module guide →Banking
Bank accounts, cheque books, issue/clear/bounce, reconciliation, banking reports.
Open module guide →Settings
Company profile, branches, email (SMTP), weight scales, license activation, and system configuration.
Open module guide →Approval Center
Configurable multi-level, role-based approvals, approval history, timeout escalation, and approval reports.
Open module guide →Setup Wizard Guide
The Setup Wizard runs once on a new installation. It prepares the database, creates your
first administrator, and activates a license or trial. You do not need
dotnet ef or PowerShell migration scripts for a normal install.
Before you start
- API is running (local: typically
https://localhost:7149; production: behind nginx/IIS). - WebApp
ApiBaseUrlpoints at that API (see Installation Guide). - Database engine is installed: SQL Server, PostgreSQL, or MySQL.
- You know the DB host, port, username/password (or Windows auth for SQL Server).
Step 1 — Database & infrastructure

Example — Local SQL Server Express
- Open /setup (auto-opens on first run).
- Enter Company/Display Name, Frontend URL
https://localhost:7019, API URLhttps://localhost:7149. - Select SQL Server, DB Server
.\SQLEXPRESS, choose a database name, then Continue.
Result: Connection is tested, the database is created if needed, and all module schemas are applied.
Fill the form, then click Continue. Schema provisioning usually takes 3–8 minutes — keep the tab open.
| Field | What to enter |
|---|---|
| Company Name / Display Name | Your organization names (shown later in branding screens). |
| Frontend URL |
Public WebApp URL with no trailing slash.
Local example: https://localhost:7019.
Production (same-origin): https://yourcompany.com.
|
| API URL |
Same public origin as the site for production: https://yourcompany.com.
Local API: https://localhost:7149.
Do not append /api — the WebApp already calls paths like api/....
|
| Database Engine | SQL Server, PostgreSQL, or MySQL. |
| DB Server |
SQL Server: .\SQLEXPRESS, localhost, or Azure host.
PostgreSQL / MySQL on the same VPS: 127.0.0.1.
|
| Port | Shown for PostgreSQL (default 5432) and MySQL (default 3306). |
| Database Name | Any name you choose (e.g. MyCompanyERP). The wizard can create it if your login has permission. |
| DB Username / Password | Unless you use Windows Authentication (SQL Server only). |
https://yourcompany.com. See
Production Deployment Guide.
What happens automatically:
- Connection test
- Database create (if needed)
- All module schemas applied (Licensing first, then every business module — including Recruitment, ESS, Workplace, Project, Approvals, Manufacturing, CRM, and the rest)
- API settings updated (provider, connection string, CORS, JWT basics)
Step 2 — Administrator account

Example — Create the first admin
- Enter Admin Username, Admin Email, Password, and Confirm Password.
- Use at least 8 characters with upper, lower, number, and special character (e.g.
@AdminPass123#). - Click Continue.
Result: Primary administrator is created — store credentials safely for first login.
Create the first admin. There is no default production password in the package.
- Username, email, and a strong password (at least 8 characters with upper, lower, number, and special character)
- This account gets full system access — store it safely
Step 3 — License activation

Example — Local trial vs production activate
- Local: click Skip — 14 day trial (internet still recommended).
- Production: enter Envato Username, Email, Purchase Code → Activate Now.
Result: License is Trial or Active; wizard advances to the completion screen.
- Activate: Envato purchase code + username/email (verified via CognitiveCircle in Production)
- Or skip: 14-day trial
- Local Development can start a trial without CognitiveCircle; purchase codes are still checked remotely
- Production requires internet access and valid
Licensing:ApiKey/HmacSecret
After the wizard — You're ready to go

ApiBaseUrl JSON if needed, then Go to Login.
Example — Verify health and sign in
- If the API recycled, wait a few seconds (IIS / systemd) or restart locally.
- Open
/api/system/healthand confirm a healthy response. - Click Go to Login (or open /users/login) with the admin from Step 2.
Result: You land on the dashboard and can continue First Steps After Install.
- Wait a few seconds if the API restarts (common on IIS/Linux Production).
- Confirm API health:
GET /api/system/health. - Sign in at /users/login with the admin you created.
- Continue with First Steps After Install (company profile, branches, users, financials…).
- Optional: copy the WebApp
ApiBaseUrlJSON intowwwroot/appsettings.jsonbefore publishing to production.
Setup Wizard FAQ
No. First install only. Use Settings → Company Management and Settings → License afterward.
Check DB service, credentials, and firewall. Drop a half-created database and retry Step 1. Support fallback: Database/apply-migrations.ps1 (see Installation Guide).
On Linux, nginx must proxy /uploads/ (and preferably /api/uploads/) to the API. Also ensure API URL was entered without a trailing /api.
Installation Guide · Production Deployment · Troubleshooting FAQ
First Steps After Install
CognitixERP is modular. Many screens depend on data created in earlier modules — for example, invoices need customers, tax rates, and GL mappings; POS sales need products, warehouses, and payment methods. Follow the phases below in order. Skip phases for modules you have not licensed or do not plan to use.
0 Complete the Setup Wizard Installation
Runs once on first launch before you can use the main application. Full field-by-field guide: Setup Wizard Guide.
- Open /setup and complete all three steps: Database & URLs, Administrator, and License / Trial.
-
Production tip: Frontend URL and API URL should both be your site origin
(e.g.
https://yourcompany.com) — do not append/api. - When the wizard finishes, log in at /users/login with the admin account you created.
- If you are redirected back to /setup, the wizard is not complete — finish any remaining step before continuing.

Example — First admin sign-in
- Open /users/login after Setup Wizard completes.
- Enter the admin username (or email) and password from Step 2.
- Click Sign in.
Result: You land on the Home dashboard with module navigation on the left.

1 Company profile & branches Settings · Branching
Every transaction is scoped to a company and usually a branch. Set this up first. Full field reference: Settings module guide.
- Company Management — open Settings → Company Management (/settings/company-management), select your company, and complete the 3-step company setup: basic information (official name, display name, business type, industry), branding (logo & favicon), and contact details (address, phone, email, timezone).
- Branches — go to Settings → Branches (/settings/branches). Create each operating location; assign a branch manager if your workflow uses branch-level approval or reporting.
- Email settings (recommended) — Settings → Email (/settings/email) for quotation, invoice, and notification emails.
- License verification — Settings → License (/settings/license) to confirm all purchased modules are active.
2 Users, roles & access Users & Security
Create logins for your team before handing over module configuration to department owners. Full guide: Users & Security.
- Review built-in Roles at User Management → Roles (/users/roles). Adjust page-level permissions if needed.
- Create Users at User Management → Users (/users/management) from HRM employees and assign each user a role (e.g. Admin, Manager, Sales, Purchase).
- Map users to the correct branch so they only see data for locations they operate in — see branch access.
- Have each user test login and set profile preferences at /users/profile.
3 Financial foundation Financials
All sales, purchase, inventory, POS, and banking postings ultimately flow through the general ledger.
- Currency — Financials → Currency Management (/financials/currency): set base currency, decimal places, and symbol placement. Add foreign currencies if you trade in multiple currencies. Do this before Chart of Accounts and any monetary master data.
- Exchange rates (multi-currency only) — Financials → Exchange Rate Management (/financials/exchangerate).
- Chart of Accounts — Financials → Chart of Accounts (/financials/chartofaccounts): create or import your account structure (Assets, Liabilities, Equity, Revenue, Expenses). Required before GL mappings, opening balances, and automatic posting.
- Fiscal years — Financials → Fiscal Years (/financials/fiscalyears): define the active fiscal year and accounting periods. Transactions cannot post outside an open period.
- Tax rates — Financials → Taxation (/financials/taxation): configure VAT/GST/sales tax rates used on invoices and purchase bills. Required before Billing, Procurement, and POS with tax.
- Payment methods — Financials → Payment Methods (/financials/payment-methods): Cash, Bank Transfer, Card, Cheque, etc. Required before customer receipts, supplier payments, and POS.
- Payment journals — Financials → Payment Journals (/financials/payment-journals): map each payment method to the correct cash/bank/clearing GL account per branch. See Payment Journals guide. Required before recording receipts, supplier payments, or POS settlements.
- Cost centers (optional) — Financials → Cost Centers (/financials/costcenters) if you track departmental P&L.
4 Tax compliance & e-invoicing Tax & Compliance
Configure only the regimes that apply to your country. Complete after company profile and tax rates (Phase 3). See the full Tax & Compliance module guide.
- Tax rates (prerequisite) — Financials → Tax & Compliance → Taxation (/financials/taxation): VAT/GST/sales tax and WHT rates used on documents before e-invoice submission.
- E-invoice compliance — Financials → Tax & Compliance → E-Invoice Compliance (/settings/e-invoice-compliance): enable one regional scheme (ZATCA for Saudi Arabia, GST India for India). Match company TIN/VAT/GST number from Company Setup.
- After go-live, monitor submissions in E-Invoice Audit (/settings/e-invoice-audit) and reconcile with regional reports (/settings/gst-reports, /settings/zatca-reports).
5 GL account mappings & posting rules Financials · Banking
Tells the system which Chart of Accounts line each transaction type hits. Without this, auto-posting from Billing, Inventory, POS, and Banking will fail or post to wrong accounts.
- GL Account Mappings — Financials → GL Account Mappings (/financials/gl-account-mappings): review default mappings for Sales, Purchases, Inventory, Tax, POS, and Clearing categories. Override per branch where needed. Requires Chart of Accounts (Phase 3).
- Payment method routing (optional) — Financials → Method Routing Matrix (/financials/payment-method-matrix) for advanced payment routing.
- Banking posting settings — Banking → Banking Posting Settings (/settings/banking-coa): map bank transaction types to GL accounts before recording bank movements.
6 Inventory & warehouse masters Inventory · Stock · WMS
Required before sales, purchases, stock transfers, or POS that deducts inventory. See the three module guides under Inventory, Stock, and WMS for full setup order.
- Unit of measures — Inventory → Unit of Measures (/inventory/unitofmeasures). First step — see Inventory guide.
- Categories, brands, product groups — /inventory/categories, /inventory/brands, /inventory/productgroups.
- Products — Inventory → Products (/inventory/products): SKU, UoM, tax, valuation, variants.
- Warehouses (minimum one per branch) — WMS → Warehouses (/inventory/warehouses). Requires branches. See WMS guide.
- Branch opening stock — Stock → Branch Opening Stock (/inventory/branch-opening-stock). Requires products + warehouse. See Stock guide.
- Reorder policies (optional) — Inventory → Reorder Policies (/inventory/reorderpolicies).
- Weight machine (retail/grocery only) — Settings → Weight Machine (/settings/weightmachine) if POS uses weighed items.
7 Customers & suppliers CRM · Procurement · Billing
Party master data is shared across Billing, CRM, and Procurement.
- Customers — CRM → Customers (/crm/customers): add billing address, tax ID, credit limit, opening balance, and default currency. Required for quotations, orders, invoices, and POS customer sales. See Customer Details guide.
- Suppliers — Procurement → Suppliers (/procurement/suppliers): add vendor details and payment terms. Required for purchase orders, GRN, and supplier payments.
8 Bank accounts Banking
Set up after GL mappings and payment methods so bank postings reconcile correctly. Full field reference: Banking module guide.
- Banking Posting Settings — /settings/banking-coa: map FX gain/loss, bank fees, and interest income GL accounts.
- Bank accounts — Banking → Accounts (/banking/accounts): register each company bank account with currency, GL link (or auto-create), and reconciliation tolerance.
- Verify auto-created Bank-type payment journals on Payment Journals.
- Configure cheque books if your business uses cheque payments (/banking/cheques).
- Import a test statement and run reconciliation before go-live.
9 Opening balances (migration / go-live) Financials · Inventory
Only needed when migrating from another system or starting mid-period. Post once, before daily operations.
- GL opening balances — Financials → Opening Balance (/financials/opening-balance): post opening journal entries for balance sheet accounts (cash, receivables, payables, equity, etc.). Requires COA, fiscal year, and GL mappings.
- Inventory opening stock — Inventory → Branch Opening Stock (/inventory/branch-opening-stock): enter on-hand quantities and valuation per warehouse/branch. Requires products and warehouses.
- Run Trial Balance (/financials/trialbalance) to verify debits equal credits before processing live transactions.
10 HR foundation HRM
Skip this phase if you are not using the HRM module. See the full HRM module guide.
- Departments — HRM → Departments (/hrm/departments).
- Designations — HRM → Designations (/hrm/designations).
- Leave types, shifts, holidays, and attendance policy — configure before employee onboarding.
- Salary rules & structure templates — needed before payroll processing.
- Employees — HRM → Dashboard → Add Employee (/hrm/employees/new): link each employee to department, designation, branch, and (optionally) a system user account.
11 POS & CRM pipeline POS · CRM
Operational modules — configure last, after all master data and GL rules are ready.
- POS settings — POS → Settings (/pos/settings): default branch, receipt footer, stock rules, and payment methods accepted at the terminal. See POS Settings guide. Requires branches, products, warehouses, payment methods, payment journals, and GL mappings.
- CRM pipeline settings (if using sales pipeline) — CRM → Pipeline Settings (/crm/pipeline-settings): define pipelines, stages, and win/lost rules. See the full CRM module guide.
12 People, hiring, workplace & projects ESS · Recruitment · Workplace · Project
Optional people-operations modules. Link employees to user accounts first (HRM). See the module guides for details.
- Employee Self Service — grant ESS pages, then employees open /ess/dashboard. See ESS guide.
- Recruitment — create a job requisition, publish a posting, open the public careers page. See Recruitment guide.
- Workplace — add a training program and company assets; employees see them from ESS Workplace. See Workplace guide.
- Project Management — create a project, assign work, collect timesheets. See Project Management guide.
- Approval Center — design a workflow if documents need multi-level approval. See Approval Center guide.
13 Go-live verification All modules
Run these end-to-end tests in a sandbox branch before processing real business data.
- Sales cycle — Quotation → Sales Order → Invoice → Customer Receipt. Confirm invoice posts to GL and stock reduces (if inventory item). See Billing guide.
- Purchase cycle — Purchase Order → Goods Receipt (GRN) → Purchase Invoice → Supplier Payment. Confirm payables and inventory valuation update correctly. See Procurement guide.
- POS sale — open a POS session, sell a product, close session. Verify cash GL and inventory impact. See POS guide.
- Bank reconciliation — import a bank statement and match at least one transaction.
- Review Trial Balance, Balance Sheet, and Stock Valuation reports for unexpected balances.
Quick dependency reference
| You want to… | Configure first |
|---|---|
| Post a sales invoice | Company, branch, COA, fiscal year, tax rates, customers, products, GL mappings, payment methods |
| Receive goods from a supplier | Suppliers, products, warehouses, GL mappings (inventory accounts) |
| Run POS | Branches, products, warehouses, payment methods, GL mappings, POS settings |
| Record a bank payment | COA, bank accounts, banking COA settings, GL mappings |
| Process payroll | Departments, designations, salary rules, employees, fiscal year |
| Submit e-invoices | Company tax details, tax rates, e-invoice compliance settings |
Branching & Company Setup
The Branching module is the foundation of CognitixERP. It stores your legal company profile, branding (logo & favicon), timezone, and operating locations (branches). Almost every transaction — sales, purchases, inventory, POS, payroll — is scoped to a branch. Configure company details first, then create branches before any operational module.
Part 0 — First-run installation wizard
0. Setup Wizard (new installations only)
Route: /setup (public — before login)
On a fresh install the browser opens the Setup Wizard. It creates your database (SQL Server, PostgreSQL, or MySQL), applies module schemas, creates the administrator, and activates a license or trial. See the full Setup Wizard Guide for every field and FAQ.
| Wizard step | What you do |
|---|---|
| 1 — Database & URLs |
Company/Display name, Frontend URL, API URL (same origin in production — no /api),
database engine, host/port, database name, credentials → Continue.
|
| 2 — Administrator | Create admin username, email, and strong password (no default password ships). |
| 3 — License / Trial | Envato purchase code + username/email, or Skip — 14 day trial. |
After setup, log in at /users/login and continue with Part 1 (Company Setup) for legal address, tax ID, timezone, logo, and favicon.
Routes at a glance
Navigation & permissions
| Menu path | Route | Permission page | Actions |
|---|---|---|---|
| Settings → Company Management | /settings/company-management | CompanyManagement | Read list · Create (once) · Update · Delete · View profile |
| Settings → Company Management → Create / Edit | /settings/company-setup /settings/company-setup/{id} |
CompanyManagement | Create · Update (3-step wizard) |
| Settings → Branches | /settings/branches | Branches | Read · Create · Update · Delete · View profile |
Part 1 — Company Setup
1. Company Management (list page)
Menu: Settings → Company Management | Route: /settings/company-management
This is the landing page for company configuration. CognitixERP supports one company record per installation. After a company exists, the Create Company button is disabled — use Edit instead.
Screen elements
| Element | Description |
|---|---|
| Create Company (+ button) | Visible only with Create permission. Navigates to /settings/company-setup. Disabled when a company already exists. |
| Data table | Columns: Official Name, Display Name, Official Email, Phone Number, Website. |
| View (eye icon) | Opens read-only company profile at /settings/company-view/{id}. |
| Edit (pencil icon) | Requires Update permission. Opens 3-step wizard at /settings/company-setup/{id}. |
| Delete (trash icon) | Requires Delete permission. Shows confirmation dialog before permanent removal. |
FAQ — Company list
Only one company is allowed per ERP instance. Use the Edit action to update the existing record.
Your role needs Read permission on page CompanyManagement. Ask an administrator to update your role in User Management → Roles.
Yes, if you have Delete permission — but this removes the company master record. Branches and transactional data may become inconsistent. Prefer editing over deleting in production.
2. Company Setup wizard (create & edit)
Create route: /settings/company-setup | Edit route: /settings/company-setup/{company-id}
A 3-step guided form with a stepper at the top. Click completed step circles to jump back. Use Next / Previous to move between steps. On step 3, click Create Company or Update Company to save.
On save, logo/favicon upload first (if selected), then company data is saved. Branding updates immediately in the navigation drawer, browser tab favicon, and preloader.
Step 1 — Basic Information

Example — Update company identity
- Go to Settings → Company Management and click Edit.
- On Step 1 (Basic Info), set Official Name, Display Name, Business Type, and Industry Sector.
- Optionally enter Established Date, Registration No., and TIN / VAT / GST Number.
- Click Next to continue Contact, then People & Brand, then save.
Result: Company branding and legal details appear across login, invoices, and reports.
| Field | Required | Description |
|---|---|---|
| Official Name | Yes | Legal registered name — appears on invoices, compliance documents, and official reports. |
| Display Name | Yes | Short trading name shown in the app header, login screen, and POS receipts. |
| Business Type | Yes | Private Limited, Public Limited, Proprietorship, Partnership, LLC, or Other. |
| Industry Sector | Yes | Industry classification (Retail, Manufacturing, Healthcare, IT, etc.) — used for reporting context. |
| Established Date | No | Date the business was founded (optional). |
| Company Registration No. | No | Trade license or company registration number. |
| TIN / VAT / GST Number | No | Tax identification number — required for e-invoicing and tax reports. Enter the exact number your tax authority expects. |
FAQ — Basic Information
Official Name is the legal name on formal documents. Display Name is the shorter brand name in the UI and customer-facing screens like POS.
It is informational for now — it does not enable/disable modules. Module access is controlled by your license and role permissions.
Required fields on the current step must be filled. Backend validation also requires contact and key-people fields when you submit on step 3 — complete all three steps before saving.
Step 2 — Contact Information
| Field | Required | Description |
|---|---|---|
| Head Office Address | Yes | Multi-line registered head office address. |
| City | Yes | City of head office. |
| State | Yes | State, division, or province. |
| Country | Yes | Country name. |
| Zip / Postal Code | Yes | Postal code. |
| Phone Number | No | Landline or mobile contact. |
| Fax Number | No | Optional fax. |
| Official Email | Yes | Primary company email — must be valid format. Used on document headers. |
| Website URL | No | Company website (optional). |
FAQ — Contact Information
Head office address is the company's registered address. Branch addresses are configured separately under Settings → Branches. They can match if your only location is the head office.
Official Email must be a valid email format (e.g. info@company.com). It is validated on the server when you submit.
Yes — company contact details from this step are used as the default company header on billing and procurement documents.
Step 3 — Key People & Branding
| Field | Required | Description |
|---|---|---|
| Owner / Founder Name | Yes | Business owner or founder. |
| CEO / Managing Director | Yes | Senior executive contact. |
| HR Head / Contact Person | Yes | HR department lead — used on HR correspondence. |
| Emergency Contact | No | Optional emergency phone or person. |
| Company Slogan / Tagline | No | Tagline shown on login screen and company profile. |
| Timezone | No | IANA timezone (e.g. Asia/Dhaka). Drives date/time display across the ERP. If empty, UTC is used. |
| Upload Company Logo | No | Image file — shown in navigation drawer header and login page. |
| Upload Company Favicon | No | Image or .ico — browser tab icon, preloader mark, and compact branding. |
After save: your logo and favicon update immediately in the navigation drawer, browser tab, and login screen — no full page reload required.
FAQ — Branding & Timezone
Use a standard image format (PNG, JPG, WEBP) or ICO for favicon. Ensure the file is not empty. Company data is not saved if upload fails — try a smaller file or contact your administrator.
Browsers cache favicons aggressively. Hard refresh (Ctrl+Shift+R) or clear site data for the WebApp URL.
All date-sensitive operations — attendance, fiscal periods, report date filters — use this timezone across the ERP.
Complete company setup with a Display Name and save. The login page shows your company name and logo automatically.
3. Company profile (read-only view)
Route: /settings/company-view/{company-id}
Read-only summary opened from the View action on Company Management. Sections:
- Business Information — type, sector, established date, registration, tax number
- Contact Information — phone, fax, email, website
- Head Office Address — formatted address block
- Key People — owner, CEO, HR head, emergency contact
- System Settings — configured timezone (or "Not configured — UTC")
Click Edit in the header to open the wizard at /settings/company-setup/{id}.
FAQ — Company profile
The URL ID does not match an existing company. Return to Company Management and open View from the table row.
Part 2 — Branch Setup
Branches represent physical or logical operating units (stores, offices, warehouses). Each branch has a unique 2-letter code used in POS transaction numbering and document prefixes. Create the company before adding branches.
4. Branches (list page)
Menu: Settings → Branches | Route: /settings/branches
Filter bar
| Filter | Options |
|---|---|
| Status | All · Active · Inactive |
| Branch Type | All · Base (head office) · Sub |
| Search | Matches name, code, city, phone, or email (live filter) |
| Clear Filters | Resets all filters |
Table columns
| Column | Description |
|---|---|
| Branch Name | Name with ☐ icon if base/head office branch. |
| Branch Code | 2-letter code chip (e.g. DH, CT). |
| City / Contact / Email | Branch contact details. |
| Parent Branch | Parent in hierarchy, or dash if top-level. |
| Branch Manager | Assigned HRM employee, or dash if none. |
| Status | Active (green) or Inactive chip. |
| Actions | View · Edit · Delete |
FAQ — Branch list
Complete Company Setup first (Part 1). Branches are linked to the company record automatically.
Non-admin users see only their assigned branch. Admin and BranchManager roles see all branches. Check your role and user branch assignment.
Deletion may fail if the branch is referenced by sales, inventory, or users. Prefer setting the branch to Inactive instead of deleting.
5. Add / Edit Branch dialog
Opened from Add Branch or Edit on the branch list — modal dialog (not a separate route).

Example — Create a second branch
- Open Settings → Branches.
- Click + Add Branch.
- Enter Branch Name (e.g.
Sylhet) and Branch Code (exactly 2 letters, e.g.SY). - Optionally choose Parent Branch and Branch Manager, then fill Address / City / Country.
- Click Add Branch.
Result: The new location appears in the branch table and can be selected from the top-bar branch switcher.
Section A — Basic Information
| Field | Required | Rules |
|---|---|---|
| Branch Name | Yes | Max 100 characters. Descriptive name (e.g. "Dhaka Head Office"). |
| Branch Code | Yes | Exactly 2 letters (A–Z). Auto-uppercased on save. Used in POS numbering. Example: DH, CT. |
| Parent Branch | No | Optional hierarchy — select a parent or "None (top level)". Cannot select self. |
| Branch Manager | No | HRM employee from employee list. Requires employees to exist in HRM module. |
Section B — Address
| Field | Required | Max length |
|---|---|---|
| Address (multi-line) | No | 500 |
| City | No | 100 |
| State | No | 100 |
| Country | No | 100 |
| Zip / Postal Code | No | 20 |
Section C — Contact & Status
| Field | Description |
|---|---|
| Contact Number | Branch phone (max 50 chars). |
| Branch email — validated if provided. | |
| Is Base Branch (switch) | Mark as head office / primary branch. Shown with ☐ on list and "Head Office" on profile. |
| Is Active (switch) | Visible on Edit only. New branches are created active. Inactive branches are hidden from most operational pickers. |
Dialog footer shows a preview chip with Name (CODE) before saving.
FAQ — Branch dialog
Branch codes embed in POS receipt numbers and document references. Only two uppercase letters (A–Z) are accepted — no digits or special characters.
Register employees first in HRM → Dashboard → Add Employee (/hrm/employees/new). The dropdown lists all active employees.
Technically the switch allows it, but best practice is one head office (base branch) per company. Sub-branches report under a parent.
Inactive branches remain in the database for history but are excluded from active branch pickers (POS, sales, stock). Users assigned to an inactive branch may lose access to operational screens.
When editing, the current branch is excluded from parent options to prevent circular hierarchy. Only other active branches appear.
6. Branch profile (read-only view)
Route: /settings/branch-view/{branch-id}
Opened from the View (eye) action. Displays:
- Address — full formatted location
- Contact — phone and email
- Hierarchy & Management — parent branch, manager, base branch flag
- Status — active/inactive with description
Header shows status chip and Edit button (returns to branch list to open edit dialog).
FAQ — Branch profile
You can only view branches your user is allowed to access. Non-admin users cannot open other branches' profiles.
7. How branches affect the rest of the ERP
| Feature | Behaviour |
|---|---|
| Branch switcher (top bar) | Admin and BranchManager can switch active branch. Other users are locked to their assigned branch. |
| Active branch state | Changing branch reloads data on subscribed pages (inventory, reports, etc.). |
| Billing / Procurement | Documents are posted to the selected or assigned branch. |
| POS | Terminal uses branch from POS Settings default or session branch. Branch code appears in receipt numbers. |
| WMS / Warehouses | Warehouses link to branches — create branches before warehouses (WMS guide). |
| Users | Each user has a BranchId — controls data visibility. |
| Financial reports | Branch P&L comparison and branch-scoped GL reports use branch master data. |
FAQ — Multi-branch operations
Check the user's assigned branch in User Management. Admin users can switch branch from the top bar; regular users cannot.
Only Admin and BranchManager roles get the switcher with all branches. Ensure at least one active branch exists.
Financials & Accounting
The Financials module is the accounting backbone of CognitixERP. It defines how money is measured (currency), when transactions can post (fiscal year & periods), where they land (chart of accounts & GL mappings), and how tax and payments are handled. Billing, Procurement, POS, Banking, and Payroll all post into this module automatically once setup is complete. After Financials setup, continue with the dedicated Banking guide for bank accounts, reconciliation, and cheques.
Recommended setup order
Routes at a glance — setup phase
Navigation & permissions (setup screens)
| Menu path | Route | Permission page |
|---|---|---|
| Financials → Currency Management | /financials/currency | Currency |
| Financials → Exchange Rate Management | /financials/exchangerate | ExchangeRate |
| Financials → Fiscal Years | /financials/fiscalyears | FiscalYears |
| Financials → Chart of Accounts | /financials/chartofaccounts | ChartOfAccounts |
| Financials → GL Account Mappings | /financials/gl-account-mappings | GlAccountMappings |
| Financials → Tax & Compliance → Taxation | /financials/taxation | Taxation |
| Financials → Payment Methods | /financials/payment-methods | PaymentMethods |
| Financials → Payment Journals | /financials/payment-journals | PaymentJournals |
| Financials → Cost Centers | /financials/costcenters | CostCenters |
| Financials → Opening Balance | /financials/opening-balance | OpeningBalance |
Part 1 — Foundation Setup (in order)
Step 1 — Currency Management
Menu: Financials → Currency Management | Route: /financials/currency
Configure this before anything else in Financials. Every amount in the ERP — invoices, stock valuation, payroll, reports — uses the base currency's decimal places and symbol. A warning banner appears at the top until a base currency is configured.

Example — Set BDT as base currency
- Go to Financials → Currency Management.
- Click Add Currency (or Add Base Currency from the warning banner).
- Enter Code
BDT, Symbol৳, NameBangladeshi Taka, Decimal Places2, and mark as Base. - Save.
Result: The base-currency warning disappears and all amounts use ৳ with 2 decimal places.
How to configure
- Click Add Currency (or Add Base Currency from the warning banner).
- In the dialog, enter:
- Currency Code — 3-letter ISO code (e.g.
BDT,USD,JPY). Cannot be changed after create. - Symbol — display symbol (e.g. ৳, $, ¥).
- Currency Name — full name (e.g. Bangladeshi Taka).
- Decimal Places — 0 for JPY, 2 for USD/BDT, 3 for KWD. Preview shows format (N0, N2, N3).
- Base vs Foreign — mark exactly one currency as Base.
- Amount in Words (optional, for invoice/document PDFs) — three fields that control how totals are spelled out in words on Sale and Purchase invoice PDFs:
- Numbering System — Western (thousand / million / billion) or South Asian (thousand / lakh / crore). Pick what your country uses — e.g. South Asian for BDT, INR, PKR; Western for USD, EUR, GBP.
- Unit Name — spoken name of the main unit (e.g.
Taka,Dollars,Rupees). When left blank, the currency code is used instead. - Sub-Unit Name — spoken name of the fractional unit (e.g.
Poisha,Cents,Paise). Leave blank for currencies with no sub-unit (e.g. JPY) and the fractional part is omitted.
- Currency Code — 3-letter ISO code (e.g.
- Save. The table shows Base/Secondary chip, decimal format, and Active status.
- To change base currency later, use the ☐ star icon on a foreign currency row (confirmation required; blocked if journal entries already exist).
FAQ — Currency
Decimal places come from Currency Management — not hardcoded. Set the correct decimal places on your base currency (e.g. JPY = 0, KWD = 3).
No — the delete button is disabled on the base currency. Set another currency as base first, then delete the old one if it has no transactions.
Create a currency and mark it as Base, or click the ☐ icon on an existing currency to set it as base.
Sale and Purchase invoice PDFs print the total spelled out in words below the totals block, driven by the document currency. The grouping follows the currency's Numbering System (South Asian prints lakh/crore, Western prints million/billion), and the unit/sub-unit names come from the currency's Unit Name and Sub-Unit Name. For example BDT prints like "One Lakh Twenty Thousand Taka and Fifty Poisha Only", while USD prints like "One Hundred Twenty Thousand Dollars and Fifty Cents Only".
It follows the active interface language, so the words are localized (English, Bengali, French, Arabic) along with the digits — the same way other numbers on the document are localized. The numbering system (South Asian vs Western) is independent of language and always comes from the currency setting.
Step 2 — Exchange Rate Management (multi-currency only)
Menu: Financials → Exchange Rate Management | Route: /financials/exchangerate
Skip this step if you operate in a single currency. Required when you sell, purchase, or hold balances in foreign currencies. Requires Step 1 — base currency and foreign currencies added.

Example — Add USD → BDT rate
- Open Financials → Exchange Rate Management.
- Click Add Exchange Rate.
- Select From
USD, To baseBDT, enter today’s Rate and Effective Date, mark Active. - Save.
Result: Foreign-currency invoices convert using this rate from the effective date forward.
How to configure
- Click Add Exchange Rate.
- Select From Currency (foreign) and confirm Base Currency (to).
- Enter Rate and Effective Date — the rate valid from that date forward.
- Mark as Active. Update rates when market rates change; add new rows with new effective dates rather than overwriting history.
FAQ — Exchange Rates
The active exchange rate for the transaction date (or the rate effective on that date). Ensure a rate exists before posting foreign-currency documents.
After go-live, use /financials/currency-revaluation at period-end to post unrealized FX gain/loss. Setup exchange rates first (this step).
Step 3 — Fiscal Years & Accounting Periods
Menu: Financials → Fiscal Years | Route: /financials/fiscalyears
Defines your financial calendar. Journal entries, opening balances, and module auto-posting can only occur inside an open accounting period of an active fiscal year.

Example — Create FY 2025–2026
- Go to Financials → Fiscal Years.
- Click Add Fiscal Year.
- Name
2025-2026, set Start/End dates covering the year, toggle Active, then Save. - Select the year and add monthly accounting periods (Open for current month).
Result: Journal entries and opening balances can post only inside open periods of this fiscal year.
3A — Create a fiscal year
- Click Add Fiscal Year.
- Enter Name (e.g.
2025-2026). - Set Start Date and End Date — end must be after start. Start date auto-suggests a one-year range.
- Toggle Active on for the current operating year.
- Save. Use the activate (play) icon to activate an inactive year; only one should be active at a time.
3B — Accounting periods (same page, lower section)
- Click a fiscal year row in the top table to select it.
- Click Add Accounting Period in the periods section.
- Create periods covering the full fiscal year (monthly is typical: Jan, Feb, … Dec).
- Each period has Start Date, End Date, and status: Open, Pending, or Closed.
- Use the close-period action to close a period after month-end. Closed periods block new postings.
Year-end close: when the fiscal year end date is reached, use the year-end close icon on the active year. Admin can reopen a closed year if needed.
FAQ — Fiscal Year & Periods
Create accounting periods on the Fiscal Years page that cover the fiscal year start date. Opening balance posts on the FY start date only.
The transaction date falls in a closed period. Reopen the period (reopen icon) or adjust the entry date to an open period.
No — edit and delete are disabled on closed years. Admin can reopen the year, make corrections, then close again.
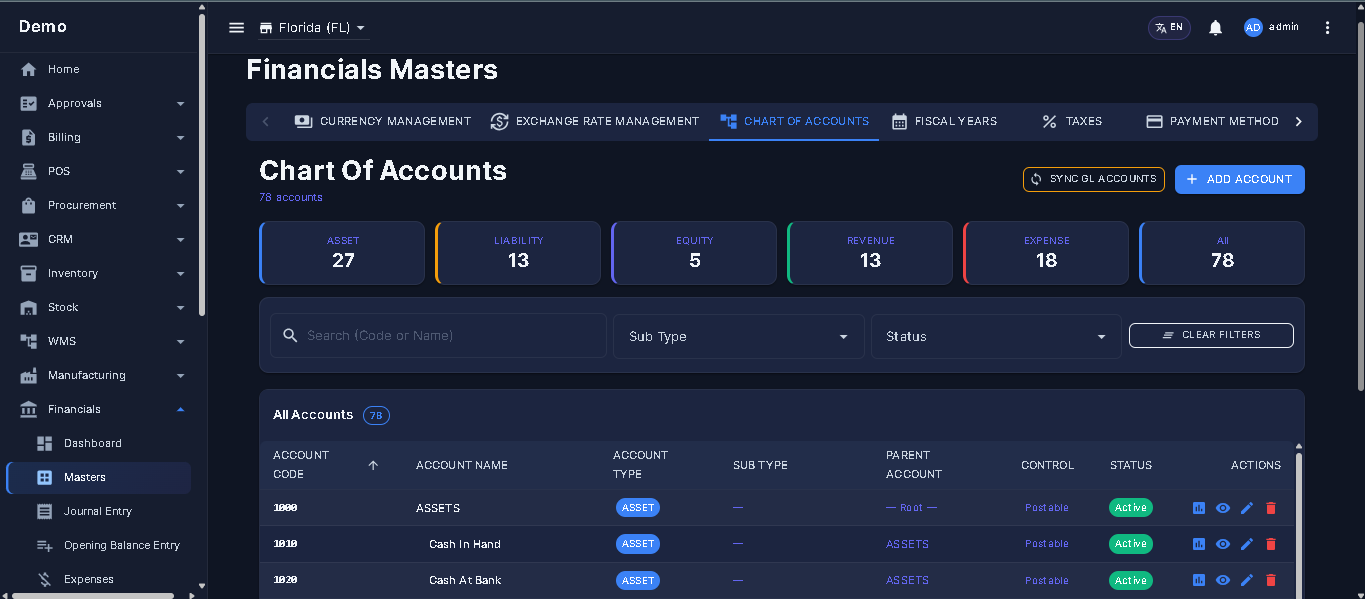
Step 4 — Chart of Accounts (COA)
Menu: Financials → Chart of Accounts | Route: /financials/chartofaccounts
Your complete list of GL accounts. Every automatic posting from Billing, Inventory, POS, and Banking targets accounts defined here. Requires Steps 1 and 3. Create COA before GL mappings and opening balances.

Example — Add a Cash account
- Open Financials → Chart of Accounts.
- Click Add Account.
- Code
1010, NameCash on Hand, Type Asset, Sub-Type Cash, mark Active. - Save.
Result: The account appears in COA and can be used in GL mappings and payment journals.
How to configure
- Review the stat cards (Asset, Liability, Equity, Revenue, Expense counts) — click to filter by type.
- Click Add Account or use Sync GL Accounts if your installation seeds default accounts.
- In the account dialog:
- Account Code — unique numeric/alphanumeric code (e.g.
1010Cash,4010Sales Revenue). - Account Name — descriptive name.
- Account Type — Asset, Liability, Equity, Revenue, or Expense.
- Account Sub-Type — Receivable, Payable, Bank, Cash, Fixed Asset, etc. (used by reports and mappings).
- Parent Account — optional hierarchy for roll-up reports.
- Active — inactive accounts cannot receive new postings.
- Account Code — unique numeric/alphanumeric code (e.g.
- Build a standard structure: Current Assets → Cash/Bank/Receivables; Current Liabilities → Payables/Tax Payable; Equity → Retained Earnings; Revenue & Expense accounts for operations.
FAQ — Chart of Accounts
Imports or refreshes system-default GL accounts required by CognitixERP modules. Run once during initial setup, then add custom accounts manually.
Accounts with posted history should be deactivated (set Inactive), not deleted, to preserve audit trail and report integrity.
At minimum: Accounts Receivable, Sales Revenue, Inventory Asset, COGS, Tax Payable, Cash/Bank. GL Mappings (Step 5) link transaction types to these accounts.
Step 5 — GL Account Mappings
Menu: Financials → GL Account Mappings | Route: /financials/gl-account-mappings
Tells CognitixERP which COA account each transaction type posts to. Without correct mappings, invoice approval, GRN, POS sales, and payments will fail or post to wrong accounts. Requires Step 4 — Chart of Accounts.

Example — Map Sales Revenue
- Open Financials → GL Account Mappings.
- Click Add Mapping.
- Select Mapping Type for sales revenue, pick your Revenue account (e.g.
4010), Scope All Branches, Active. - Save. Repeat for AR, Inventory, Tax Payable, and Clearing as needed.
Result: Approved invoices and POS sales post to the correct GL accounts automatically.
How to configure
- Review category stat cards: Core, Tax & WHT, Inventory, Revenue & Expense, Clearing & Interim.
- Click a category to filter. Scan default mappings pre-seeded by the system.
- Click Add Mapping or edit an existing row:
- Mapping Type — transaction type (e.g. Sales Revenue, Accounts Receivable, Inventory Asset, VAT Payable). Fixed after create.
- Account Code — autocomplete from your COA.
- Scope — All Branches (default) or Branch Specific override for one location.
- Active — inactive mappings fall back to system default.
- Verify Inventory, Revenue, Tax, and Clearing categories before going live with Billing or Procurement.
FAQ — GL Mappings
Check GL Account Mappings for Sales, AR, Tax, and Inventory categories. Ensure mapped account codes exist and are active in COA.
Branch-specific overrides take priority over the "All Branches" default for that branch. Other branches still use the default.
GL Mappings are required. Payment Method Matrix (/financials/payment-method-matrix) is optional advanced routing — configure after payment methods (Step 7) if needed.
Step 6 — Taxation (Tax Rates & Tax Groups)
Menu: Financials → Tax & Compliance → Taxation | Route: /financials/taxation
Configure VAT/GST/sales tax and withholding (WHT/TDS) rates used on invoices, purchase bills, and POS. Requires COA for WHT accounts when using Withholding category.

Example — Create VAT 15%
- Go to Financials → Taxation.
- Click Add Tax.
- Name
VAT 15%, Rate15, Type Percentage, Category Standard, Scope Both (or Sales), set Effective Date. - Save. Optionally create a Tax Group that includes this rate for products.
Result: Invoices and POS lines can apply VAT 15% using this tax rate.
6A — Tax rates
- Click Add Tax.
- Enter Tax Name (e.g. VAT 15%), Rate, and Tax Type (Percentage or Fixed amount).
- Select Category: Standard, Zero Rate, Exempt, or WHT/TDS (withholding).
- Set Scope: Sales, Purchase, or Both.
- Set Effective Date and optional Expiry Date.
- For WHT/TDS: link payable and receivable GL accounts in the expanded dialog section.
6B — Tax groups (same page, lower section)
- Click Add Tax Group when a product needs multiple taxes combined (e.g. VAT + supplementary duty).
- Name the group, set effective date, and attach one or more tax rates from Step 6A.
- Assign tax groups to products in Inventory or line-level on invoices.
FAQ — Taxation
Verify an active tax rate exists with correct Scope (Sales for invoices), effective date covers the invoice date, and the product or line has a tax assigned.
Rates past their Expiry Date show as expired in red. Create a new rate with a current effective date and deactivate the old one.
Regional e-invoice gateways are configured under Tax & Compliance. Tax rates here feed those submissions.
Step 7 — Payment Methods
Menu: Financials → Payment Methods | Route: /financials/payment-methods
Defines how customers pay and how you record receipts — Cash, MFS (bKash/Nagad), Card, Gateway, Cheque, Other. Required for customer receipts, supplier payments, and POS. Requires COA cash/clearing accounts. GL routing is configured on Payment Journals, not on this screen.

Example — Add CASH payment method
- Open Financials → Payment Methods.
- Click Add Payment Method.
- Name
Cash, CodeCASH, Type Cash. Optionally enable Auto-create Payment Journals for your branches. - Save, then verify / map journals under Payment Journals.
Result: Customer receipts, supplier payments, and POS can select Cash as a payment method.
How to configure
- Click Add Payment Method.
- Enter Name, optional Icon emoji, and unique uppercase Code (e.g.
CASH,BKASH). - Select Type: Cash, MFS, Card, Gateway, Cheque, or Other.
- Enable Requires Reference for Card/MFS/Gateway — forces transaction ID on receipt entry.
- On create, use Auto-create Payment Journals to provision a branch journal + routing link in one step (Admin can select multiple branches).
- Bank payments: do not create a Bank-type payment method here — use Banking → New Bank Account instead (auto-creates COA + Bank-type payment journal).
- After saving, map each method to the correct cash/clearing GL via Payment Journals → Payment Method Lines.
FAQ — Payment Methods
Methods marked "System" are seeded defaults. You can deactivate but should not delete them if modules reference their codes.
Ensure the method is Active and enabled in POS Settings. Cash methods are most common for retail POS.
Step 8 — Payment Journals (GL routing for receipts & payments)
Menu: Financials → Payment Journals | Route: /financials/payment-journals | Permission: PaymentJournals
A Payment Journal is a branch-scoped master record that tells CognitixERP which Chart of Accounts asset account to debit or credit when money moves — customer receipts, supplier payments, POS settlements, and CRM advance payments. It is not a batch payment screen and not the same as Journal Entry (/financials/journalentry): Payment Journal is configuration; Journal Entry is the posted debit/credit document.

Example — Review Cash journal for a branch
- Open Financials → Payment Journals.
- Filter or select your branch and locate the Cash-type journal.
- Confirm Default GL points to your cash account; mark Default if needed.
- Open Payment Method Lines and ensure
CASHis linked to this journal.
Result: Cash receipts and POS cash sales post to the correct GL automatically.
Why payment journals matter
Every operational payment screen asks for a Payment Method (what the customer or supplier
used) and a Payment Journal (which GL bucket receives or sends the cash). Without journals,
receipts and payments fall back to legacy GL mapping codes (1010 Cash / 1020 Bank)
and cannot distinguish, for example, Dhaka petty cash from Chittagong petty cash, or bKash merchant from Nagad
merchant. Payment journals also enable multi-currency locks, bank reconciliation links, and Phase 2
in-transit (outstanding) posting.
Conceptual model
| Concept | Description |
|---|---|
| Payment Journal | Branch-owned container with a Default GL Account (where settled cash lives), optional Outstanding GL (in-transit), optional currency lock, and optional Bank Account link. |
| Payment Method Line | Bridge row linking one Payment Method code to one journal for that branch. Drives auto-selection on payment screens. |
| Journal types | Cash, Bank, MFS, Card, Cheque — filters eligible GL subtypes and payment picker lists. |
| Default flag | Exactly one active journal per (Branch, Type) can be marked default — used when no Payment Method Line match exists. |
| Effective currency | Bank-linked journals inherit the bank account currency. Others use the optional currency field, or accept any currency when set to multi-currency. |
Typical branch setup examples
| Journal name | Type | Default GL | Payment method lines |
|---|---|---|---|
| Dhaka Petty Cash | Cash | 1010 — Cash on Hand | CASH |
| Dhaka bKash Merchant | MFS | 1015 — bKash Clearing | BKASH |
| Dhaka DBBL BDT | Bank | 1021 — DBBL Current (from bank account) | BANK (if used) |
| Dhaka Visa Terminal | Card | 1018 — Card Clearing | CARD, VISA |
| Dhaka Cheque Inward | Cheque | 1019 — Cheques in Hand | CHEQUE |
Page layout
- Branch picker (required) — autocomplete at top. All journals and lines are branch-scoped. Changing branch reloads the table and cancels any open create/edit form.
- New Journal — opens inline create form (disabled until a branch is selected).
- Journals table — lists all journals for the branch (active and inactive).
- Payment Method Lines panel — opens when you click the list icon on a journal row; manage method-to-journal links.
Create / Edit journal — form fields
| Field | Required | Description |
|---|---|---|
| Name | Yes | Display label in payment pickers and reports (max 150 chars). Example: Dhaka HSBC USD Operating. |
| Code | Yes | Short uppercase machine code (max 40 chars), unique per branch. Used in JE reference prefixes. Example: DHK-HSBC-USD. Stored uppercased on save. |
| Type | Yes | Cash · Bank · MFS · Card · Cheque. Drives GL account subtype filter and payment-screen journal filtering. |
| Default GL Account | Yes | Primary asset account debited (receipt) or credited (payment). Account picker shows Asset accounts only; subtype filtered by Type (Cash → Cash/None; Bank → Bank/None; MFS/Card/Cheque → Bank/Cash/None clearing-style). |
| Outstanding GL Account | No | Optional in-transit / clearing account (Phase 2). When set, payments post here first; bank reconciliation moves balance to Default GL. Shown with “Phase 2” chip in the table when configured. |
| Currency | No | Optional ISO currency lock (BDT, USD, …). Leave as — multi-currency — to accept any document currency. Auto-filled from base currency on new Cash/MFS journals; locked read-only when a bank account is linked. |
| Bank Account | Bank type | Shown read-only when Type = Bank. Auto-assigned from the branch’s first active bank account on create. Links journal to Banking module for statement import and reconciliation. Default GL and currency derive from the bank record — not editable while linked. |
| Default | No | When checked, becomes the default journal for this branch + type. Backend demotes any previous default automatically. |
| Active | No | Inactive journals are hidden from new payment dropdowns; historical postings remain valid. Deactivating also clears the default flag. |
Type-specific behaviour
| Type | GL picker constraint | Bank link | Typical use |
|---|---|---|---|
| Cash | Asset · Cash or generic subtype | None | Petty cash, POS cash drawer, branch cash on hand. |
| Bank | Auto from bank CoA | Required (auto-assigned) | Company bank accounts — usually auto-created with Banking → New Bank Account. |
| MFS | Asset · clearing subtypes | None | bKash, Nagad, Rocket merchant wallets. |
| Card | Asset · clearing subtypes | None | POS card terminal, payment gateway settlements. |
| Cheque | Asset · clearing subtypes | None | Cheques received or issued before bank clearance. |
Journals table columns
| Column | Description |
|---|---|
| Name | Journal name; “Linked to bank” caption when BankAccountId is set. |
| Code | Machine code chip. |
| Type | Colour-coded type chip. |
| Default GL | account code — account name monospace display. |
| Outstanding GL | In-transit account when configured; otherwise em dash. |
| Currency | ISO code chip, or Multi when unlocked. |
| Default | Star icon when this is the branch default for its type. |
| Status | Active / Inactive chip. |
| Actions | Lines (manage payment methods) · Edit · Deactivate (active rows only). |
Payment Method Lines panel
Click the list icon on a journal row to open Payment Method Lines for that journal. Each line binds one global Payment Method to this journal for the current branch context.
| Field / action | Description |
|---|---|
| Select Payment Method | Dropdown of active payment methods (name + code). |
| Add Line | Creates an active line with auto-incremented sequence. Same method can exist on different journals in different branches. |
| Sequence | Display order when multiple lines match (lower first). Tie-break: default journal wins. |
| Deactivate line | Soft-deactivates the routing link without deleting history. |
Resolution query joins PaymentMethodLine → PaymentJournal where
journal.BranchId = payment branch, both row and journal are active, ordered by
journal.IsDefault DESC, then line.Sequence ASC.
How payment screens auto-select a journal
Billing, Procurement, CRM, and POS call GetForPaymentAsync(branchId, paymentMethodCode, documentCurrencyCode).
The picker applies this logic:
- Method → type filter — Cash methods show Cash journals; MFS → MFS; Card/Gateway → Card; Cheque → Cheque; Bank → Bank; Other → no type filter.
- Payment Method Line match — if a line exists for the branch + method, that journal is flagged Recommended and sorted first.
- Currency filter — journals locked to a different currency than the document are excluded. If any journal is explicitly locked to the document currency, only those are shown (prevents a USD receipt from picking a generic multi-currency cash journal when a dedicated USD cash journal exists).
- Default journal — within the filtered list, the branch default for that type is preferred.
- Auto-select — UI pre-selects: recommended journal → else default → else first available. User can override when multiple journals remain valid.
GL posting — customer receipt (AR)
When a customer payment is approved, Financials posts a journal entry roughly as:
| Line | Debit | Credit | Account source |
|---|---|---|---|
| Cash/Bank inflow (net) | ✓ | Payment Journal Outstanding GL if set, else Default GL | |
| WHT Receivable | ✓ (if WHT) | Tax record GL from Taxation | |
| Accounts Receivable | ✓ | GL Mapping AR | |
| Advance from Customers | ✓ (excess) | GL Mapping when payment exceeds open invoices |
Reference number pattern: CP-{paymentId}. The selected PaymentJournalId is stored on
the payment record for audit and reporting.
GL posting — supplier payment (AP)
| Line | Debit | Credit | Account source |
|---|---|---|---|
| Accounts Payable | ✓ | GL Mapping AP | |
| Cash/Bank outflow (net) | ✓ | Payment Journal Default / Outstanding GL | |
| WHT Payable | ✓ (if WHT) | Tax record GL | |
| Advance to Suppliers | ✓ (excess) | GL Mapping when payment exceeds open invoices |
Supplier payments enforce a balance guard on Cash/Bank/MFS GL accounts — insufficient balance blocks the payment before posting.
Phase 2 — Outstanding GL & bank reconciliation
When Outstanding GL Account is configured on a journal, the payment posts to that in-transit account first. An Outstanding Payment record is created for Banking reconciliation. When the bank statement line is matched, the balance moves from Outstanding GL to Default GL (typically the linked bank CoA). Use this for cheque clearing, gateway settlement delays, or MFS T+1 settlement patterns.
Multi-currency
- Multi-currency journal (
CurrencyCode= null) — accepts receipts/payments in any document currency; FX conversion uses exchange rates from Exchange Rates. - Currency-locked journal — only appears in pickers when document currency matches (e.g. dedicated
USDcash journal for foreign-currency customers). - Bank-linked journal — currency locked to the bank account currency automatically; mismatch between payment currency and bank currency should be resolved via FX or a different journal.
WHT interaction
Withholding tax does not change which payment journal is selected. WHT adds separate GL lines (WHT Receivable on customer receipts, WHT Payable on supplier payments) alongside the journal’s cash/bank line. Configure WHT tax records in Taxation before enabling deduction on payment forms.
Auto-provisioning shortcuts
| Trigger | What is created | Follow-up |
|---|---|---|
| Payment Methods → Add (create) | Optional per-branch journal + Payment Method Line when “Auto-create Payment Journals” branches are checked. | Verify Default GL on each auto journal; set as default if needed. |
| Banking → New Bank Account | Bank-type payment journal linked to the new account (BANK-{slug} code pattern). | Mark as default Bank journal; add Payment Method Line if paying via BANK code. See Bank Accounts. |
Cross-module integration
| Module | Screen | Payment journal usage |
|---|---|---|
| Billing | Customer Receipt, Customer Payment dialog, Invoice inline payment | Required picker — auto-resolved from method + currency + branch. |
| Procurement | Supplier Payment, Supplier Payment dialog, Invoice inline payment | Same resolution rules as Billing; balance guard on outflow accounts. |
| CRM | Customer Details → Make Payment / Pay Advance | Navigates to Billing receipt or opens payment dialog with journal picker. |
| POS | POS terminal payment step | Journal auto-resolved — required before checkout. See POS payment guide. |
| Banking | Bank reconciliation, statement import | Bank-linked journals connect payments to bank accounts for matching. See Reconciliation. |
| Financials reports | Payment Journal report, Payment Method Ledger, Outstanding Payments | Audit cash movement by journal and method. |
Related setup screens (legacy / advanced)
- Payment Method Matrix (/financials/payment-method-matrix) — optional advanced routing; Payment Method Lines on Payment Journals are the primary path.
- Branch Cash Mapping (/financials/branch-cash-mapping) — legacy branch-specific Cash/Bank/Cheque GL overrides used when no payment journal is selected; prefer journals for new deployments.
Recommended go-live checklist (per branch)
- Create at least one Cash journal → Default GL = branch cash account → mark Default → add
CASHPayment Method Line. - For each MFS/Card method in use, create matching-type journal → map clearing GL → add method line.
- Register bank accounts in Banking (auto journal) or manually create Bank-type journals → verify Default GL matches bank CoA.
- Test one customer receipt and one supplier payment — confirm JE hits expected GL accounts.
- Run Payment Journal report (/financials/reports/payment-journal) and Trial Balance to verify balances.
Payment Journal report
Route: /financials/reports/payment-journal | Permission: FinancialsReportPaymentJournal
Transaction register filtered by date range, fiscal year, accounting period, branch, cost center, and currency. Use to reconcile journal activity against bank statements and payment method ledger.
FAQ — Payment Journals
Ensure at least one active journal exists for the receipt branch and matches the payment method type. Create a journal, add a Payment Method Line for the selected method, and verify currency lock matches the invoice/receipt currency.
Check the Payment Journal’s Default GL (and Outstanding GL if Phase 2). Payment methods no longer carry their own GL account — routing is journal-only. Edit the journal or select a different journal on the payment form.
Journal Code must be unique within the branch. Rename or deactivate the old journal.
Bank-type journals linked to a Banking account inherit GL and currency from that account. Update the bank account’s CoA link in Banking, not the journal directly.
Use Deactivate instead. Historical payments retain their stored PaymentJournalId for audit. Inactive journals are excluded from new payments.
Configure Payment Journals once during setup. Operational modules create Journal Entries automatically when you record receipts and payments. Use manual Journal Entry only for adjustments not covered by Billing, Procurement, or Banking.
Create one journal per branch (branch-scoped). If the wallet is truly centralised, post inter-branch clearing via GL mappings; do not share a single journal across branches.
Step 9 — Cost Centers (optional)
Menu: Financials → Cost Centers | Route: /financials/costcenters
Optional departmental or project tracking for P&L analysis. Configure before operational posting if you want cost center on every expense and journal line.

Example — Add an Admin cost center
- Go to Financials → Cost Centers.
- Click Add Cost Center.
- Enter code and name (e.g.
ADMIN/Administration), optional parent, then Save.
Result: Expenses and journal lines can assign this cost center for reporting.
How to configure
- Click Add Cost Center.
- Enter code, name, and optional parent for hierarchy (e.g. Admin → HR → Training).
- Assign cost centers on journal entries, expenses, and reports that support dimensional analysis.
FAQ — Cost Centers
Your organization may require cost center on certain account types. Create centers first, then select on the transaction.
Step 10 — Opening Balance (migration / go-live)
Menu: Financials → Opening Balance | Route: /financials/opening-balance
Post opening GL balances when migrating from another system or starting mid-year with existing balances. Post once per branch before daily operations. Requires Steps 3, 4, 5, and branches from Branching module.

Example — Post opening balances for Head Office
- Open Financials → Opening Balance.
- Select the branch (entry date is locked to fiscal year start).
- Add balanced debit/credit lines for cash, bank, AR, AP, inventory, and equity.
- Confirm totals match, then click Post Opening Balance and check Trial Balance.
Result: Opening GL balances are posted for that branch and ready for live transactions.
How to post
- Select Branch — entry date is locked to fiscal year start (shown read-only).
- Add balanced lines — each row is a From/To pair (debit and credit accounts with amounts).
- Include balance sheet accounts: cash, bank, receivables, payables, inventory, equity/opening balance equity.
- Verify total debits equal total credits before posting.
- Click Post Opening Balance. Run Trial Balance to confirm.
FAQ — Opening Balance
No — opening balance must post on the fiscal year start date by design. Adjust fiscal year dates if needed before posting.
Reverse via a manual journal entry or contact your administrator. Avoid re-posting — check Trial Balance after first post.
GL opening balance sets account balances. Inventory quantities are entered separately under Inventory → Branch Opening Stock. Both should reconcile to the same inventory asset value.
Part 2 — Daily Operations
After foundation setup, use these screens for day-to-day accounting. All posting screens validate that the transaction date falls in an open accounting period.
Journal Entry (manual GL)
Menu: Financials → Journal Entry | Routes: /financials/journalentry · new /financials/journalentry/new · view /financials/journalentry/{id} · edit /financials/journalentry/{id}/edit
Use for adjustments, accruals, depreciation, and transactions not created by Billing, Procurement, POS, or Banking. Module documents post automatically — do not duplicate them here.
Header fields
| Field | Description |
|---|---|
| Entry Date | Must fall in an open accounting period. Blocked if period is closed. |
| Branch | Branch scope for the entry — affects branch P&L reports. |
| Reference / Narration | Document reference and description on GL ledger. |
| Currency | Base or foreign; foreign lines use exchange rate for base-currency totals. |
Line fields
| Field | Description |
|---|---|
| Account | COA account from Chart of Accounts — must be active. |
| Debit / Credit | Enter amount on one side only per line. Total debits must equal total credits. |
| Cost Center | Optional dimensional tag when cost center tracking is enabled. |
| Party | Optional customer/supplier link for party ledger reports. |
FAQ — Journal Entry
Create or reopen an accounting period on Fiscal Years that covers the date, or change the entry date to an open period.
Expenses & recurring expenses
Routes: /financials/expenses · /financials/recurring-expenses
Record operational expenses (rent, utilities, travel). Workflow: create → approve → pay. Approved expenses post debit to expense account and credit to cash/payable via GL mappings. Recurring expenses auto-generate drafts on schedule (monthly rent, subscriptions).
Payment journals & method matrix
Routes: /financials/payment-journals · /financials/payment-method-matrix · /financials/branch-cash-mapping
Payment journals — branch-scoped GL routing containers for cash, bank, MFS, card, and cheque movements. Configure once during setup; operational modules auto-select journals on every receipt and payment. See the full Payment Journals guide. Payment method matrix — optional advanced routing. Branch cash mapping — legacy POS/cash drawer GL overrides; prefer payment journals for new setups.
Currency revaluation & period close
Routes: /financials/currency-revaluation · /financials/period-close · /financials/observability/currency
FX revaluation — at month-end, post unrealized gain/loss on foreign-currency balances using current exchange rates. Requires active fiscal year and accounting period.
Period close — run FX revaluation as-of date; reverse by period label (e.g. Jan-2026). Close individual accounting periods on Fiscal Years page when month-end reconciliation is complete.
Currency observability — audit trail of rate usage and conversion anomalies.
| Task | Menu / Route | Notes |
|---|---|---|
| Manual journal entries | Financials → Journal Entry /financials/journalentry | Debit/credit must balance. Posts to open period only. |
| Record expenses | Financials → Expenses /financials/expenses | Approve and pay expenses; posts to GL. |
| Payment journals (setup) | Financials → Payment Journals /financials/payment-journals | Configure GL routing for receipts & payments — see guide. |
| Recurring expenses | Financials → Expenses (recurring) /financials/recurring-expenses | Automate monthly rent, subscriptions, etc. |
| FX revaluation | Financials → Currency Revaluation /financials/currency-revaluation | Period-end unrealized gain/loss (multi-currency). |
FAQ — Daily operations
No — approved invoices, GRNs, POS sales, and banking transactions post automatically via GL mappings. Manual journals are for adjustments, accruals, and non-module transactions.
Total debits must equal total credits in base currency. Check decimal places and FX conversion on foreign-currency lines.
Part 3 — Reports & Period Close
Financial statements
Core statements filter by fiscal year, accounting period, branch, cost center, and currency.
| Report | Route | When to use |
|---|---|---|
| Trial Balance | /financials/trialbalance | After opening balance — verify debits = credits. |
| General Ledger | /financials/ledger | Account transaction detail with running balance. |
| Balance Sheet | /financials/balance-sheet | Assets, liabilities, equity snapshot. |
| Profit & Loss | /financials/profit-and-loss | Revenue vs expense for a period. |
| Cash Flow | /financials/cash-flow | Cash movement analysis. |
Financials Reports hub
Route: /financials/reports
Access with FinancialsReports or any individual report permission.
| Report | Route |
|---|---|
| Dashboard snapshot | /financials/reports/dashboard-snapshot |
| Journal register | /financials/reports/journal-register |
| COA register | /financials/reports/coa-register |
| Account balance | /financials/reports/account-balance |
| Payment method ledger | /financials/reports/payment-method-ledger |
| Payment journal | /financials/reports/payment-journal |
| Expense summary / register | /financials/reports/expense-summary, /financials/reports/expense-register |
| Outstanding payments | /financials/reports/outstanding-payments |
| Cost center P&L | /financials/reports/cost-center-pl |
| Branch P&L comparison | /financials/reports/branch-pl-comparison |
| FX revaluation / currency gain-loss | /financials/reports/fx-revaluation, /financials/reports/currency-gain-loss |
| Fiscal close summary | /financials/reports/fiscal-close-summary |
| Audit trail | /financials/reports/audit-trail |
| Party ledger | /financials/reports/party-ledger |
| WHT summary | /financials/reports/wht-summary |
| Report | Route | When to use |
|---|---|---|
| Tax Summary / WHT Report | /financials/tax-report, /financials/wht-report | Tax period reconciliation — see Tax & Compliance. |
Month-end checklist: close accounting period → run Trial Balance → review P&L → run tax reports → (multi-currency) run FX revaluation → at year-end, close fiscal year.
Setup dependency reference
| You want to… | Complete these Financials steps first |
|---|---|
| Post any journal entry | 1 Currency · 3 Fiscal Year + open period · 4 COA |
| Approve a sales invoice to GL | 1–5 (through GL Mappings) · 6 Tax (if taxable) |
| Record customer receipt / POS payment | 1–5 · 7 Payment Methods · 8 Payment Journals |
| Migrate opening balances | 1–5 · 10 Opening Balance (+ Inventory opening stock) |
| Run Balance Sheet | 1–4 minimum · posted transactions or opening balance |
| Multi-currency invoice | 1–2 Exchange Rates · 4–6 |
Banking
Banking manages company bank accounts, manual and imported bank transactions, inter-account transfers, cheque books (issue/clear/bounce), bank statement import, reconciliation against ERP payments and receipts, and banking analytics. Each bank account links to a Chart of Accounts asset and auto-creates a Bank-type Payment Journal for Billing, Procurement, and POS.
Recommended setup order
Bank-to-ledger flow
- Register account — branch, currency, CoA link (or auto-create CoA + payment journal).
- Record movement — manual transaction, transfer, module payment, or statement import.
- Post — draft transactions post to GL via linked CoA; fees/interest use posting settings.
- Reconcile — match statement lines to system transactions; clear outstanding payments.
- Review — Bank Ledger, Cash Reconciliation, Unreconciled Items reports.
Routes at a glance
Navigation & permissions
| Menu path (Banking) | Route | Permission page |
|---|---|---|
| Banking → Dashboard | /banking | BankingDashboard |
| Banking → Accounts | /banking/accounts | BankAccounts |
| Banking → Transactions | /banking/transactions | BankTransactions |
| Banking → Cheques | /banking/cheques | BankCheques |
| Banking → Transfer | /banking/transfers/new | BankTransfers |
| Banking → Import Statements | /banking/statements/import | BankStatementImport |
| Banking → Reconciliation | /banking/reconciliation/{statementId} | BankReconciliation |
| Banking → Ledger | /banking/ledger | BankLedger |
| Banking → Reports | /banking/reports | BankingReports + report-specific |
| Settings → Banking Posting Settings | /settings/banking-coa | BankingPostingSettings (Finance/Admin) |
Part 1 — Setup
Step 1 — Banking Posting Settings
Menu: Banking → Banking Posting Settings | Route: /settings/banking-coa | Access: Finance or Admin role
Maps GL accounts for bank fee, interest, and FX gain/loss postings during reconciliation and bank transaction processing. Configure once before operational banking.

Example — Configure banking GL accounts
- Open Banking → Banking Posting Settings.
- Select FX Gain/Loss, Bank Fees Expense, and Interest Income accounts from your Chart of Accounts.
- Save.
Result: Reconciliation fees, interest, and FX adjustments post to the correct GL lines.
| Field | Required | Description |
|---|---|---|
| FX Gain/Loss Account | No | Revenue/Expense account for reconciliation FX adjustments. Empty = system default FX mapping code. |
| Bank Fees Expense Account | No | Expense account for bank charges. Empty = default fees mapping. |
| Interest Income Account | No | Revenue account for bank interest credits. Empty = default interest mapping. |
Step 2 — Bank Accounts
Menu: Banking → Accounts | Routes: list /banking/accounts · new /banking/accounts/new · edit /banking/accounts/{id}

Example — Add a current account
- Go to Banking → Accounts and click New.
- Enter bank name, account number, branch, currency, and linked CoA bank account.
- Save. A Bank-type payment journal is created automatically when configured.
Result: The account appears in the list with balance and can receive deposits, withdrawals, and transfers.
Account list — filters
| Filter | Options |
|---|---|
| Branch | All or specific ERP branch. |
| Status | All · Active · Inactive. |
Account list — columns
| Column | Description |
|---|---|
| Bank | Bank name + optional bank branch name. |
| Account Number | Account number; IBAN and SWIFT shown when set. |
| Branch | ERP branch chip. |
| Currency | Account currency ISO code. |
| CoA Account | Linked GL bank asset account code. |
| Balance | Current balance in base currency (BC). |
| Status | Active / Inactive. |
New / Edit bank account — every field
| Field | Required | Description |
|---|---|---|
| Bank Name | Yes | Financial institution name (e.g. DBBL, HSBC). |
| Bank Branch | No | Physical bank branch name (not ERP branch). |
| Account Number | Yes | Company account number at the bank. |
| SWIFT | No | SWIFT/BIC code for international transfers. |
| IBAN | No | International Bank Account Number. |
| Branch | Yes | ERP branch that owns this account — scopes transactions and journals. |
| Currency | Yes | Account currency — locks payment journal currency when linked. |
| CoA Account | Create: optional · Edit: yes | GL bank asset account. Leave blank on create to auto-generate BANK-{slug} CoA + Bank-type payment journal. |
| Reconciliation Tolerance | No | Amount variance allowed when auto-matching statement lines (default 0). |
| Dual Approval | No | When enabled, large bank transactions require second approver (workflow). |
| External Provider | No | Open banking feed provider name (for Pull Feed integration). |
| External Provider Account Id | No | Provider-side account identifier for automated statement pull. |
| Status | Edit only | Active accounts appear in payment pickers; inactive preserved for history. |
FAQ — Bank Accounts
When CoA is left blank on create, backend spawns a new bank asset account and Bank-type payment journal linked to this account. Verify the journal on Payment Journals and mark as default if needed.
CoA link is required on edit — changing it affects future postings only; historical GL remains on the original account. Consult your accountant before relinking.
Part 2 — Transactions & transfers
Dashboard
Route: /banking
KPI overview and quick actions for daily banking operations.

Example — Start the banking day from the dashboard
- Open Banking from the sidebar.
- Review Total Balance and Unreconciled Lines.
- Use quick actions to open Ledger, Import Statements, or Cheque Management as needed.
Result: You see cash position and pending reconciliation work in one screen.
| KPI / panel | Description |
|---|---|
| Total Balance (BC) | Sum of active account balances in base currency. |
| Total Inflow / Outflow | Period movement aggregates. |
| Unreconciled Lines | Statement lines awaiting match. |
| Bank Accounts table | Per-account inflow, outflow, balance. |
| Quick actions | Open Ledger · Transfers · Import Statements · Cheque Management · Reports. |
Step 3 — Bank Transactions
Routes: list /banking/transactions · new /banking/transactions/new · edit /banking/transactions/{id}

Example — Post a bank deposit
- Open Banking → Transactions and click New.
- Select account, Type Deposit, date, amount, and reference.
- Save / Post.
Result: The deposit appears in the transaction list and updates the account balance / ledger.
List filters
| Filter | Description |
|---|---|
| Account | All or one bank account. |
| From / To | Transaction date range (defaults last 30 days). |
| Status | Draft · Posted · Reconciled · Voided. |
List columns
| Column | Description |
|---|---|
| Date | Transaction date. |
| Account | Bank name — account number. |
| Type | Deposit · Withdrawal · Fee · Interest · Adjustment · TransferProxy. |
| Reference | External or internal reference. |
| Amount FC / Rate / Amount BC | Foreign currency amount, exchange rate, base currency equivalent. |
| Status | Workflow status chip. |
New / Edit transaction — form fields
| Field | Required | Description |
|---|---|---|
| Bank Account | Yes | Account to post against — shows current BC balance in picker. |
| Date | Yes | Transaction date — must fall in open accounting period. |
| Transaction Type | Yes | Deposit (inflow), Withdrawal (outflow), Fee, Interest, Adjustment, TransferProxy. |
| Rate Source | Yes | Spot · Corporate · Manual · Contract — drives FX rate lookup. |
| Currency | Read-only | Locked to selected bank account currency. |
| Amount FC | Yes | Amount in account currency (min 0.01). |
| Exchange Rate | Yes | FC→BC rate; editable when Rate Source = Manual. |
| Amount BC | Read-only | Computed base currency amount. |
| Reference | No | Cheque number, transfer ref, etc. |
| Rate Memo | No | FX rate note for audit. |
| Description | No | Multi-line narrative. |
Workflow: Save as Draft → click Post to GL. Posted transactions show status chip; only drafts are editable.
Transaction type reference
| Type | Direction | Typical use |
|---|---|---|
| Deposit | Inflow (+) | Cash deposit, incoming transfer, misc credit. |
| Interest | Inflow (+) | Bank interest credit — posts to Interest Income GL from posting settings. |
| Withdrawal | Outflow (−) | Cash withdrawal, outgoing payment. |
| Fee | Outflow (−) | Bank charges — posts to Bank Fees Expense GL. |
| Adjustment | Either | Manual correction entry. |
| TransferProxy | System | Generated leg of inter-account transfer — do not create manually. |
Step 4 — Inter-account Transfers
Routes: new /banking/transfers/new · list /banking/transfers
Moves funds between two bank accounts — same branch or cross-currency with FX.

Example — Transfer between two accounts
- Open Banking → Transfers → New.
- Select From Account and To Account, enter Amount, Date, and optional Reference / Fee.
- Confirm currency/rate if cross-currency, then Save.
Result: A withdrawal posts on From and a deposit on To (plus fee if entered).
Transfer form — every field
| Field | Required | Description |
|---|---|---|
| From Account | Yes | Source bank account — shows BC balance. |
| To Account | Yes | Destination account (cannot equal From). |
| Amount FC | Yes | Transfer amount in selected currency. |
| Currency | Yes | Defaults from From account; cross-currency warning when To differs. |
| Rate Source | Yes | Spot · Corporate · Manual · Contract. |
| Exchange Rate | Yes | Editable when Manual; auto-filled otherwise. |
| Amount BC | Read-only | Base currency equivalent preview. |
| Date | Yes | Transfer date. |
| Reference | No | Bank transfer reference number. |
| Fee FC | No | Optional bank transfer charge in FC. |
| Description | No | Transfer memo. |
| Rate Memo | No | FX audit note. |
Save posts withdrawal on From and deposit on To (plus fee transaction if specified).
Part 3 — Cheque management
Step 5 — Cheques
Route: /banking/cheques

Example — Register a cheque book
- Open Banking → Cheques and select the Bank Account.
- Click New Cheque Book and enter Book Number, Start/End numbers, and Issued Date.
- Save, then issue leaves as outgoing/incoming cheques are used.
Result: Cheque leaves appear with status tracking for issue, clear, bounce, or cancel.
Page filters
| Filter | Options |
|---|---|
| Bank Account | Required — loads cheque books and leaves. |
| Direction | All · Outgoing · Incoming. |
| Status | Available · Issued · Cleared · Bounced · Cancelled · Stale. |
New Cheque Book dialog
| Field | Required | Description |
|---|---|---|
| Book Number | Yes | Internal book identifier. |
| Series Prefix | No | Prefix prepended to leaf numbers. |
| Start Number / End Number | Yes | Cheque leaf range — total leaves = End − Start + 1. |
| Issued Date | Yes | Date book received from bank. |
| Expiry Date | No | Book validity end. |
| Notes | No | Internal memo. |
Issue Cheque dialog
| Field | Required | Description |
|---|---|---|
| Direction | Yes | Outgoing (from cheque book) or Incoming (received cheque). |
| Cheque Book | Outgoing | Select active book with available leaves. |
| Cheque Number | Incoming | Manual number for incoming cheques. |
| Cheque Date | Yes | Date on cheque face. |
| Currency / Amount FC / Exchange Rate / Amount BC | Yes | Cheque amount with FX when foreign currency. |
| Payee Name | No | Payee or drawer name. |
| Payee Reference | No | Supplier/customer reference. |
| Description | No | Payment memo. |
Cheque leaf actions
| Action | When | Fields |
|---|---|---|
| Clear | Status = Issued | Clearance Date (required); Exchange Rate Override (optional). |
| Bounce | Status = Issued | Bounce reason — reverses expected GL movement. |
| Cancel | Available or Issued | Confirmation — leaf marked Cancelled. |
Cheque status lifecycle
| Status | Meaning |
|---|---|
| Available | Leaf in book, not yet used. |
| Issued | Cheque written/received — awaiting bank clearance. |
| Cleared | Funds settled — GL finalized. |
| Bounced | Cheque returned unpaid. |
| Cancelled | Voided before or after issue. |
| Stale | Past validity period without clearance. |
Part 4 — Statements & reconciliation
Step 6 — Import Bank Statements
Route: /banking/statements/import

Example — Import a CSV statement
- Open Banking → Statements Import.
- Select Bank Account and Provider (e.g. CSV), choose the statement file, click Import.
- Review Imported/Rejected counts, then click Start Reconciliation.
Result: Statement lines load into the reconciliation workspace for matching.
| Field / action | Description |
|---|---|
| Bank Account | Target account for imported lines. |
| Provider | CSV · Excel · MT940 · OFX format parser. |
| Choose File | Accepts .csv, .xlsx, .xls, .sta, .mt940, .ofx, .qfx. |
| Import | Upload and parse — shows Imported/Rejected counts. |
| Pull Feed | Fetch from external provider when account has External Provider configured. |
| Start Reconciliation | Navigate to reconciliation workspace for imported statement. |
Preview lines columns: Date, External Id, Description, Amount FC, Currency, Rate, Amount BC, Match status (Matched/Unmatched).
Step 7 — Bank Reconciliation
Route: /banking/reconciliation/{statementId}
Two-panel workspace: Statement Lines (bank file) vs System Transactions (ERP). Match manually or via Auto-Match. Clears Phase 2 Outstanding Payments from Billing/Procurement when bank confirms receipt.

Example — Reconcile an imported statement
- Open the reconciliation workspace from the imported statement.
- Enter Statement Balance, choose Strategy (STRICT or FUZZY), then Open Session.
- Click Auto Match or Match Selected line + transaction pairs.
- When complete, click Close Session.
Result: Matched items reconcile; outstanding payments clear when bank confirms receipts.
Session controls
| Field / button | Description |
|---|---|
| Statement Balance | Closing balance per bank statement — locked after session opens. |
| Strategy | STRICT (exact match) or FUZZY (tolerance + date window). |
| Tolerance | Amount variance for fuzzy matching. |
| Days | Date window for fuzzy matching. |
| Open Session | Start reconciliation session for this statement. |
| Auto Match | Batch-match statement lines to system transactions. |
| Match Selected | Manual link — select one line + one transaction. |
| Unmatch | Break an existing match. |
| Close Session | Finalize — posts variance, fee/FX adjustments; clears outstanding items. |
System transaction link icons
| Icon | Meaning |
|---|---|
| Receipt icon | Linked to Billing customer receipt. |
| Payment icon | Linked to Procurement supplier payment. |
Outstanding payments panel
Lists in-transit payments (from Payment Journal Outstanding GL) awaiting bank confirmation. Auto-match or manual match moves balance from Outstanding GL to bank CoA on session close.
Step 8 — Bank Ledger
Route: /banking/ledger

Example — Review a month’s ledger
- Open Banking → Ledger.
- Select Account and From/To dates, then Load.
- Optionally Export CSV or open the linked GL Ledger.
Result: You see In/Out movements with FC/BC amounts for the selected period.
| Filter / column | Description |
|---|---|
| Account | Select bank account. |
| From / To | Date range filter. |
| Load | Refresh register. |
| Export CSV | Download ledger extract. |
| Open GL Ledger | Jump to Financials General Ledger for linked CoA account. |
| Columns | Date, Type, Direction (In/Out), Reference, Description, Currency, Amount FC, Rate, Amount BC. |
Part 5 — Reports
Step 9 — Banking reports hub
Route: /banking/reports
23 banking analytics and control reports.

Example — Open Account Summary
- Go to Banking → Reports.
- Open Account Summary (or any needed report from the hub).
- Apply filters and review / export as required.
Result: You get balances and control reports without leaving the Banking module.
| Report | Route | Permission | Purpose |
|---|---|---|---|
| Account Summary | /banking/reports/account-summary | BankingAccountSummary | Balances across all accounts. |
| Bank Ledger | /banking/reports/bank-ledger | BankingBankLedger | Detailed account register report. |
| Transaction Register | /banking/reports/transaction-register | BankingTransactionRegister | All bank transactions by period. |
| Cash Flow | /banking/reports/cash-flow | BankingCashFlow | Cash movement analysis. |
| Balance Trend | /banking/reports/balance-trend | BankingBalanceTrend | Account balance over time. |
| Transaction Volume | /banking/reports/transaction-volume | BankingTransactionVolume | Count/volume by type. |
| Transfer Summary | /banking/reports/transfer-summary | BankingTransferSummary | Inter-account transfer register. |
| Account Register | /banking/reports/account-register | BankingAccountRegister | Master list of bank accounts. |
| Unreconciled Items | /banking/reports/unreconciled-items | BankingUnreconciledItems | Open statement lines without match. |
| Unreconciled Aging | /banking/reports/unreconciled-aging | BankingUnreconciledAging | Age of unmatched items. |
| Reconciliation Summary | /banking/reports/reconciliation-summary | BankingReconciliationSummary | Closed session outcomes. |
| Reconciliation Variance | /banking/reports/reconciliation-variance | BankingReconciliationVariance | Statement vs book variances. |
| Statement Import Log | /banking/reports/statement-import-log | BankingStatementImportLog | Import history and errors. |
| Match Performance | /banking/reports/match-performance | BankingMatchPerformance | Auto-match success rates. |
| Draft vs Posted | /banking/reports/draft-posted | BankingDraftPosted | Pending draft transactions. |
| Linked Payments | /banking/reports/linked-payments | BankingLinkedPayments | Module payments tied to bank txns. |
| Cheque Summary | /banking/reports/cheque-summary | BankingChequeSummary | Cheque status totals. |
| Cheque Register | /banking/reports/cheque-register | BankingChequeRegister | All cheque leaves detail. |
| Cheque Aging | /banking/reports/cheque-aging | BankingChequeAging | Outstanding issued cheques by age. |
| Approval Queue | /banking/reports/approval-queue | BankingApprovalQueue | Transactions awaiting dual approval. |
| Approval Audit | /banking/reports/approval-audit | BankingApprovalAudit | Approval trail history. |
| FX Exposure | /banking/reports/fx-exposure | BankingFxExposure | Foreign currency account exposure. |
| Fee & Interest | /banking/reports/fee-interest | BankingFeeInterest | Bank fees and interest summary. |
Cross-module integration
| Module | Integration point |
|---|---|
| Financials | CoA bank accounts, GL posting on post/reconcile, FX/fees/interest GL from posting settings, Payment Journals auto-created per account. |
| Billing | Customer receipts with Bank payment method link to bank account via payment journal — appear in reconciliation. |
| Procurement | Supplier payments with Bank method — linked payment icon in reconciliation. |
| POS | Bank tender uses Bank-type payment journal tied to branch bank account. |
| Payment Journals | Bank-type journals link BankAccountId — see Payment Journals guide. |
Before go-live checklist
| Task | Depends on |
|---|---|
| Configure Banking Posting Settings (FX, fees, interest) | CoA expense/revenue accounts |
| Register each company bank account | Branch, currency, optional auto CoA |
| Verify Payment Journal per account | Payment Journals |
| Post opening bank balance | Opening Balance or first Deposit transaction |
| Import test statement and reconcile one month | CSV sample from bank |
| Run Unreconciled Items report | After first reconciliation close |
| Setup cheque books (if using cheques) | Active bank account |
FAQ — Banking
Compare Bank Ledger report with Financials General Ledger for the linked CoA account. Look for unposted draft transactions, unreconciled module payments, or opening balance posted only on one side.
Increase tolerance and date window, switch to FUZZY strategy, or verify system transactions are Posted (not Draft). Ensure customer receipts/supplier payments used the correct bank payment journal.
Only Draft status transactions are editable. Posted or Reconciled entries must be voided/adjusted via a reversing Adjustment transaction.
Auto-journal creation is best-effort — if it failed, create a Bank-type journal manually on Payment Journals and link the bank account. Check server logs for the warning.
Tax & Compliance
Tax & Compliance connects your ERP documents to regional e-invoice gateways and statutory tax reports. It builds on company identity (Branching), tax rates (Financials), and operational documents from Billing and POS. When enabled, approved sales invoices and POS receipts can be submitted automatically to ZATCA (Saudi Arabia) or GST India; submissions are tracked in an audit log with retry support.

Example — Open e-invoice compliance settings
- Complete Company TIN/VAT/GST and Financials tax rates first.
- Go to Settings → E-Invoice Compliance (/settings/e-invoice-compliance).
- Enable only the scheme that applies to your country and fill the required credentials / profile fields.
- Test with a sample approved invoice, then monitor E-Invoice Audit.
Result: Approved sales documents can submit to the configured gateway and appear in the audit log.
Recommended setup order
Follow these steps in sequence. Steps 5–7 apply only to your country’s scheme (ZATCA or GST India for production).
Routes at a glance
Navigation & permissions
| Menu path | Route | Permission page |
|---|---|---|
| Financials → Tax & Compliance → Taxation | /financials/taxation | Taxation |
| Financials → Tax & Compliance → E-Invoice Compliance | /settings/e-invoice-compliance | EInvoiceCompliance |
| Financials → Tax & Compliance → E-Invoice Audit | /settings/e-invoice-audit | EInvoiceAudit |
| Financials → Tax & Compliance → Tax Summary | /financials/tax-report | Taxation |
| Financials → Tax & Compliance → WHT Report | /financials/wht-report | WhtReport |
| Financials → Tax & Compliance → GST Reports | /settings/gst-reports | GstReports |
| Financials → Tax & Compliance → ZATCA Reports | /settings/zatca-reports | ZatcaReports |
| Financials → Tax & Compliance → NBR Reports | /settings/nbr-reports | NbrReports |
Part 1 — Setup (in order)
Step 1 — Company tax identity (Branching)
Menu: Settings → Company Setup → Step 1 (Basic Information) | Route: /settings/company-setup
E-invoice gateways validate your legal name and tax registration against submitted documents. Enter these before configuring compliance profiles.

Example — Enter company tax registration
- Open Settings → Company Management → Edit (Step 1 Basic Info).
- Confirm Official Name matches your tax registration.
- Enter TIN / VAT / GST Number exactly as the authority expects.
- Save the company wizard.
Result: Compliance profiles can pre-fill TRN/GSTIN/TIN and pass identity alignment checks.
| Field | Used for |
|---|---|
| Official Name | Default legal name on compliance profiles and e-invoice payloads. |
| TIN / VAT / GST Number | Pre-fills TRN (ZATCA), GSTIN (India), or TIN (NBR). Must match your tax authority registration exactly. |
See Branching guide — Company Setup Step 1 for full field details.
FAQ — Company tax identity
The TIN/VAT/GST number on Company Setup does not match the number saved on your active compliance profile. Update one side so both match character-for-character (including formatting your gateway expects).
Use the Branch Scope dropdown on E-Invoice Compliance to create a separate profile per branch. Each branch profile can override the default tax ID from company setup.
Step 2 — Tax rates & tax groups (Financials)
Menu: Financials → Tax & Compliance → Taxation | Route: /financials/taxation
Compliance submissions read tax amounts from invoice and POS lines. Without active tax rates, documents may post to GL but fail compliance validation or report with zero tax. Complete Financials Steps 1–4 (Currency through COA) first; see Financials Step 6 — Taxation for full instructions.

Example — Add a sales tax rate for e-invoicing
- Go to Financials → Taxation.
- Click Add Tax and create a Standard rate with Scope Sales (or Both).
- Set Effective Date on or before your first live invoice.
- Assign the rate/group to products or invoice lines.
Result: Approved documents carry tax amounts that compliance gateways and reports can validate.
Minimum for compliance
- Create at least one Standard rate with correct Scope (Sales for outbound e-invoices).
- Set Effective Date on or before your first live invoice date.
- Assign tax or tax groups to products (Inventory) or invoice lines (Billing).
- For India GST: ensure line tax breakdown maps to CGST/SGST/IGST as applicable.
- For WHT/TDS reporting later: configure WHT category rates with payable/receivable GL links.
FAQ — Tax rates before compliance
You can save a compliance profile, but submissions from zero-tax lines will not match statutory returns. Configure tax rates first.
Enable Validate HSN on submit in the GST India compliance panel only after products have valid HSN codes in Inventory. Fix product master data, then retry from E-Invoice Audit.
Step 3 — E-Invoice Compliance profiles
Menu: Financials → Tax & Compliance → E-Invoice Compliance | Route: /settings/e-invoice-compliance
Configure regional e-invoice integration. The page shows a health summary (enabled schemes, certificate expiry, failed submissions in last 24 hours, tax identity alignment) and a Branch Scope selector. Choose All Branches for a company-wide profile or a specific branch for branch-level registration.
Three scheme tabs are available — enable only the scheme that applies to your country for production. Do not enable multiple live gateways unless you genuinely operate under multiple regimes.

Example — Enable a sandbox compliance profile
- Open Financials → Tax & Compliance → E-Invoice Compliance.
- Select Branch Scope (All Branches or one branch).
- Open your country tab, set Environment to Sandbox, fill required IDs/credentials, enable the scheme.
- Save. Confirm health summary shows the scheme enabled before testing documents.
Result: Approved invoices/POS receipts can submit to the sandbox gateway and appear in E-Invoice Audit.
Common settings (all schemes)
| Setting | Description |
|---|---|
| Enabled | Turns on automatic submission when invoices/POS receipts are approved (subject to failure policy). |
| Environment | Sandbox — test credentials and sample data presets. Production — live gateway; sandbox TRN/GSTIN/credentials are blocked. |
| On failure policy | Warn only — document approves even if gateway rejects. Block approval — invoice cannot finalize until submission succeeds (recommended for go-live). |
| Legal name | Registered business name sent to the gateway. Defaults from Company Setup. |
| Submit sales return compliance | When on, credit notes / sales returns also trigger compliance submission. |
| Show QR on POS receipt | Prints compliance QR on POS receipts when submission succeeds (ZATCA, GST, NBR panels). |
3A — ZATCA (Saudi Arabia)
- Select the ZATCA tab.
- Enter TRN, optional Legal name (Arabic), and Device ID.
- For Sandbox: switch environment — preset test values load automatically. Save profile; sandbox may auto-provision a certificate.
- For Production: enter OTP from ZATCA portal, click Onboard CSID, or paste PEM certificate and private key then Upload Certificate.
- Save profile. Confirm green Certificate active chip before go-live.
3B — GST India
| Field | Description |
|---|---|
| GSTIN | 15-character GST identification — must match company registration. |
| IRN threshold amount | Minimum invoice value requiring IRN (e-invoice). |
| Seller state code | 2-digit state code for place-of-supply logic. |
| GSP credentials | Client ID, Client Secret, Username, Password from GST Suvidha Provider. |
| B2C POS IRN | Submit IRN for retail POS receipts above threshold. |
| Composition scheme | Enable if registered under composition — affects tax calculation. |
| Default RCM | Reverse charge mechanism default on purchase lines. |
| Validate HSN on submit | Block submission if product HSN missing/invalid. |
| Default payment mode | Cash/Credit/Bank for e-invoice payload. |
- Select the GST India tab.
- Enter GSTIN, IRN threshold amount, and Seller state code (required).
- Enter GSP/API credentials: Client ID, Client Secret, Username, Password.
- Configure toggles: B2C POS IRN submission, composition scheme, default reverse charge (RCM), HSN validation, default payment mode.
- Start in Sandbox with preset credentials; switch to Production only with live GSTIN and production API keys.
- Save profile. GST India uses API credentials — no PEM certificate upload.
3C — NBR (Bangladesh) — preview only
- Select the NBR tab only for evaluation or future testing.
- Fields available today: TIN, Show QR on POS, PEM certificate/key (same pattern as ZATCA).
- Do not treat successful saves as proof of NBR acceptance — gateway integration is still being completed.
FAQ — E-Invoice Compliance
Always complete at least one successful test cycle in Sandbox (sample invoice → audit log → regional report) before switching Environment to Production and entering live credentials.
The gateway rejected submission. Open E-Invoice Audit, read the error message, fix data (tax ID, certificate, line tax), use Retry, or temporarily set policy to Warn only while debugging (not recommended long term).
Renew certificate with your tax authority before expiry. Upload new PEM certificate and private key, or re-run ZATCA CSID onboarding with a fresh OTP.
No — not for live NBR compliance. Use Financials tax rates and internal Tax Summary reports until CognitixERP ships a completed NBR integration in a future update.
Step 4 — Post compliant documents (Billing & POS)
Once Step 3 is enabled, compliance runs at document approval time — not at draft save.

Example — Submit via an approved sales invoice
- Create a sales invoice with tax lines and a valid customer.
- Approve / post the invoice (not draft save).
- If failure policy is Block, fix any gateway errors before finalizing; if Warn only, check Audit for status.
- For POS, finalize the sale and confirm QR appears when Show QR is enabled.
Result: A submission row is created in E-Invoice Audit for that document.
| Source | When submission triggers | Notes |
|---|---|---|
| Sales invoice (Billing) | Invoice approved / posted | Uses customer, line tax, and company profile for active scheme. |
| POS receipt | POS sale finalized | QR on receipt if enabled; GST B2C IRN depends on threshold and B2C toggle. |
| Credit note / sales return | When return approved | Only if Submit sales return compliance is enabled on profile. |
Requires: customers and products set up, GL mappings configured, and tax assigned to lines. See Billing and POS module guides.
FAQ — Document submission
Check that compliance is Enabled for your branch scope, the invoice date falls within an open fiscal period, and the active scheme matches your country. Draft invoices never submit.
Enable Show QR on POS receipt on the compliance profile and confirm submission status is Success in E-Invoice Audit.
Step 5 — E-Invoice Audit (monitor & retry)
Menu: Financials → Tax & Compliance → E-Invoice Audit | Route: /settings/e-invoice-audit
Central log of every compliance submission. Filter by branch, scheme (ZATCA / GST India / NBR), and status. Use this page daily during rollout and month-end reconciliation.

Example — Retry a failed submission
- Open Financials → Tax & Compliance → E-Invoice Audit.
- Filter Status to Failed (and your scheme), then Refresh.
- Open the failed row, fix the root cause (tax ID, HSN, certificate, credentials).
- Click Retry and confirm status becomes Success.
Result: The document is re-submitted and the audit log updates with the new status/reference.
How to use
- Set filters (branch, scheme, status) and click Refresh.
- Review columns: submitted time, document type, scheme, status, reference/IRN, tax amount.
- For failed rows, open details, fix root cause, then click Retry.
- For GST India e-way bill eligible rows, use the e-way bill action when available.
- Link back to E-Invoice Compliance from the header to adjust credentials or certificates.
FAQ — E-Invoice Audit
Credentials or certificate expired. Update on E-Invoice Compliance, save, then retry. For GST India, verify Client ID/Secret and username/password are production keys when Environment is Production.
Finance managers and IT admins with the EInvoiceAudit permission. Compliance settings (EInvoiceCompliance) can be restricted to administrators only.
Part 2 — Regional & financial tax reports
Step 6A — GST Reports (India)
Menu: Financials → Tax & Compliance → GST Reports | Route: /settings/gst-reports
Available when GST India compliance is enabled. Set date range and branch, click Refresh, then export PDF, Excel, or CSV.
| Tab | Purpose |
|---|---|
| GSTR-1 | Outward supplies — document-level taxable value and CGST/SGST/IGST totals. |
| GSTR-3B | Summary return figures for the period. |
| GSTR-2A | Inward supplies (purchase-side) view for reconciliation. |
| GSTR-2B | Auto-drafted ITC statement view for supplier invoice matching. |
FAQ — GST Reports
Enable and save GST India on E-Invoice Compliance first. Reports aggregate submitted and posted tax data for the selected period.
Step 6B — ZATCA Reports (Saudi Arabia)
Menu: Financials → Tax & Compliance → ZATCA Reports | Route: /settings/zatca-reports
VAT return-style summary for the date range: total taxable value, total VAT, standard-rated VAT, and document lines with clearance references. Export to PDF, Excel, or CSV.
FAQ — ZATCA Reports
Submission may have failed or predates compliance enablement. Check E-Invoice Audit for that invoice and retry successful submission.
Step 6C — NBR Reports (Bangladesh) — preview only
Menu: Financials → Tax & Compliance → NBR Reports | Route: /settings/nbr-reports
When NBR is fully supported, this page will summarize taxable value and VAT for the selected period with export options — same pattern as ZATCA Reports.
Step 7 — Tax Summary Report (Financials)
Menu: Financials → Tax & Compliance → Tax Summary | Route: /financials/tax-report
Internal reconciliation of tax collected and paid by tax rate and period — independent of e-invoice gateway. Use alongside regional reports (GST/ZATCA) or alone when e-invoicing is not enabled (e.g. Bangladesh until NBR is ready).
- Select fiscal year and accounting period (or custom date range).
- Optionally filter by branch.
- Generate report and export if needed.
FAQ — Tax Summary
Tax Summary includes all GL-posted tax transactions; GSTR-1 focuses on outward supplies submitted under GST compliance. Investigate timing (period boundaries) and failed submissions in E-Invoice Audit.
Step 8 — WHT Report (withholding tax)
Menu: Financials → Tax & Compliance → WHT Report | Route: /financials/wht-report
Tracks withholding tax payable to suppliers and receivable from customers when WHT/TDS tax rates are configured in Taxation. Set date range and branch, then generate.
| Tab | Contents |
|---|---|
| WHT Payable | Amounts withheld on supplier payments — by supplier and rate. |
| WHT Receivable | Amounts withheld by customers on your sales. |
| Transactions | Detailed WHT transaction register for the period. |
Requires: WHT category tax rates with GL accounts in Taxation.
FAQ — WHT Report
No transactions used WHT tax rates in the date range. Assign WHT rates on purchase/sales lines and ensure invoices are approved.
Setup dependency reference
| You want to… | Complete these steps first |
|---|---|
| Submit ZATCA e-invoice on approval | 1 Company tax ID · 2 Tax rates · 3A ZATCA profile + active certificate · GL mappings |
| Generate GST IRN (India) | 1–2 · 3B GST India credentials · products with HSN · approved sales invoice/POS |
| Retry a failed submission | 5 E-Invoice Audit (after fixing profile or document data) |
| File GSTR-1 / 3B figures | 3B enabled · successful submissions in period · 6A GST Reports |
| Reconcile VAT (Saudi) | 3A ZATCA enabled · 6B ZATCA Reports vs E-Invoice Audit |
| Internal tax reconciliation (any country) | 2 Tax rates · 7 Tax Summary |
| WHT return preparation | 2 WHT tax rates · supplier/customer transactions · 8 WHT Report |
| NBR live e-invoice (Bangladesh) | Not available yet — wait for future CognitixERP update |
Month-end compliance checklist: E-Invoice Audit (zero failures) → regional report (GST/ZATCA) → Tax Summary → WHT Report (if applicable) → close accounting period in Financials.
HRM (Human Resource Management)
The HRM module covers the full employee lifecycle — organisation structure, attendance, leave, payroll, loans, performance appraisals, onboarding/offboarding, and HR analytics. It integrates with branch assignment, user accounts, and Financials for payroll posting.
Biometric devices (optional): deploy Cognitix.BiometricAgent on Windows to sync ZKTeco-style fingerprint/face terminals with Daily Attendance. Kiosk and biometric can run together — HR reconciles all sources on Daily Attendance.
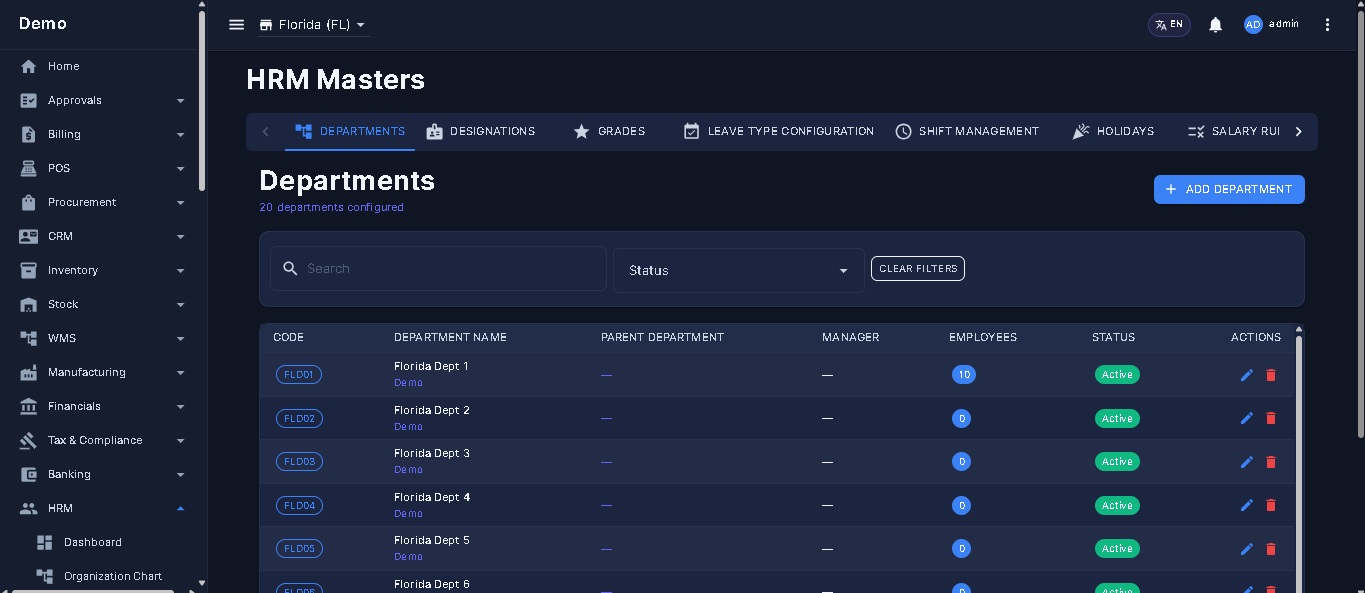
Recommended setup order
Routes at a glance
Navigation & permissions (key screens)
| Menu path (HRM) | Route | Permission page |
|---|---|---|
| HRM → Dashboard / Org Chart | /hrm/dashboard, /hrm/org-chart | Dashboard |
| HRM → Departments | /hrm/departments | Departments |
| HRM → Designations | /hrm/designations | Designations |
| HRM → Grades | /hrm/grades | Grades |
| HRM → Contracts / Onboarding | /hrm/contracts, /hrm/boarding-templates | Contracts, BoardingTemplates |
| HRM → Shifts (all shift screens) | /hrm/shifts … | Shifts, ShiftAssignments, etc. |
| HRM → Daily Attendance / Kiosk | /hrm/daily-attendance, /hrm/kiosk | DailyAttendance |
| HRM → Leave Types / Applications / Allocations | /hrm/leave-types … | LeaveTypes, LeaveApplications, LeaveAllocations |
| HRM → Salary Rules / Templates / Payroll | /hrm/salary-rules … | SalaryRules, PayrollAndBenefits |
| HRM → Loans / Advances | /hrm/loans, /hrm/salary-advances | EmployeeLoans, SalaryAdvances |
| HRM → Attendance Settings (Week-Off & Payroll Cycle) | /hrm/attendance-settings | AttendanceSettings |
| HRM → Appraisals | /hrm/appraisals | Appraisals |
| HRM → Reports | /hrm/reports | HRMReports + report-specific |
Part 1 — Organisation foundation (in order)
Step 1 — Departments
Menu: HRM → Departments | Route: /hrm/departments
Create your department tree first — every employee, payroll cost report, and org chart node rolls up to a department.

Example — Add a Finance department
- Open HRM → Departments and click Add Department.
- Enter name Finance, optional code FIN, and parent if it sits under Operations.
- Save. Assign a department head after employees exist.
Result: Finance appears in the department tree and can be selected on employee records and payroll cost reports.
Dialog fields
| Field | Required | Description |
|---|---|---|
| Department Name | Yes | Display name (e.g. Finance, Sales, Warehouse). |
| Department Code | No | Short code for reports and imports. |
| Parent Department | No | Build hierarchy — sub-departments roll up to parent in org chart. |
| Department Head | No | Employee assigned as manager — dropdown populated after employees exist. |
| Active | Yes | Inactive departments hidden from new employee assignment. |
- Click Add Department.
- Enter name, optional code, and parent department for hierarchy.
- Save. Assign department head after employees are registered.
FAQ — Departments
Reassign or terminate employees first, or set department Inactive instead of deleting.
Step 2 — Designations
Menu: HRM → Designations | Route: /hrm/designations
Job titles (Manager, Accountant, Sales Executive). Required when registering employees.

Example — Add Accountant designation
- Go to HRM → Designations and click Add.
- Enter name Accountant, optional description, keep Active.
- Save.
Result: Accountant is available in the designation dropdown when registering or editing employees.
| Field | Description |
|---|---|
| Designation Name | Title shown on employee profile and payslip. |
| Description | Optional role summary. |
| Active | Inactive designations excluded from new hires. |
Step 3 — Grades (optional)
Menu: HRM → Grades | Route: /hrm/grades
Pay bands or job grades for structured compensation. Link grades to salary structure templates if used.

Example — Add grade G3
- Open HRM → Grades and add grade code G3 with optional min/max salary range.
- Save and link the grade on employee records or salary templates as needed.
Result: G3 is selectable on employee employment details for HR planning reports.
| Field | Description |
|---|---|
| Grade Name / Code | Identifier (e.g. G1, Senior, Executive). |
| Min / Max salary range | Optional bounds for HR planning — not enforced on payroll automatically. |
Step 4 — Approval workflows
Menu: HRM → Approval Workflows | Route: /hrm/approval-workflows
Define multi-level approvers for leave, overtime, salary advances, and payroll adjustments before employees submit requests.

Example — Leave approval (Supervisor → HR)
- Open HRM → Approval Workflows and create a Leave workflow.
- Add Level 1 = reporting manager, Level 2 = HR role.
- Save before employees submit leave applications.
Result: New leave requests appear in each approver’s pending queue in order.
| Setting | Description |
|---|---|
| Workflow type | Leave, Overtime, Salary Advance, Payroll Adjustment, etc. |
| Approval levels | Ordered list — Level 1 (supervisor) → Level 2 (HR) → Level 3 (director). |
| Approver role / user | Who receives pending approval notifications at each level. |
| Auto-approve threshold | Optional — small amounts skip upper levels. |
Part 2 — Leave, holidays & shifts
Step 5 — Leave types
Menu: HRM → Leave Types | Route: /hrm/leave-types

Example — Create Annual leave (18 days)
- Open HRM → Leave Types and add Annual.
- Set paid, default allocation 18 days/year, requires approval, half-day allowed.
- Save, then grant balances in Leave Allocations.
Result: Employees can apply Annual leave; unpaid types deduct as LWP in payroll when configured.
- Create types: Annual, Sick, Casual, Unpaid, Maternity, etc.
- Configure per type: paid/unpaid, max days per year, accrual frequency, carry-forward limit, requires approval, half-day allowed.
- Set whether leave deducts from payroll (LWP) for unpaid types.
| Field | Description |
|---|---|
| Leave Type Name | Shown on leave application form. |
| Default allocation | Annual entitlement days — applied via Leave Allocations. |
| Accrual | Monthly/yearly accrual vs fixed annual grant. |
| Requires approval | Routes through Approval Workflows when enabled. |
Step 6 — Holidays & holiday calendar
Routes: /hrm/holidays · /hrm/holiday-calendar
Define public/company holidays per year. Calendar view helps HR and employees plan leave around closures.

Example — Add Independence Day
- Open HRM → Holidays and add the holiday name, date, and year.
- Confirm it appears on the holiday calendar view.
Result: That date is treated as a non-working day for attendance and leave calculations.
Step 7 — Shifts & schedules

Example — Create Morning shift (09:00–18:00)
- Open HRM → Shifts and add Morning with start 09:00, end 18:00, grace 15 minutes.
- Assign employees via Shift Assignments with an effective date.
Result: Late detection and working hours use this shift when attendance is recorded.
Configure in this order:
| Step | Screen | Route |
|---|---|---|
| 7A | Shifts | /hrm/shifts |
| 7B | Shift Rotations | /hrm/shift-rotations |
| 7C | Shift Assignments | /hrm/shiftassignments |
| 7D | Shift Schedules | /hrm/shiftschedules |
| 7E | Shift Swap (operations) | /hrm/shift-swap |
Shifts define start/end times, grace minutes, and break rules; assignments link employees before attendance is recorded.
| Screen | Key fields |
|---|---|
| Shifts | Name, start time, end time, grace period (late tolerance), overnight flag, active. |
| Shift Rotations | Cycle pattern (e.g. 2-day morning → 2-day evening) for rotating teams. |
| Shift Assignments | Employee + shift + effective date range. |
| Shift Schedules | Calendar view of who works which shift per day. |
| Shift Swap | Employee requests swap — manager approves; updates schedule. |
Step 8 — Attendance & overtime policies
Routes: /hrm/attendance-policy · /hrm/overtime-policy
Set late-entry rules, half-day thresholds, weekend handling, and overtime calculation before processing attendance.


Example — Late after 15 min + 1.5× weekday OT
- Open Attendance Policy — set late after 15 minutes and half-day threshold as needed.
- Open Overtime Policy — set weekday OT multiplier 1.5×, minimum block 30 minutes.
- Save both before daily attendance go-live.
Result: Punches calculate late minutes and OT hours that flow into payroll.
| Policy area | Typical settings |
|---|---|
| Attendance policy | Late after X minutes, half-day after Y hours absent, weekend days, holiday override, biometric vs manual source. |
| Overtime policy | OT rate multiplier, minimum OT block (30 min), weekday vs weekend OT rules, requires pre-approval. |
Part 3 — Payroll configuration
Step 9 — Salary rules & structure templates
Routes: /hrm/salary-rules · /hrm/salary-structure-templates


Example — Standard staff package
- Create salary rules for Basic, House Rent, and Tax deduction.
- Create a structure template that includes those rules.
- Assign the template on each employee’s compensation section.
Result: Payroll generate uses the template components instead of zero net pay.
- Salary rules — earnings (Basic, HRA, Transport) and deductions (Tax, PF) with formula or fixed amount.
- Structure templates — bundle rules into reusable packages assigned to employees.
- Loan types (/hrm/loan-types) — before employee loan applications.
FAQ — Payroll setup
Verify employee has an active salary structure template assigned and salary rules reference valid GL accounts in Financials mappings.
Part 4 — Employees & contracts
Step 10 — Onboarding templates & contracts
Routes: /hrm/boarding-templates · /hrm/contracts
Onboarding checklists for new hires; employment contracts with start/end dates and visa tracking for expiry reports.


Example — Permanent contract + onboarding checklist
- Create an onboarding template with tasks (ID copy, bank details, laptop).
- Create a contract with start date and optional end/visa expiry.
- Link both when registering the employee.
Result: HR tracks boarding progress; contract/visa expiry reports flag renewals.
Step 11 — Employee registration
Menu: HRM → Dashboard → Add Employee | Routes: /hrm/dashboard · /hrm/employees/new · profile /hrm/employees/{id}
- Open HRM Dashboard — KPI cards: total employees, active, on leave, new hires (30 days).
- Click Add Employee — multi-section form.
- Complete sections below and save.

Example — Register a new accountant
- From HRM Dashboard, click Add Employee.
- Enter personal details, department Finance, designation Accountant, join date, and salary structure.
- Set shift, optional kiosk PIN, and link a user account for self-service.
- Save.
Result: Employee appears in headcount, can punch attendance, and is ready for leave allocation and payroll.
Employee form — key sections
| Section | Fields |
|---|---|
| Personal | Full name, employee code, gender, date of birth, blood group, photo, national ID, contact phone/email, emergency contact. |
| Employment | Department, designation, grade, branch, join date, employment type (permanent/contract), reporting manager. |
| Compensation | Salary structure template, bank account for payroll, payment mode. |
| Shift & attendance | Default shift assignment, attendance policy group, biometric ID (if using agent). |
| System access | Link to Users account — enables My Attendance and leave self-service. |
| Documents | Contract upload, visa/passport with expiry (feeds visa expiry report). |
| Kiosk PIN (Step 7 — Statutory) | 4–6 digit PIN for Attendance Kiosk. Leave empty to allow kiosk access without PIN (not recommended in shared offices). |
Profile routes: view /hrm/employees/{id} · edit /hrm/employees/edit/{id}
FAQ — Employees
Register the employee in HRM first, then select them as Branch Manager in Settings → Branches.
Create a user in User Management from the employee record and link the user account on the employee profile.
Step 12 — Leave allocations
Menu: HRM → Leave Allocations | Route: /hrm/leave-allocations
Assign opening leave balances per employee and leave type for the fiscal/year period. Run after employees and leave types exist.

Example — Allocate 18 Annual days
- Open HRM → Leave Allocations.
- Select employee, leave type Annual, period year, and days = 18.
- Save.
Result: Leave applications deduct from this balance; reports show remaining days.
Part 5 — Daily operations
Step 13 — Attendance
Routes: /hrm/daily-attendance · /hrm/kiosk · /hrm/my-attendance

Example — Review today’s punches
- Open HRM → Daily Attendance for today’s date.
- Filter by branch/department; correct missed punches or approve regularizations.
Result: Clean attendance data is ready for overtime and payroll processing.
| Screen | Purpose |
|---|---|
| Daily Attendance | HR records or imports check-in/out; syncs with biometric agent. |
| Attendance Kiosk | /hrm/kiosk — self-service terminal (code + PIN + webcam). Full kiosk guide → |
| My Attendance | Employee self-view of own records. |
| Late Entry Records | /hrm/late-entry-records — audit late arrivals. |
| Attendance Regularization | /hrm/attendance-regularization — approve missed punch corrections. |
| Overtime Records | /hrm/overtime-records — approved OT hours for payroll. |
Attendance Kiosk — detailed guide
Menu: HRM → Attendance Kiosk | Route: /hrm/kiosk | Permission: DailyAttendance (Read)

Example — Punch In at reception
- Open the kiosk on a dedicated tablet (HTTPS) and allow camera.
- Employee enters code and PIN, then taps CHECK IN.
- Confirm success message; fields clear for the next person.
Result: Daily Attendance shows In time with photo; late minutes apply per shift policy.
Kiosk vs other attendance methods
| Method | Who uses it | Hardware | Best for |
|---|---|---|---|
| Attendance Kiosk | Any employee at shared terminal | PC/tablet + webcam; no login | Small/medium offices, shops, warehouses without biometric devices |
| Biometric Agent + device | Employee scans finger/face | ZKTeco-style terminal + Windows agent service | High-volume factories, strict access control |
| Daily Attendance (HR) | HR/admin | None — manual entry or import | Corrections, remote workers, bulk import |
| My Attendance | Logged-in employee | Personal phone/PC with user account | Self-service view only (not a kiosk punch) |
Prerequisites (configure before go-live)
- Employees registered with unique Employee Code (Step 11).
- Kiosk PIN set per employee (Employee Registration → Step 7 Statutory, or Edit Employee). Recommended 4–6 digits.
- Shift assigned to employee (Step 7 — Shifts) — drives late detection.
- Attendance policy configured (Step 8) — grace minutes, half-day rules.
- Company timezone set in Branching — kiosk clock and punch times use company timezone.
HR setup — deploy a kiosk terminal
- Use a dedicated tablet or PC at the entrance (avoid personal laptops).
- Install Chrome or Edge. Use HTTPS URL — browsers block webcam on insecure HTTP except localhost.
- Log in once as a user with DailyAttendance Read permission (or keep session pinned for the kiosk account).
- Navigate to /hrm/kiosk and press F11 for fullscreen (optional).
- When the browser asks Allow camera, click Allow — required for check-in photo capture.
- Pin the kiosk tab; disable sleep/screen lock on the device during working hours.
- Train employees: Code → PIN → Check In/Out. Form auto-clears after each successful punch.
Kiosk screen — what employees see
| UI element | Behaviour |
|---|---|
| Live clock | Current time and date (company timezone). |
| Webcam preview | Live video feed; green border when employee is already checked in today. Shows camera-off icon if permission denied. |
| Employee Code | Type or scan barcode of employee code — name appears when code matches an active employee. |
| Status chip | If already In today, shows In since hh:mm and button switches to CHECK OUT. |
| PIN | Masked password field — verifies identity before punch. |
| CHECK IN / CHECK OUT | Large button — green for In, orange/warning for Out. Press Enter after entering code. |
| Status message | Success or error alert — auto-clears after 5 seconds. |
| Branding footer | Company display name + “ATTENDANCE KIOSK”. |
Employee punch — step by step
- Stand in front of the webcam (face visible in preview).
- Enter your Employee Code — confirm your name appears below the camera.
- Enter your PIN (if HR assigned one).
- Click CHECK IN (morning arrival) or CHECK OUT (end of shift).
- Wait for success message — e.g. ✓ Ahmed — In at 09:02 AM or ✓ Ahmed — Out (8.5 hrs).
- Fields reset automatically — next employee can punch immediately.
What happens in the system
| Event | System action |
|---|---|
| Check In | Creates/updates today's Daily Attendance summary; captures JPEG photo from webcam; records device type as Biometric/kiosk source; calculates late minutes against assigned shift (if not flexible shift); auto-creates Late Entry record when late. |
| Check Out | Records checkout time; calculates total working hours and overtime minutes per attendance policy; no photo on checkout (check-in photo retained). |
| HR review | Open /hrm/daily-attendance — photo thumbnail on row; click to view full captured photo dialog. |
| Payroll | Working hours, late minutes, and OT flow into payroll run (Step 15). |
PIN security rules
| Scenario | Result |
|---|---|
| Employee has no Kiosk PIN set | PIN field can be left empty — punch allowed (convenient but less secure). |
| Employee has PIN set | Must enter matching PIN — empty or wrong PIN shows Invalid PIN. |
| HR resets PIN | Edit employee → Kiosk PIN field → Save. Tell employee privately; do not share on group chat. |
FAQ — Attendance Kiosk
The kiosk shows a warning but check-in may still proceed; however the photo will be missing. Fix browser site permissions (lock icon → Camera → Allow) and reload. HTTPS is required on production URLs.
Verify the employee is Active, code matches exactly (case-insensitive), and belongs to the company. Inactive or terminated employees are excluded from the kiosk employee list.
If employee forgot they punched In, the kiosk detects open check-in and switches the button to CHECK OUT. If already checked out today, message shows Already checked out today.
The kiosk loads all active employees company-wide. For branch isolation, use separate kiosk URLs per branch login (branch-scoped user) or deploy one terminal per location.
HR corrects via Daily Attendance edit, or employee submits /hrm/attendance-regularization for manager approval.
No. Kiosk is software-only (webcam + PIN). Biometric Agent is for physical fingerprint/face hardware. Many sites use kiosk only; factories may use biometric only or both.
Yes, but a fixed tablet/PC at the entrance is recommended. Mobile front-camera works for photo capture; ensure employees allow camera permission.
Biometric Device — detailed guide
Menu: Settings → Biometric Settings | Route: /hrm/attendance/biometric-settings
Connect a physical fingerprint/face terminal (ZKTeco, eSSL, Suprema, or compatible) to CognitixERP so that device punches flow into Daily Attendance automatically. A small Windows helper service — Cognitix.BiometricAgent — reads the device on your local network and pushes punches to the API using a device API key. The settings page has three tabs: Device Configuration, Employee ↔ Device Mapping, and Integration Guide.
Tab 1 — Device Configuration
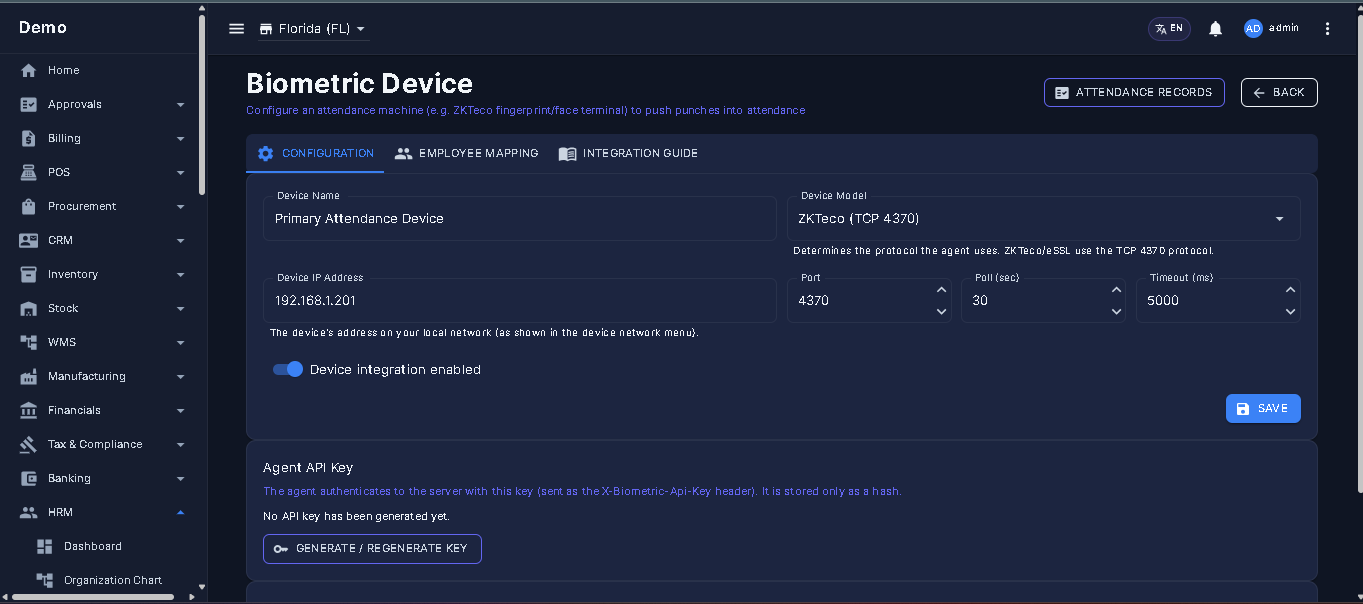
| Field | Required | Description |
|---|---|---|
| Device Name | Yes | Friendly label (e.g. Main Gate ZK). |
| Model | Yes | ZKTeco (TCP 4370), eSSL (ZK-compatible), Suprema, or Other. |
| IP Address | Yes | Device address on the local network, reachable by the agent PC. |
| Port | Yes | Device TCP port (ZKTeco default 4370). |
| Polling Interval (s) | Yes | How often the agent reads new punches (5–3600 seconds). |
| Connect Timeout (ms) | Yes | Socket connect timeout per poll (500–60000 ms). |
| Active | Yes | Enable/disable syncing without deleting the configuration. |
API key
Click Regenerate Key to issue a device API key. The key is shown once — copy it immediately into the agent configuration. Regenerating invalidates the previous key.
Tab 2 — Employee ↔ Device Mapping
Tab 3 — Integration Guide
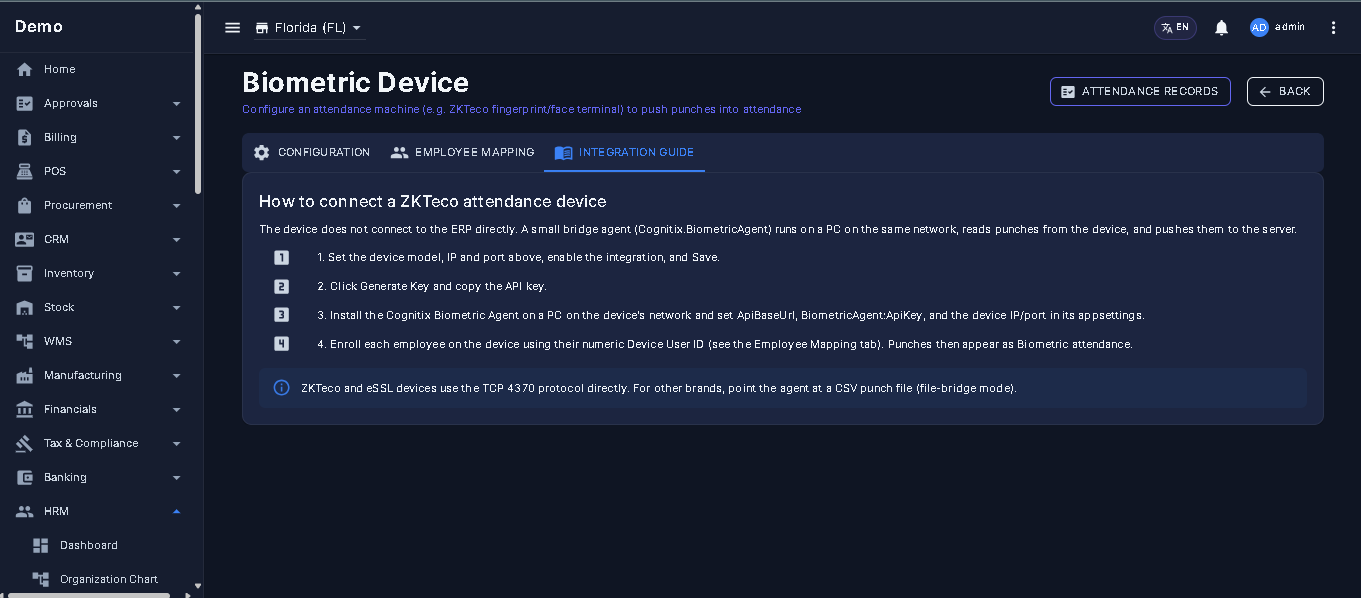
Example — Connect a ZKTeco terminal
- Open Settings → Biometric Settings.
- Enter name, choose ZKTeco, set the device IP and port 4370, then Save.
- Click Regenerate Key and copy the shown API key.
- On the Mapping tab, set each employee's device user ID.
- Install Cognitix.BiometricAgent on a Windows PC on the same network, paste the API key, and start the service.
- Watch the live status — Last seen and Last punch update as the agent connects and syncs.
Result: device punches appear on /hrm/daily-attendance and feed late-entry, overtime, and payroll calculations.
FAQ — Biometric Device
Check the device is Active, the agent is running with a valid API key, the IP/port are reachable, and each employee has the correct device user ID on the Mapping tab.
Click Regenerate Key to issue a new one and update the agent. The old key stops working immediately.
ZKTeco and ZK-compatible (eSSL) terminals over TCP, plus Suprema. Choose Other for compatible devices and set the correct port.
Step 14 — Leave applications
Menu: HRM → Leave Applications | Route: /hrm/leave-applications
Employees or HR submit leave requests; approval workflow routes to managers. Approved leave deducts from allocation balance.

Example — Apply 2 days Annual leave
- Open HRM → Leave Applications and create a new application.
- Select employee, leave type Annual, dates, and submit.
- Manager/HR approves via the approval workflow.
Result: Leave is Approved; allocation balance decreases; unpaid types can feed LWP in payroll.
Step 15 — Payroll & benefits processing
Menu: HRM → Payroll and Benefits | Route: /hrm/payroll-benefits

Example — Run March payroll
- Open HRM → Payroll and Benefits and select the March pay period.
- Click Generate Payroll, review draft payslips, then Approve & Post.
- Print payslips or export the payroll register from Reports.
Result: Salary expense and net payable post to GL; employees get payslips for the month.
- Select pay period (month) aligned with Financials open accounting period.
- Click Generate Payroll — system calculates per employee: basic + allowances − deductions − LWP − loan EMI − advance recovery + overtime.
- Review draft payslips — drill into components per employee.
- Submit for approval (if workflow configured) then Approve & Post.
- GL posting: salary expense, employer contributions, net payable, deduction liabilities — via Financials GL mappings.
- Print payslips or export payroll register from Reports.
FAQ — Payroll run
Ensure leave applications are approved with unpaid leave type and dates fall inside the pay period.
Verify active employee loan with EMI schedule and payroll deduction flag enabled.
Related: Salary Advances (/hrm/salary-advances), Employee Loans (/hrm/loans).
Part 6 — Performance & separation
Step 16 — Appraisals, goals & skills
Routes: /hrm/appraisal-templates · /hrm/appraisals · /hrm/goals · /hrm/skills


Example — Start Q2 appraisal cycle
- Create an appraisal template with KPIs and rating scale.
- Open a cycle, assign reviewers, and score employees.
- Link or review goals for the same period.
Result: Performance scores and goals are available for HR planning and reports.
- Create appraisal templates (KPIs, rating scales).
- Open appraisal cycle, assign reviewers, score employees.
- Track goals and skill matrix for workforce planning.
Step 17 — Resignations & terminations
Routes: /hrm/resignations · /hrm/terminations
Manage voluntary exit workflow and involuntary separation. Final settlement ties into last payroll run.


Example — Process a resignation
- Open HRM → Resignations and record the employee, last working day, and reason.
- Complete clearance; run final settlement with the last payroll period.
- For involuntary exit, use Terminations instead with the appropriate reason and effective date.
Result: Employee exits the active headcount; final pay and access follow your separation checklist.
Step 18 — HRM reports
Menu: HRM → Reports | Route: /hrm/reports

Example — Export monthly attendance
- Open HRM → Reports and choose Monthly Attendance.
- Select month/branch filters and export or print.
Result: Management receives a filtered attendance register for the period.
| Report | Route |
|---|---|
| Headcount | /hrm/reports/headcount |
| Daily / monthly attendance | /hrm/reports/daily-attendance, /hrm/reports/monthly-attendance |
| Leave balance / applications / utilization | /hrm/reports/leave-balance, etc. |
| Payroll summary / payslip register / components | /hrm/reports/payroll-summary, etc. |
| Employee listing | /hrm/reports/employee-listing |
| Overtime / late entry / regularization | /hrm/reports/overtime, etc. |
| Shift schedule | /hrm/reports/shift-schedule |
| Contract / visa expiry | /hrm/reports/contract-expiry, /hrm/reports/visa-expiry |
| Loan & advance outstanding | /hrm/reports/loan-advance |
| Department cost / headcount movement | /hrm/reports/department-cost, etc. |
| Appraisal performance / boarding pipeline | /hrm/reports/appraisal-performance, etc. |
| HR audit trail | /hrm/reports/audit-trail |
Step 19 — Attendance Settings (Week-Off & Payroll Cut-off Cycle)
Menu: HRM → Attendance Settings | Route: /hrm/attendance-settings
Business rules run only on the backend (the web client displays and submits values — it never computes pay periods or week-off decisions itself). The page is fully localized in English, Bengali, Arabic, and French.
Tab 1 — Week-Off configuration
Week-off (rest day) is resolved by scope, most specific first: Employee → Department → Company. If no configuration matches, the system falls back to its previous default (Friday + Saturday) so existing installs behave unchanged.
| Field | Meaning |
|---|---|
| Scope | Company (default for everyone), Department (override for one department), or Employee (override for one person). |
| Department / Employee | Shown only for the matching scope — picks who the override applies to. |
| First off day | The primary weekly rest day (for example Friday). |
| Second off day (optional) | A second rest day for a two-day weekend (for example Saturday). Leave empty for a single rest day. |
| Effective From | Date the configuration starts to apply. |
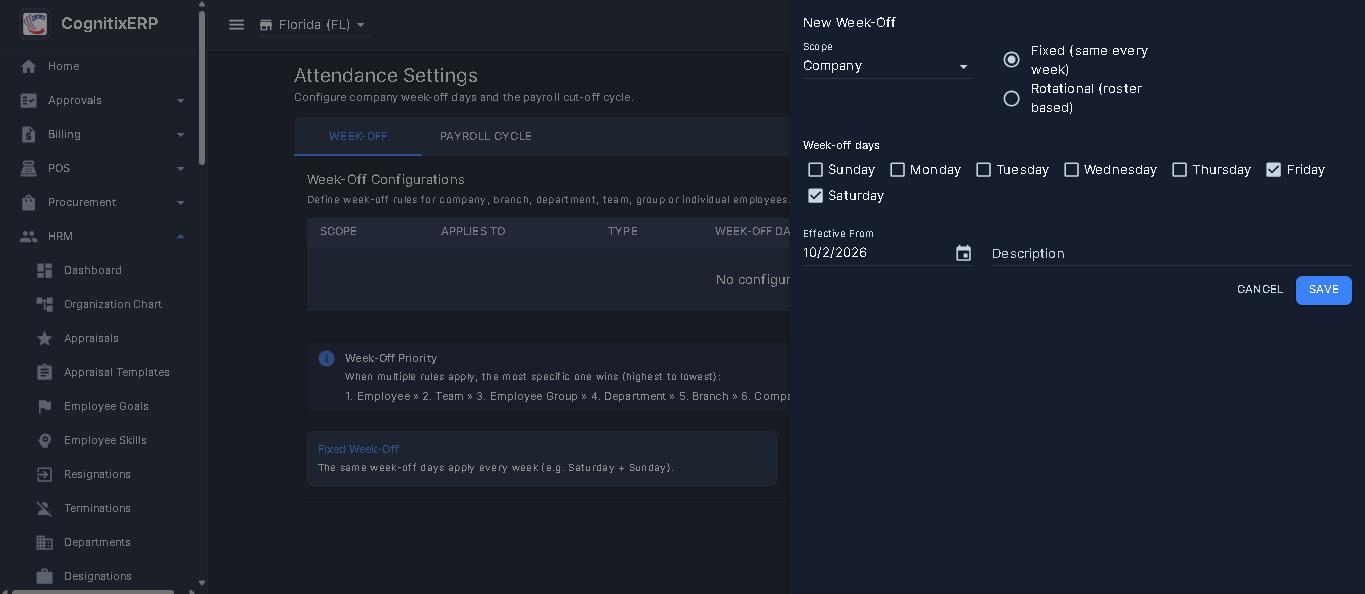
Example — Give one department a single rest day
- Open HRM → Attendance Settings → Week-Off and click New Week-Off.
- Set Scope = Department, choose the department, set First off day = Friday, and leave the second day empty.
- Save. Company-level Friday + Saturday still applies to everyone else.
Result: Attendance, working-day counts, and payroll for that department treat only Friday as a rest day; all other staff keep the two-day weekend.
Tab 2 — Payroll Cut-off Cycle
The cycle defines the pay-period window. A cycle is labelled by the month it ends in (the real-world payroll convention). For example, with start day 21 and cut-off day 20, the August payroll covers 21 Jul → 20 Aug.
| Field | Meaning |
|---|---|
| Cycle start day | Day of the month the pay period opens (1–31). |
| Cut-off day | Day the pay period closes; attendance/overtime after this day roll into the next cycle (per carry policy). |
| Processing day | Day payroll is prepared. Stored for reference and display. |
| Payment day | Day salaries are paid. Stored for reference and display. |
| Post cut-off carry | Carry to next cycle (default) — attendance/overtime after the cut-off count in the next payroll; or Include in current cycle. |
| Active | Only one cycle configuration is active at a time; saving a new active one supersedes the previous. |
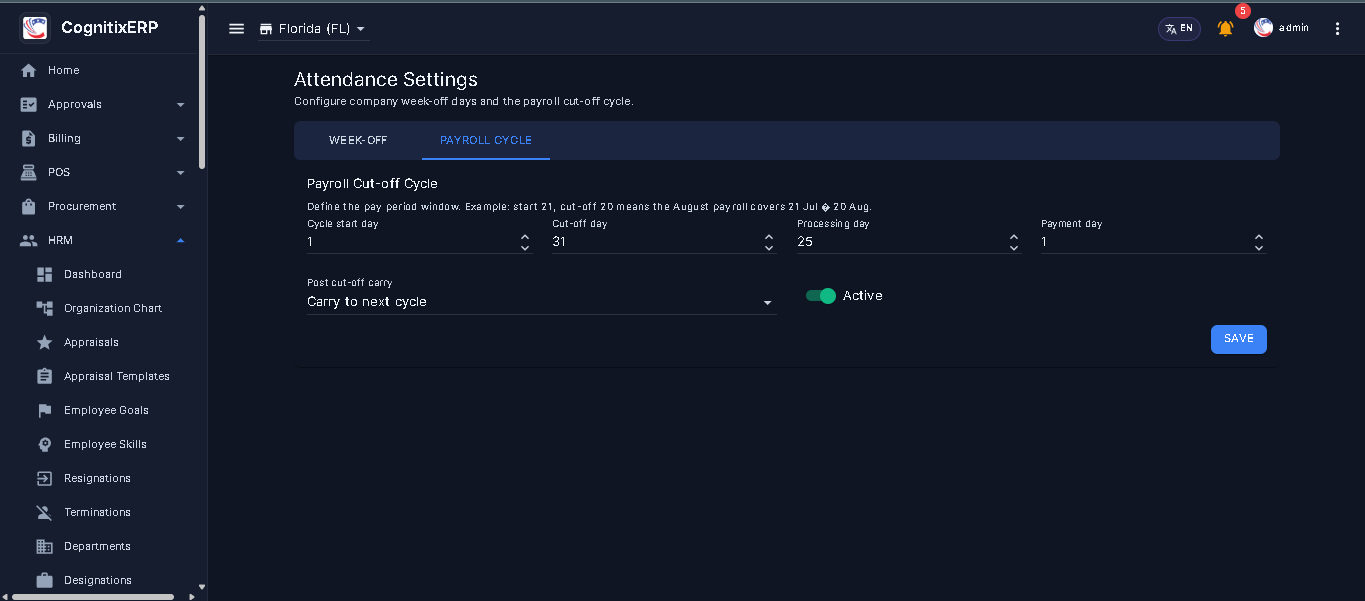
Example — Set a 21st-to-20th payroll cycle
- Open HRM → Attendance Settings → Payroll Cycle.
- Set Cycle start day = 21, Cut-off day = 20, choose your Processing and Payment days, and leave Post cut-off carry = Carry to next cycle.
- Mark it Active and Save.
- When you run payroll for August, the period resolves automatically to 21 Jul → 20 Aug. Leave or overtime dated 22–23 Aug is counted in the September payroll.
Result: Payroll, attendance summaries, working days, overtime, late marks, and salary-advance/loan deductions all follow the cut-off window instead of the calendar month.
Setup dependency reference
| You want to… | Complete these HRM steps first |
|---|---|
| Register any employee | 1 Departments · 2 Designations |
| Assign leave balance | 5 Leave types · 11 Employees · 12 Leave allocations |
| Record daily attendance | 7 Shifts · 8 Attendance policy · 11 Employees · optional Kiosk PIN |
| Deploy attendance kiosk | 11 Employees (code + PIN) · 7 Shifts · 8 Policy · HTTPS browser + webcam |
| Run monthly payroll | 9 Salary rules/templates · 11 Employees · 13 Attendance · 14 Leave (if LWP) |
| Employee self-service leave | User account linked · 5 Leave types · 12 Allocations |
| Performance review cycle | 11 Employees · 16 Appraisal templates |
| Set company rest days (week-off) | 1 Departments (for dept overrides) · 11 Employees (for employee overrides) · 19 Attendance Settings |
| Run payroll on a cut-off cycle (e.g. 21st–20th) | 19 Attendance Settings (Payroll Cycle tab, marked Active) |
CRM (Customer Relationship Management)
CRM manages your sales and support funnel — contacts, leads, customers, opportunities, sales pipelines, activities, support tickets, forecasts, and analytics. Won opportunities can feed into Billing quotations and sales orders when your process connects CRM accounts to operational customers.
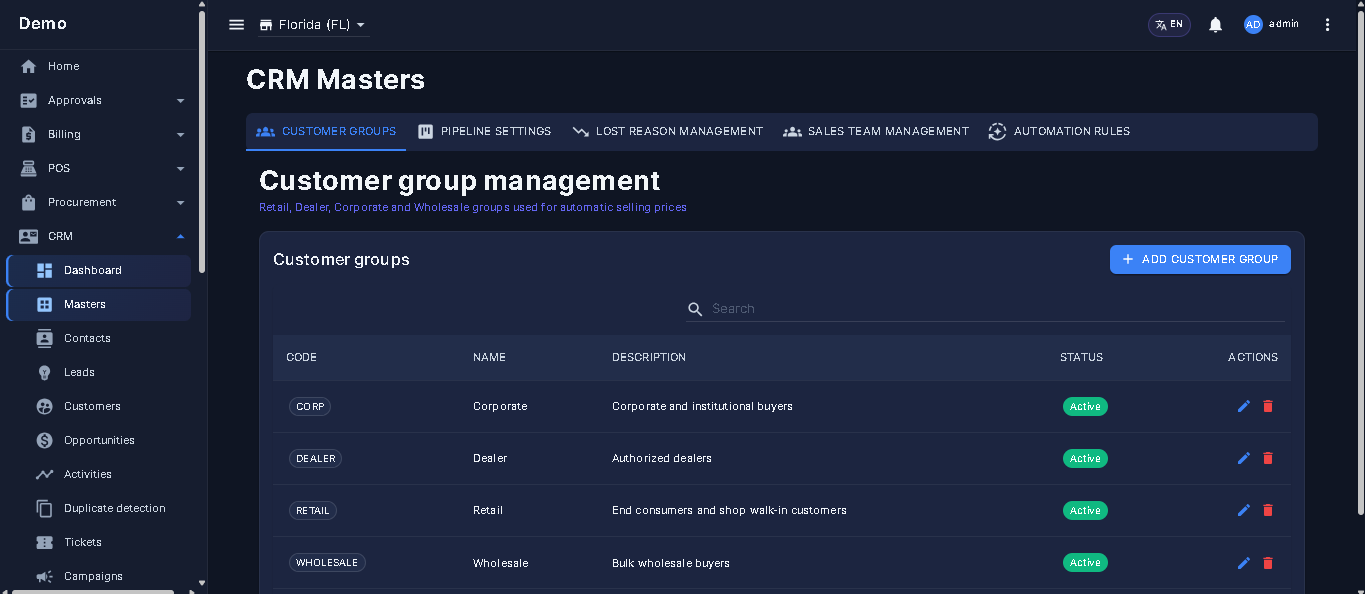
Recommended setup order
Routes at a glance
Navigation & permissions (key screens)
| Menu path (CRM) | Route | Permission page |
|---|---|---|
| CRM → Dashboard | /crm | CrmDashboard |
| CRM → Contacts | /crm/contacts | Contacts |
| CRM → Leads | /crm/leads | Leads |
| CRM → Customers | /crm/customers | Customers |
| CRM → Opportunities | /crm/opportunities | Opportunities |
| CRM → Sales Teams | /crm/salesteams | SalesTeams |
| CRM → Activities | /crm/activities | Activities |
| CRM → Pipeline Settings | /crm/pipeline-settings | PipelineSettings |
| CRM → Lost Reasons | /crm/lostreasons | LostReasons |
| CRM → Automation / Duplicates | /crm/automation-rules, /crm/duplicates | AutomationRules, DuplicateDetection |
| CRM → Tickets | /crm/tickets | Tickets |
| CRM → Campaigns | /crm/campaigns | Campaigns |
| CRM → Sales Pipeline / Forecasts | /crm/sales-pipeline, /crm/salesforecasts | SalesPipelinePage, SalesForecasts |
| CRM → Conversion / CLV dashboards | /crm/conversiondashboard, /crm/customerlifetimevalue | ConversionDashboard, CustomerLifetimeValue |
| CRM → Reports | /crm/reports | CRMReports + report-specific |
Part 1 — Pipeline foundation (in order)
Step 1 — Pipeline settings
Menu: CRM → Pipeline Settings | Route: /crm/pipeline-settings
Configure before leads or opportunities. Defines how deals move from first contact to won/lost.

Example — Standard Sales pipeline
- Open CRM → Pipeline Settings and click Add Pipeline.
- Name it Standard Sales, mark Default, and add stages Prospecting → Qualification → Proposal → Negotiation.
- Set probability % per stage; mark one Won and one Lost stage.
Result: New opportunities can select this pipeline; the Sales Pipeline board shows these stages.
- Click Add Pipeline — name it (e.g. Standard Sales), mark one as Default.
- For each pipeline, add Stages in order (Prospecting → Qualification → Proposal → Negotiation).
- Set Probability % per stage for weighted forecast.
- Mark exactly one stage as Won and one as Lost (terminal stages).
- Keep pipeline Active for use on new opportunities.
FAQ — Pipeline settings
Create at least one active pipeline with stages before adding opportunities. Set a default pipeline for auto-selection.
Step 2 — Lost reasons
Menu: CRM → Lost Reasons | Route: /crm/lostreasons
Standard reasons when marking deals lost (Price, Competitor, No budget, Timing). Required before closing opportunities as lost — drives lost-deals and lost-reasons reports.

Example — Add Price and Competitor reasons
- Open CRM → Lost Reasons and add Price and Competitor.
- Keep both Active so they appear on the opportunity close dialog.
Result: Lost deals require a reason; Lost Reasons reports show coaching insights.
| Field | Description |
|---|---|
| Reason Name | Short label shown on opportunity close dialog. |
| Description | Optional detail for sales coaching. |
| Active | Inactive reasons hidden from new selections but preserved on historical deals. |
Step 3 — Sales teams
Menu: CRM → Sales Teams | Routes: /crm/salesteams · members /crm/salesteams/{team-id}/members

Example — Create Inside Sales team
- Open CRM → Sales Teams and add Inside Sales.
- Open members and add CRM users/employees to the team.
- Assign opportunities and forecasts to this team.
Result: Revenue-by-team and scorecard reports can filter by Inside Sales.
- Create teams (e.g. Inside Sales, Field Sales).
- Add members — link CRM users/employees as team members.
- Assign opportunities and forecasts to teams for revenue-by-team reports.
Part 2 — Contacts, leads & customers
Step 4 — Contacts
Menu: CRM → Contacts | Routes: /crm/contacts · /crm/contacts/{id}
Individual people (name, email, phone, job title, company link). Contacts attach to leads, customers, and opportunities as stakeholders and activity targets.

Example — Add a procurement contact
- Go to CRM → Contacts and click Add.
- Enter name, email, phone, job title Procurement Manager, and link to a customer if known.
- Assign an owner and save.
Result: The contact appears in search and can be targeted on activities and opportunities.
| Field | Description |
|---|---|
| First / Last Name | Contact person name — searchable across CRM. |
| Email / Phone | Primary communication channels; used in duplicate detection. |
| Company / Customer link | Associate contact with CRM customer account. |
| Job Title | Role at customer organization (e.g. Procurement Manager). |
| Owner | Sales rep responsible for follow-up. |
Step 5 — Leads
Menu: CRM → Leads | Routes: /crm/leads · /crm/leads/{id}

Example — Add a website lead and qualify
- Open CRM → Leads and click Add Lead.
- Enter company/name, source Website, owner, and expected value.
- Log a call, move status to Qualified, then convert to customer.
Result: A CRM customer is created from the lead; you can open opportunities against that account.
- Click Add Lead — dialog fields below.
- Log activities (calls, meetings, tasks) against the lead from detail page or Activities screen.
- Update status through qualification stages (New → Contacted → Qualified → Converted / Lost).
- When qualified, convert to customer (/crm/customers/new/{lead-id}).
| Field | Description |
|---|---|
| Lead Name / Company | Prospect identity. |
| Source | Website, Referral, Campaign, Cold Call — feeds lead source report. |
| Status / Priority | Pipeline position and urgency (Low/Medium/High). |
| Assigned Owner | Sales rep responsible. |
| Expected Value | Estimated deal size before opportunity creation. |
FAQ — Leads
Open the lead and use convert, or navigate to /crm/customers/new/{lead-id}. The wizard carries contact details into the new CRM customer; you can then create opportunities against that account.
Step 6 — CRM customers (detailed guide)
Menu: CRM → Customers | Routes: /crm/customers · new /crm/customers/new · from lead /crm/customers/new/{lead-id} · details /crm/customers/{id} | Permission: Customers

Example — Create a B2B customer
- Open CRM → Customers → New (or convert from a qualified lead).
- Complete Profile (Business, company, contact, branch), Financials, Currency, and Addresses.
- Save, then open Customer Details to view ledger and CRM tabs.
Result: The customer is available for quotations, invoices, opportunities, and POS sales.
Create customer — 4-step wizard (/crm/customers/new)
Also opened when converting a qualified lead — wizard pre-fills contact data from the lead.
Step 1 — Profile
| Field | Required | Description |
|---|---|---|
| Contact Type | Yes | Individual (B2C) or Business (B2B) — shown as B2C/B2B chip on Customer Details. |
| Company Name | Yes (Business) | Legal or trading name of customer organization. |
| First Name / Last Name | Yes | Customer or contact person name — forms Display Name on details page. |
| Yes | Primary email — used on invoices and CRM email threads. | |
| Phone Number | Yes | Primary phone — searchable on Customer Receipt screen. |
| Alternative Phone Number | No | Secondary contact number — shown on profile card when set. |
| Tax ID | No | Customer tax registration (VAT/GST/TIN) — flows to billing documents and compliance. |
| Branch | Yes | Owning branch — scopes customer ledger, default document branch, and CRM activities. |
Step 2 — Financials
| Field | Required | Description |
|---|---|---|
| Opening Balance | No (default 0) | Accounts receivable opening balance for migration — reconcile with Financials AR GL. |
| Credit Limit | No (default 0) | Maximum outstanding allowed — displayed on Customer Details profile; enforce in sales process. |
| Default WHT Tax | No | Withholding tax record — auto-fills WHT on new customer receipts/payments (requires WHT taxes in Taxation settings). |
Step 3 — Currency
| Field | Required | Description |
|---|---|---|
| Preferred Currency | No | Default transaction currency on quotations, orders, and invoices. |
| Preferred Rate Type | No | Spot or Corporate — exchange rate source for FC documents. |
| Allow Multiple Currencies | No (default on) | When enabled, customer can transact in currencies beyond preferred currency. |
| Allowed Currencies | No | Multi-select permitted currencies — enabled when multi-currency checkbox is on. |
Step 4 — Addresses (repeatable — Add Address button)
| Field | Required | Description |
|---|---|---|
| Address Type | No | Billing, Shipping, or other — chip shown on profile addresses card. |
| Street 1 / Street 2 | No | Address lines. |
| City / State / Postal Code / Country | No | Location — default billing/shipping on sales documents. |
Quick create — Customer dialog (from list or document pickers)
Tabbed modal with Profile, Financials, Currency, and Addresses — same fields as wizard. Right panel shows live Customer Summary preview (name, email, branch, currency, opening balance, credit limit).
Edit customer — EditCustomerDialog (from Customer Details or list)
Same profile and financial fields. Additional edit-mode behaviour:
- Currency guard — if invoices exist, preferred currency may be locked; alert shows reason and lock date.
- Duplicate With New Currency — enter currency code + Duplicate button to clone customer in new currency (parallel to supplier duplicate).
- Business type uses Contact Person First/Last Name fields (optional) separate from company name.
Customer Details page (/crm/customers/{id})
Read-only dashboard — the central hub for customer relationship and receivables. Layout mirrors Supplier Details: left profile column + right tabbed content panel.
Page header — actions
| Button | Action |
|---|---|
| Make Payment | Navigates to /billing/customer-receipt/{customerId} — record receipt against open invoices. |
| Pay Advance | Opens Customer Payment dialog with type Advance — records prepayment without linking to a specific invoice. |
| Edit | Opens EditCustomerDialog — refreshes page on save. |
| Delete | Confirmation dialog — removes customer and returns to list (blocked if transactions exist). |
Left column — profile card
| Display | Description |
|---|---|
| Avatar + Display Name | Customer name with B2B/B2C type chip in header. |
| Company Name chip | Shown for B2B customers when company name is set. |
| FC currency chip | Warning chip when customer uses foreign preferred currency. |
| Primary email address. | |
| Phone Number | Primary phone. |
| Alternative Phone | Secondary phone — shown only when set. |
| Tax ID | Tax registration — shown only when set. |
| Currency | Preferred currency code + “(Multi)” when multiple currencies allowed. |
| Due Balance | Total outstanding AR — FC amount with BC equivalent for foreign-currency customers. |
| Advance | Unallocated customer advance balance (prepayments held on account). |
| Credit Limit | Configured maximum credit exposure. |
| Last Payment Date | Date of most recent receipt — shown when available. |
| Addresses card | Repeatable address blocks with type chip, street, city/state/postal, country. |
Right column — tabs
Tab 1 — Ledger
| Element | Description |
|---|---|
| Date Range picker + Filter | Filter ledger transactions by period (default: last month to today). |
| Opening Balance KPI | Period opening balance in display currency (FC converted for FC customers). |
| Closing Balance KPI | Running balance at end of filtered period. |
| Ledger table columns | Date · Description · Debit · Credit · Balance — AR sub-ledger style (invoices increase debit/receivable, receipts increase credit). |
Tab 2 — Sales
All billing and POS invoices for this customer (latest first).
| Column | Description |
|---|---|
| Invoice Number | Sales invoice reference. |
| Date | Issue date. |
| Due Date | Payment due date. |
| Status | Workflow chip: Draft · Sent · Partially Paid · Paid · Overdue · Cancelled. |
| Payment Status | Due · Partial · Paid. |
| Total Amount | Invoice total in document currency (FC) or base currency (BC). |
Tab 3 — Payments
Two sections — payment history and advance applications.
| Section | Columns / behaviour |
|---|---|
| Payment history | Invoices with payment activity (Partial or Paid): Reference · Date · Payment Status · Total Amount. Make Payment button repeats header action. |
| Advance Applied | Invoice · Date · Amount (BC) · Status (Applied/Reversed) · Reverse button (↩) to undo advance allocation on an invoice. |
Tab 4 — Activities
CRM activity timeline filtered to this customer — calls, meetings, tasks logged from Activities module.
Tab 5 — Emails
Email thread panel linked to customer entity — correspondence history.
Tab 6 — Notes
Internal chatter/notes — team comments on the customer account.
Tab 7 — Documents
File attachment panel — upload contracts, ID copies, signed agreements.
Customer Payment dialog (from Pay Advance or invoice actions)
| Field | Required | Description |
|---|---|---|
| Balance summary | Read-only | Invoice context: Invoice, Total, Remaining Due — or customer-wide: Total Sales, Total Paid, Due Balance. |
| Amount | Yes | Receipt amount — FC or BC label based on invoice/customer currency. |
| Payment Type | Yes | Due Payment · Opening Balance · Advance. |
| Paid On | Yes | Receipt date. |
| Payment Method | Yes | Cash / Bank / Cheque / MFS / Card — from Financials payment methods. |
| Payment Journal | Yes | Auto-resolved GL journal — branch + payment method + document currency. See Payment Journals guide. |
| Bank Account | Yes (Bank) | Bank journal picker when paying by bank. |
| FX Rate Type / Custom Rate | FC only | Spot / Corporate / Custom for foreign currency receipts. |
| WHT Tax / WHT Rate (manual) | No | Withholding on receipt — Cr AR full / Dr Cash net / Dr WHT Receivable. |
| Payment Note | No | Memo or reference number. |
Customer Receipt page (/billing/customer-receipt/{customerId?})
Bulk receipt entry — mirrors Supplier Payment page: select customer → view open invoices → enter payment amount with FIFO allocation → download receipt. Reached from Customer Details Make Payment button.
FAQ — Customers & Customer Details
Yes — CRM Customers is the billing party master. Invoices, receipts, and POS sales all reference this customer ID. No separate Billing customer screen exists.
Currency locks once transactions exist. Use Duplicate With New Currency in Edit Customer dialog to create a parallel customer record.
Customer opening balance feeds the customer ledger Opening KPI. Financials GL AR opening must match total customer opening balances — reconcile before go-live.
Open Customer Details → Payments tab → Advance Applied table → click ↩ Reverse on the row. Advance returns to unallocated balance.
Sales tab loads all invoices linked to customer ID including POS. Verify invoice was posted with this customer selected; check branch filter if using multi-branch.
Navigate to /crm/customers/new/{lead-id} — wizard pre-fills name, email, phone, tax ID, addresses, and branch from lead contact. Complete financials and currency steps before saving.
Part 3 — Opportunities & pipeline operations
Step 7 — Opportunities
Menu: CRM → Opportunities | Routes: /crm/opportunities · /crm/opportunities/{id}

Example — Create a negotiation deal
- Open CRM → Opportunities and add a new opportunity.
- Link customer, Standard Sales pipeline, stage Negotiation, expected revenue, and close date.
- Move stages as the deal progresses; mark Won or Lost (with lost reason) when done.
Result: The deal appears on the Sales Pipeline board and contributes to weighted forecast.
- Create opportunity — link customer, pipeline, stage, expected value, weighted amount, close date, sales team.
- Move stage as deal progresses (edit detail or drag on Sales Pipeline board).
- Add products/line items or quote references when integrated with Billing.
- Mark Won (terminal won stage) or Lost with lost reason from Step 2.
| Field | Description |
|---|---|
| Opportunity Name | Deal title. |
| Pipeline / Stage | Current position — stage probability drives forecast weighting. |
| Expected Revenue | Deal value in base currency. |
| Expected Close Date | Target close — used in stage aging and deal cycle reports. |
| Win Probability | Defaults from stage; can override manually. |
FAQ — Opportunities
Weighted value = expected revenue × stage probability %. Update stage or probability on the opportunity.
Step 8 — Activities
Menu: CRM → Activities | Route: /crm/activities
Tasks, calls, meetings, and emails logged against leads, customers, or opportunities. Drives activity summary reports and team follow-up discipline.
| Activity type | Typical use |
|---|---|
| Task | Follow-up to-do with due date and assignee. |
| Call | Phone conversation log with outcome notes. |
| Meeting | Scheduled meeting with location/video link. |
| Logged email correspondence (manual entry). |
Filter Activities list by owner, type, status (open/completed), and related entity.
Step 9 — Sales pipeline board
Menu: CRM → Sales Pipeline | Route: /crm/sales-pipeline
Kanban view of open opportunities by stage. Drag cards to advance deals; totals show pipeline value per stage.

Example — Drag a deal to Proposal
- Open CRM → Sales Pipeline.
- Drag an opportunity card from Qualification to Proposal.
- Confirm stage totals update for both columns.
Result: Opportunity stage and win probability update; forecasts use the new weighted value.
FAQ — Sales pipeline
Confirm the opportunity uses an active pipeline and the target stage exists. Won/lost stages are terminal — create a new opportunity for a follow-on deal instead of reopening a closed one.
Part 4 — Support & automation
Step 10 — Support tickets
Menu: CRM → Tickets | Routes: /crm/tickets · /crm/tickets/{id}
Customer support cases with priority, status, SLA tracking, and assignment. Use ticket summary and SLA compliance reports for service desk KPIs.

Example — Log a high-priority ticket
- Open CRM → Tickets and create a ticket linked to the customer.
- Set priority High, assign an owner, and update status through resolution.
Result: Ticket summary and SLA reports reflect open/resolved times for service KPIs.
FAQ — Tickets
Tickets need priority and status workflow with open/resolved timestamps. Review ticket detail for assignment and resolution times; SLA compliance report compares against your configured targets.
Step 10b — Campaigns
Menu: CRM → Campaigns | Route: /crm/campaigns | Permission: Campaigns
Plan and track marketing campaigns, link them to leads and opportunities, then measure results on the Campaign performance report in the CRM reports hub (PDF, Excel, and CSV — same pattern as Manufacturing reports).

Example — Launch a Q4 email campaign
- Open CRM → Campaigns and click New.
- Name:
Q4 Product Launch. Set start/end dates and channel (Email). - Save, then tag new leads with this campaign as they arrive.
- Open CRM → Reports → Campaign performance to export PDF/Excel/CSV.
Result: Campaign spend and conversion sit next to pipeline reports.
Step 11 — Automation & duplicate detection
Routes: /crm/automation-rules · /crm/duplicates
Automation rules — trigger actions on lead/opportunity events (assign owner, create task). Duplicate detection — merge or resolve duplicate contacts/customers before data quality issues spread.

Example — Auto-assign new website leads
- Open CRM → Automation Rules and add a rule for new leads with source Website.
- Action: assign owner to Inside Sales lead queue / create a follow-up task.
- Optionally review Duplicates and merge matching contacts.
Result: New matching leads get an owner/task automatically; duplicate noise is reduced.
Part 5 — Forecasts, dashboards & reports
Step 12 — Forecasts & analytics dashboards
Routes: /crm/salesforecasts · /crm/conversiondashboard · /crm/customerlifetimevalue

Example — Compare forecast vs pipeline
- Open Sales Forecasts for the current period and set team targets.
- Compare weighted pipeline value to target; check Conversion and CLV dashboards.
Result: Managers see target gaps, conversion rates, and account revenue potential.
- Sales forecasts — period targets vs pipeline weighted value.
- Conversion dashboard — lead-to-customer and stage conversion rates.
- Customer lifetime value — revenue potential by account.
Step 13 — CRM reports
Menu: CRM → Reports | Route: /crm/reports

Example — Run win/loss for the quarter
- Open CRM → Reports and choose Win / Loss.
- Filter by date range and team, then export or print.
Result: Sales leadership gets closed-won vs closed-lost performance for coaching.
| Report | Route |
|---|---|
| Pipeline summary | /crm/reports/pipeline-summary |
| Win / loss | /crm/reports/win-loss |
| Revenue by team / person | /crm/reports/revenue-by-team, /crm/reports/revenue-by-person |
| Top deals / deal cycle time | /crm/reports/top-deals, /crm/reports/deal-cycle-time |
| Lead pipeline / lead source | /crm/reports/lead-pipeline, /crm/reports/lead-source |
| Opportunity register | /crm/reports/opportunity-register |
| Conversion funnel | /crm/reports/conversion-funnel |
| Lost deals / lost reasons | /crm/reports/lost-deals, /crm/reports/lost-reasons |
| Forecast vs actual | /crm/reports/forecast-vs-actual |
| Customer CLV / entity snapshot | /crm/reports/customer-clv, /crm/reports/entity-snapshot |
| Activity summary / team scorecard | /crm/reports/activity-summary, /crm/reports/team-scorecard |
| Stage aging | /crm/reports/stage-aging |
| Ticket summary / register / SLA | /crm/reports/ticket-summary, etc. |
| Quote pipeline / campaign performance | /crm/reports/quote-pipeline, /crm/reports/campaign-performance |
Setup dependency reference
| You want to… | Complete these CRM steps first |
|---|---|
| Create any opportunity | 1 Pipeline settings · 6 Customers (or lead converted) |
| Use sales pipeline board | 1 Pipeline · 7 Opportunities |
| Mark deal lost with reason | 2 Lost reasons · 7 Opportunities |
| Team revenue report | 3 Sales teams · 7 Opportunities with values |
| Convert lead to customer | 5 Leads · 4 Contacts (optional) |
| Invoice after won deal | 7 Won opportunity · Billing customer master |
| SLA ticket reporting | 10 Tickets with priority/status workflow |
Inventory
The Inventory menu covers product master data — units of measure, categories, brands, products (with variants), discount types, reorder policies, alerts, warranty claims, and master-data reports. It does not include warehouse structure (see WMS) or quantity movements (see Stock).
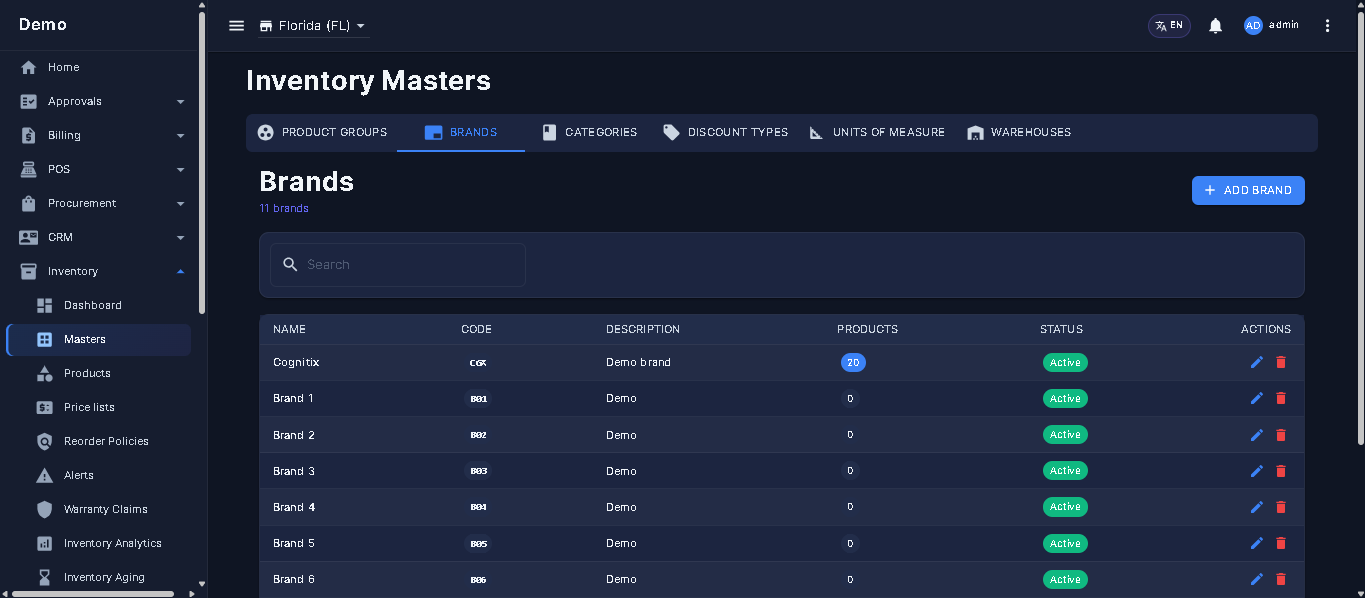
Recommended setup order
Routes at a glance
Navigation & permissions
| Menu path (Inventory group) | Route | Permission page |
|---|---|---|
| Inventory → Dashboard | /inventory | InventoryDashboard |
| Inventory → Products | /inventory/products | Products |
| Inventory → Product Groups | /inventory/productgroups | ProductGroups |
| Inventory → Brands | /inventory/brands | Brands |
| Inventory → Categories | /inventory/categories | Categories |
| Inventory → Discount Types | /inventory/discounttypes | DiscountTypes |
| Inventory → Unit of Measures | /inventory/unitofmeasures | UnitOfMeasures |
| Inventory → Reorder Policies | /inventory/reorderpolicies | ReorderPolicies |
| Inventory → Alerts | /inventory/alerts | Alerts |
| Inventory → Warranty Claims | /inventory/warranty-claims | WarrantyClaims |
| Inventory → Analytics / Aging | /inventory/analytics, /inventory/aging | InventoryAnalytics, InventoryAging |
| Inventory → Reports | /inventory/reports | Report-specific permissions |
Part 1 — Master data setup (in order)
Step 1 — Unit of Measures
Menu: Inventory → Unit of Measures | Route: /inventory/unitofmeasures
Configure before products. Every product links to one base UoM (Piece, Kg, Litre, Box, etc.).

Example — Add Piece and Carton
- Open Inventory → Unit of Measures and add Piece (pc) as a base unit.
- Add Carton as derived with conversion factor 12 Pieces.
- Save both before creating products.
Result: Products can select Piece as base UoM and Carton as purchase/sales UoM.
| Field | Description |
|---|---|
| Name | Full unit name (Kilogram, Piece, Carton). |
| Symbol | Short code (kg, pc, ctn). |
| Base unit | Mark if this is a base UoM; derived units reference a base with conversion factor. |
| Conversion factor | For derived units — e.g. 1 Carton = 12 Pieces. |
| Active | Inactive UoM cannot be assigned to new products. |
- Click Add.
- Enter name, symbol, and base/derived relationship.
- Save. Repeat for all units your catalogue uses.
FAQ — Unit of Measures
Create at least one active unit of measure first. Products cannot exist without a UoM.
Step 2 — Categories
Menu: Inventory → Categories | Route: /inventory/categories
Organise products for browsing, reporting, and POS. Supports hierarchy (parent/child categories).

Example — Electronics → Phones
- Open Inventory → Categories and add top-level Electronics.
- Add child category Phones under Electronics.
- Assign the category when creating products (Step 6).
Result: Products inherit category defaults (e.g. tax) and appear in category summary reports.
- Add top-level categories (e.g. Electronics, Grocery).
- Add sub-categories where needed.
- Assign categories when creating products (Step 6).
Step 3 — Brands
Menu: Inventory → Brands | Route: /inventory/brands
Optional but recommended for retail and distribution. Used in product master and category/brand summary reports.

Example — Add a brand
- Open Inventory → Brands and add the brand name.
- Keep Active so it appears on the product registration wizard.
Result: Products can link this brand; Category & Brand Summary reports include it.
Step 4 — Product Groups
Menu: Inventory → Product Groups | Route: /inventory/productgroups
Bundle related products for pricing or reporting (optional). Can be configured after initial product load.

Example — Create Retail Fast Movers group
- Open Inventory → Product Groups and add Retail Fast Movers.
- Set optional default UoM if the group should auto-fill on product select.
Result: Products in this group share reporting/pricing defaults on the wizard.
Step 5 — Discount Types
Menu: Inventory → Discount Types | Route: /inventory/discounttypes
Define percentage or fixed discounts referenced on sales lines and POS (optional before go-live).

Example — Add 10% promotional discount
- Open Inventory → Discount Types and add a percentage discount of 10%.
- Save; optionally set it as default on a product in Step 6 Pricing.
Result: Sales and POS lines can apply this discount type from the picker.
Step 6 — Add Product (5-step registration wizard)
Menu: Inventory → Products → Add Product | Routes: /inventory/products · new /inventory/products/new · edit /inventory/products/edit/{id} · view /inventory/products/view/{id} | Permission: Products

Example — Register a Finished Good SKU
- Open Inventory → Products → Add Product.
- Step 1–2: Name, SKU, Finished Good, base UoM, category/brand.
- Step 3–4: Purchase/sale price, costing method, Available for Sale, Status = Active.
- Step 5: Optional image → Save Product.
Result: Product appears on the products list and can be used on Billing, POS, and opening stock.
Wizard navigation
- Horizontal stepper: Identification → Categorization → Pricing & Tax → Inventory Behaviour → Media & Extras.
- Next validates the current step; Previous goes back without losing data.
- Click a completed step in the stepper to jump back (edit mode).
- Save Product appears only on Step 5 — creates/updates the product and optional variant SKUs.
Prerequisites before Add Product
| Master data | Route | Why needed |
|---|---|---|
| Unit of Measure | /inventory/unitofmeasures | Required on Step 2 — base UoM for all qty fields. |
| Category | /inventory/categories | Auto-fills default tax from category on select. |
| Product Group | /inventory/productgroups | Auto-fills default UoM from group on select. |
| Brand | /inventory/brands | Optional — reporting and filtering. |
| Tax rates / groups | Financials → Taxation | Step 3 tax multi-select. |
| Suppliers | Procurement → Suppliers | Step 1 supplier linkage + auto-reorder PO. |
| GL mappings | Financials GL mappings | Default accounts unless product-level override set. |
For size/colour variant products, use Product Templates (/inventory/product-templates) or enable Variants on Step 3 during registration — the system generates child SKUs from attribute combinations.
Product Type — options (Step 1)
| Type | Stock tracked | Typical use |
|---|---|---|
| Raw Material | Yes | Inputs for manufacturing or assembly. |
| Finished Good | Yes | Standard sellable inventory item — most retail SKUs. |
| Service | No | Non-stockable — labour, consulting, delivery fee lines. |
| Consumable | No | Internal use (office supplies) — not sold or tracked in stock. |
| Semi-Finished | Yes | WIP / intermediate manufacturing stage. |
| Asset | Separate | Fixed assets (machinery) — not regular inventory. |
| Packaging Material | Yes | Cartons, labels used to pack finished goods. |
| By-Product | Yes | Secondary output from manufacturing process. |
Wizard Step 1 — Identification
| Field | Required | Description |
|---|---|---|
| Product Name | Yes | Display name on invoices, POs, POS, and reports. Changing name triggers SKU auto-suggestion if SKU was auto-generated. |
| Specification | No | Short technical spec or model description — shown on product view. |
| SKU | Yes | Unique stock-keeping unit code. Auto-generated from product name via backend when left empty — uniqueness validated against database. Used in bulk import, opening stock, and reports. |
| Barcode | No | Primary scan code for POS and document line barcode scan. QR scanner button simulates a scan for testing. |
| HSN | No* | Harmonized System Nomenclature code — required for GST India e-invoice on taxable goods. |
| Product Type | Yes | Controls whether stock is tracked and which modules list the item (see table above). |
Supplier Linkage (optional table — Add Supplier button)
| Column | Required | Description |
|---|---|---|
| Supplier | Per row | Vendor from Procurement supplier master. |
| Supplier Product Code | No | Vendor's own catalogue/SKU reference for this item. |
| Purchase Price | No | Supplier-specific buy price — used as reference on PO lines. |
| Lead Time (Days) | No | Expected delivery days from this supplier. |
| Min Order Qty | No | Minimum quantity this supplier accepts per order. |
| Preferred | No | Checkbox — only one preferred supplier per product. Used by Auto Reorder on Step 4 to select PO vendor. |
Wizard Step 2 — Categorization
| Field | Required | Description |
|---|---|---|
| Product Group | No | Bundle for pricing tiers and reporting. Quick-add (+) opens dialog. On select, backend may auto-fill default UoM if base UoM empty. |
| Unit of Measure | Yes | Base UoM for stock qty, opening stock, and inventory transactions. If UoM type is Weight, product becomes weight-based — enables scale read on procurement GRN and weight POS. |
| Brand | No | Brand master link — quick-add (+) dialog. Inactive brands show (Inactive) badge in edit mode. |
| Category | No | Category master link — quick-add (+) dialog. On select, backend auto-fills default tax on Step 3 if no tax selected yet. |
| Warranty Period | No | Numeric warranty duration — feeds /inventory/warranty-claims module. |
| Purchase UoM | No | Alternate unit for buying — e.g. buy in Carton while base UoM is Piece. Default: Same as Base UoM. |
| Sales UoM | No | Alternate unit for selling — e.g. sell in Box while base is Piece. Default: Same as Base UoM. |
| UoM Conversion Factor | Conditional | Shown when Purchase UoM is set — e.g. 1 Carton = 12 Pieces. Applied automatically on PO receipt and SO shipment qty conversion. |
Wizard Step 3 — Pricing & Tax
Core pricing
| Field | Required | Description |
|---|---|---|
| Purchase Price | Yes | Standard buy price in base currency (BC) — drives inventory valuation and COGS. Helper text confirms BC context. |
| Sale Price | Yes | Default sell price in BC — used on Billing/POS lines unless branch or customer rate overrides. |
| Costing Method | Yes | FIFO · LIFO · Weighted Average — determines how unit cost is calculated on stock moves and Product Valuation Report. |
| Discount Type | No | Default line discount from Inventory discount types — quick-add (+) dialog. |
| Tax Inclusive / Exclusive | Yes | Tax Inclusive = sale price includes tax. Tax Exclusive = tax added on top — enables tax multi-select below. |
| Select Tax | Conditional | Multi-select taxes and tax groups (shown when Tax Exclusive). Chips show Sales/Purchase scope. Effective tax rate preview alert sums percentage taxes. |
Foreign Currency Purchase Price (expandable panel)
| Field | Required | Description |
|---|---|---|
| Purchase Currency | No | Foreign currency for imported cost — clearable to use base currency only. |
| Foreign Purchase Price | No | Unit cost in FC — disabled until currency selected. |
| Exchange Rate to Base | No | Base per 1 FC unit — auto-loads from exchange rates when currency/date changes. Progress bar while loading. |
| BC Equivalent alert | Read-only | Shows computed base-currency purchase price after FX conversion — this value feeds Purchase Price (BC). |
Variants (registration only — Add Variants button)
| Field | Description |
|---|---|
| Attribute Name | Variant dimension — e.g. Colour, Size, Material. |
| Attribute Values | Each value row: Value text + optional Price Adjustment (+/− from base sale price). |
| Variant count preview | Success alert shows how many SKUs will be generated (Cartesian product of all attribute values) on save. |
Remove Variants clears all attribute rows. Variant child SKUs are created on save — template parent cannot receive stock directly.
GL Account Overrides (expandable — accountant use)
| Field | GL role | Fallback |
|---|---|---|
| Income Account | Sales revenue on invoice | Global GL mapping by product group/category |
| COGS Account | Cost of goods sold on shipment | Global mapping |
| Inventory Account | Inventory asset on receipt/adjustment | Global mapping |
| Purchase Account | Purchase expense (non-stock items) | Global mapping |
Resolution order at posting: Product override → Product Group → Category → Global mapping.
Branch-Specific Pricing (Add Branch Price button)
| Column | Description |
|---|---|
| Branch | Branch for price override. |
| Sale Price | Branch sell price — blank uses default Sale Price. |
| Purchase Price | Branch buy price — blank uses default Purchase Price. |
Wizard Step 4 — Inventory Behaviour
| Setting | Type | Description |
|---|---|---|
| Serial Number Tracking | Toggle | Each unit gets unique serial — mandatory entry on procurement GRN (Received) and enforced on picking for serial products. |
| Batch Number Tracking | Toggle | Lot/batch grouping with expiry — batch dialog on GRN; FEFO picking uses batch expiry. |
| Available for Sale | Toggle | When on, product appears in Billing quotation/order/invoice and POS product pickers. |
| Product Status | Select | Draft (work in progress) · Active (operational) · Obsolete (no new transactions) · Discontinued (phased out). Only Active products appear on new documents. |
| Expiry Date | Date | Product-level expiry for perishable items — complements batch expiry on transactions. |
| Alert Threshold | Number | Low-stock alert quantity — triggers inventory alerts when on-hand falls below this level (separate from reorder policy min). |
Reorder Policy (expandable panel on Step 4)
| Field | Required | Description |
|---|---|---|
| Min Stock Level | If auto-reorder | Trigger point — when stock falls below, reorder suggestion/PO is generated. |
| Max Stock Level | If auto-reorder | Target ceiling after reorder — must be greater than min. |
| Reorder Quantity | If auto-reorder | Qty to order each time policy fires. |
| Lead Time (Days) | If auto-reorder | Supplier delivery lead time for planning. |
| Auto Reorder Enabled | No | When on, system can auto-create procurement PO when stock hits minimum — uses Preferred supplier from Step 1. |
| Preferred supplier alert | Read-only | Info chip showing which supplier will be used for auto PO. |
Wizard Step 5 — Media & Extras
Product Image
| Detail | Description |
|---|---|
| Upload | Click or drag image — PNG, JPG, WEBP accepted. Preview shown immediately. |
| Usage | Displayed on product view and POS terminal product grid. |
| Validation error | Shown below upload area if file type/size invalid. |
Multi-Barcodes (Add Barcode button)
| Column | Description |
|---|---|
| Barcode Type | EAN-13 · EAN-8 · UPC-A · Code128 · QR · DataMatrix · Other. |
| Barcode Value | Scannable code — multiple packaging levels (case, inner pack, unit). |
Primary Barcode on Step 1 is the default scan field; multi-barcode table adds alternate codes resolved during POS/Billing barcode scan.
Customer-Specific Pricing (Add Rate button)
| Column | Description |
|---|---|
| Customer Type | Free-text customer segment name — e.g. Wholesale, VIP, Distributor. |
| Price | Special sell price for that customer type — applied when customer matches segment rules. |
| Field | Required | Description |
|---|---|---|
| Internal Notes | No | Staff-only notes — not printed on customer documents. Multi-line text area. |
Click Save Product on Step 5. Set status Active on Step 4 before go-live. Post opening stock via Branch Opening Stock.
Edit product (/inventory/products/edit/{id})
Same 5-step wizard pre-filled with existing data. Differences from registration:
- Variants section not shown on edit — manage variants via Product Templates.
- Inactive product groups, brands, categories, discount types show (Inactive) badge but remain selectable for historical products.
- Supplier rows, branch prices, barcodes, and multi-rates load from saved product.
Field impact — where each setting is used
| Field / setting | Billing / POS | Procurement | Stock / WMS | Financials |
|---|---|---|---|---|
| SKU / Barcode | Line scan, search | PO/GRN lines, bulk import | Opening stock, transfers | — |
| Product Type = Service | Sellable, no stock check | PO as expense line | No stock moves | Revenue only |
| Sale / Purchase Price | Default line price | Default PO cost | Opening stock valuation | COGS calculation |
| Costing Method | — | Receipt cost layer | Transfer/adjustment cost | Valuation report |
| Tax / HSN | Invoice tax, compliance | Input tax on GRN | — | Tax GL accounts |
| Serial / Batch tracking | — | GRN serial/batch entry | Picking serial scan | — |
| Auto Reorder + Preferred supplier | — | Auto PO creation | Reorder suggestions | — |
| GL overrides | Revenue account | Purchase account | Inventory account | Journal posting |
Recommended first product checklist
- Step 1: Name, SKU, Finished Good type, primary barcode.
- Step 2: Base UoM (Piece/kg), category with default tax.
- Step 3: Purchase + sale price, costing method, tax exclusive + VAT tax.
- Step 4: Available for Sale on, Status = Active, set alert threshold.
- Step 5: Upload image (optional), Save Product.
- Verify on /inventory/products list → post opening stock.
- Test on Billing invoice line and POS scan.
FAQ — Add Product
Product must be Active, type must be stockable or Service, and Available for Sale toggle must be on for sales pickers.
SKU must be globally unique. Edit the SKU manually or change product name to regenerate auto-SKU.
Enter valid HSN code on Step 1 before approving taxable sales invoices.
Enable Serial Number Tracking on Step 4 only if you need per-unit serials — once stock exists, toggling tracking may be restricted.
Set base UoM to a Weight type unit (kg, g, lb) on Step 2 — product becomes weight-based automatically.
Enable Auto Reorder on Step 4, set min/max/qty, mark a preferred supplier on Step 1, and ensure stock fell below minimum.
Stock posts to variant SKUs only — never to template parent. Use Step 3 Variants or Product Templates to generate variant products.
Step 7 — Reorder Policies
Menu: Inventory → Reorder Policies | Route: /inventory/reorderpolicies
Minimum/maximum stock rules per product. Drives low-stock alerts and WMS reorder suggestions. Requires products (Step 6). Stock quantities help but are not required to create policies.

Example — Set min 10 / max 50 for a SKU
- Open Inventory → Reorder Policies and click Add Policy.
- Select product and branch, set min 10, max 50, reorder qty 40.
- Optionally enable Auto reorder, then use Trigger Auto Reorders when stock is low.
Result: Low stock raises alerts and can suggest/create procurement POs.
- Click Add Policy, select product and branch/warehouse scope.
- Set minimum, maximum, and reorder quantity.
- Enable Auto reorder if procurement integration should suggest POs.
- Use Trigger Auto Reorders to evaluate all policies on demand.
Step 8 — Alerts & Warranty Claims
Routes: /inventory/alerts · /inventory/warranty-claims
Alerts — active low-stock and policy violations; badge appears on the top bar notification icon. Warranty Claims — track customer warranty returns linked to serialised or warrantied products.


Example — Review low-stock and log a warranty claim
- Open Inventory → Alerts to review products below threshold or reorder min.
- Open Warranty Claims, link customer/product (and serial if tracked), and set claim status.
Result: Ops sees stock risk early; warranty returns are auditable in reports.
Step 9 — Inventory reports & analytics
Menu: Inventory → Reports | Route: /inventory/reports

Example — Export product master register
- Open Inventory → Reports and choose Product Master Register.
- Filter by category/brand if needed, then export or print.
Result: Catalogue snapshot is ready for audit or go-live checklist.
| Report | Route |
|---|---|
| Reports hub | /inventory/reports |
| Dashboard snapshot | /inventory/reports/dashboard-snapshot |
| Product master register | /inventory/reports/product-master-register |
| Category & brand summary | /inventory/reports/category-brand-summary |
| Alert summary | /inventory/reports/alert-summary |
| Warranty claims report | /inventory/reports/warranty-claims-report |
| Inventory analytics | /inventory/analytics |
| Inventory aging | /inventory/aging |
Setup dependency reference
| You want to… | Complete these Inventory steps first |
|---|---|
| Create any product | 1 UoM · 2 Categories (recommended) |
| Sell on POS / invoice | 1–6 Products with tax and prices |
| Low-stock alerts | 6 Products · 7 Reorder policies · stock quantities (Stock) |
| Procurement auto-suggest | 7 Reorder policies with auto reorder enabled |
Stock
The Stock menu covers on-hand quantities and movements — stock levels, branch opening stock, branch stock view, transfers between warehouses, adjustments, minimum thresholds, valuation, and stock reports.
Recommended setup order
Routes at a glance
Navigation & permissions
| Menu path (Stock group) | Route | Permission page |
|---|---|---|
| Stock → Stock | /inventory/stock | StockManagement |
| Stock → Branch Opening Stock | /inventory/branch-opening-stock | BranchOpeningStock |
| Stock → Branch Stock | /inventory/branch-stock | BranchStock |
| Stock → Stock Transfers | /inventory/stocktransfers | StockTransfers |
| Stock → Stock Adjustments | /inventory/stockadjustments | StockAdjustments |
| Stock → Minimum Stock Thresholds | /inventory/minimumstockthresholds | MinimumStockThresholds |
| Stock → Product Valuation Report | /inventory/productvaluationreport | ProductValuationReport |
| Stock → Reports | /inventory/stock/reports | Report-specific permissions |
Part 1 — Stock setup & operations (in order)
Step 1 — Stock Management (overview)
Menu: Stock → Stock | Route: /inventory/stock
Read-only overview of product quantities by warehouse. Use after opening stock is posted to verify balances before go-live.

Example — Verify balances after opening stock
- Post opening stock (Step 2), then open Stock → Stock.
- Filter by warehouse and confirm on-hand matches your migration sheet.
Result: You confirm warehouse balances before live sales or transfers.
Step 2 — Branch Opening Stock (detailed guide)
Menu: Stock → Branch Opening Stock | Route: /inventory/branch-opening-stock | Permission: BranchOpeningStock

Example — Single SKU opening at Main WH
- Open Stock → Branch Opening Stock in Single Product mode.
- Select branch, date, product, qty, unit cost (BC), and warehouse.
- Save, then verify on Stock Management and Product Valuation.
Result: On-hand stock and valuation are set for go-live; reconcile with Financials inventory GL.
Prerequisites
- Branches created.
- Products registered (Active status).
- At least one WMS warehouse per branch (required for warehouse-level stock).
- Optional: Zone → Rack → Bin structure for bin-level placement.
- Financials — base currency configured; foreign currency + exchange rates if importing FC costs.
Four entry modes (toolbar)
| Mode | When to use |
|---|---|
| Single Product | One SKU at a time, or multi-select from product catalog with per-line qty/cost. |
| Template Bulk | Product has variants (size/colour) — set opening qty for all variants of a template in one grid. |
| Bulk Import | Hundreds/thousands of SKUs — enter rows manually or paste from spreadsheet (SKU/barcode, qty, cost, warehouse name). |
| Reverse | Admin correction — undo mistaken opening stock with mandatory reason (audit trail). |
Mode A — Single Product
Default mode. Two sub-modes via toggle:
- One Product — single SKU dropdown.
- Multiple Products — search catalog, multi-select rows, add to list with default quantity; edit qty and unit cost per line before save.
| Field | Required | Description |
|---|---|---|
| Branch | Yes | Branch receiving stock. Filters warehouse dropdown. |
| Date | Yes | Opening date — typically fiscal year start or migration cut-over date. |
| Product | Yes | Standalone products (not template parents). Variants selectable individually. |
| Quantity | Yes | On-hand qty in base UoM. Zero allowed — info banner explains zero-qty use (placeholder row without valuation). |
| Unit Cost (BC) | Yes* | Cost per unit in base currency — drives Product Valuation report. *Can be 0 when qty is 0. |
| Currency (FC) | No | Optional foreign currency for imported cost. |
| FC Unit Cost | No | Cost in foreign currency — auto-converts to BC when exchange rate set. |
| Exchange Rate | No | Base per FC unit — can auto-load from Exchange Rate Management for the opening date. |
| Warehouse | Recommended | Destination warehouse. Empty = unassigned branch-level stock only. |
| Zone / Rack / Bin | No | Cascading WMS location — bin requires rack, rack requires zone, zone requires warehouse. |
| Location summary | — | Info alert shows full path e.g. Main WH / Receiving / A-01 / Bin-03. |
| Also create Putaway Rule | No | Checkbox — auto-creates a product-level putaway rule pointing to the selected zone/rack/bin so future GRNs land in the same slot. See Putaway guide. |
Serial / batch products: when product has Serial Number Tracking or Batch Number Tracking enabled, additional fields appear to enter serial numbers or batch/lot for each opening quantity line.
Mode B — Template Bulk
- Select Branch and Date.
- Choose a Product Template — shows variant count chip.
- Grid loads all variants with attributes (Size: L, Colour: Red). Check Include per row.
- Enter Quantity and Unit Cost (BC) per included variant.
- Set shared Stock Location (warehouse → zone → rack → bin) applied to all selected variants.
- Optional: Also create Putaway Rules — one rule per included variant product.
- Click Save Selected Variants.
Mode C — Bulk Import
Best for large migrations. Each row:
| Column | Description |
|---|---|
| SKU | Product SKU — required if barcode empty. |
| Barcode | Alternative identifier — system matches SKU or barcode. |
| Quantity | Opening qty. |
| Unit Cost (BC) | Base currency cost. |
| Warehouse Name | Optional — must match warehouse name in WMS; blank uses branch default logic. |
Use Add Row for manual entry or paste from Excel. Click Import — result summary shows success/failure counts; failed rows list error per row (unknown SKU, invalid warehouse, etc.).
Mode D — Reverse (correction)
Warning banner — irreversible stock reduction. Fields: Branch, Product, Quantity to reverse, optional Warehouse (or branch-level), mandatory Reason text.
Use when opening stock was posted twice or wrong quantity entered. Does not auto-reverse GL — reconcile Financials separately if inventory asset was affected.
After posting — verification
- /inventory/stock — verify quantities by warehouse.
- /inventory/branch-stock — branch aggregate view.
- /inventory/productvaluationreport — total value vs Financials inventory GL.
- /inventory/stock/reports/opening-stock-summary — audit register of opening entries.
- /inventory/wms/reports/stock-movements-register — move type Opening Stock.
FAQ — Branch Opening Stock
Create an active warehouse for the selected branch under WMS → Warehouses first.
Opening stock sets quantities × unit cost here. GL inventory asset balance is set in Financials → Opening Balance. Both must use the same valuation — reconcile with Product Valuation Report.
Yes for go-live efficiency — it seeds putaway rules so future GRNs and receipts auto-suggest the same bin without re-entering location manually.
Yes — warehouse-level only (skip zone/rack/bin). Add bin structure later and use Stock Moves to re-slot inventory.
Verify SKU/barcode exactly matches product master. Product must be Active. Template parent SKUs cannot receive stock — use variant SKU.
Step 3 — Branch Stock
Menu: Stock → Branch Stock | Route: /inventory/branch-stock
Branch-scoped stock summary — filter by branch to see aggregated quantities across warehouses in that branch.

Example — Check Dhaka branch totals
- Open Stock → Branch Stock and select the branch.
- Review aggregated qty per product across warehouses in that branch.
Result: Branch managers see total available stock without opening each warehouse.
Step 4 — Minimum Stock Thresholds
Menu: Stock → Minimum Stock Thresholds | Route: /inventory/minimumstockthresholds
Quick threshold rules per product/branch (complements Inventory reorder policies). Triggers appear in Alerts when stock falls below minimum.

Example — Set threshold of 20 units
- Open Stock → Minimum Stock Thresholds and add a rule for product + branch.
- Set minimum qty (e.g. 20) and save.
Result: When on-hand falls below 20, Inventory Alerts and below-minimum reports flag the SKU.
Step 5 — Stock Transfers
Menu: Stock → Stock Transfers | Route: /inventory/stocktransfers
Move stock between warehouses (same branch or inter-branch). Full workflow with approval gates.

Example — Replenish store from main warehouse
- Create a transfer: source Main WH → destination Store WH, add lines and qty.
- Submit → Approve → Ship → Receive at destination.
Result: Source stock decreases on ship; destination increases on receive; register shows Completed.
Status workflow
| Status | Meaning | Available actions |
|---|---|---|
| Pending Approval | Created, awaiting manager approval. | Approve · Reject · Cancel |
| Approved | Approved but not yet shipped. | Ship (In Transit) · Cancel |
| In Transit | Stock deducted from source; in movement. | Receive (Complete) |
| Completed | Received at destination — final. | View only |
| Rejected | Approval denied. | View only |
| Cancelled | Cancelled before completion. | View only |
Create transfer — fields
| Field | Description |
|---|---|
| Source / Destination Warehouse | From and to locations — can cross branches. |
| Transfer Date | Document date. |
| Line items | Product, quantity, serial/batch if tracked. |
| Notes | Reason for transfer (replenishment, balancing). |
- Click Create Stock Transfer.
- Select source and destination warehouse, add products and quantities.
- Submit → Approve → Ship → Receive at destination.
- Detail view: /inventory/stocktransfers/details/{id}
FAQ — Stock Transfers
Available quantity at source warehouse is less than transfer qty. Reduce quantity or post stock adjustment first.
Step 6 — Stock Adjustments
Menu: Stock → Stock Adjustments | Route: /inventory/stockadjustments
Correct quantities after cycle counts, damage, or shrinkage. Approved adjustments update stock and post to GL (inventory adjustment accounts via GL mappings).

Example — Write off damaged units
- Open Stock → Stock Adjustments and create a decrease for the warehouse.
- Select product, qty, reason Damage, then submit/approve.
Result: On-hand drops; inventory adjustment posts via GL mappings; register keeps the audit trail.
| Field | Description |
|---|---|
| Branch / Warehouse | Location of adjustment. |
| Adjustment Type | Increase or decrease quantity. |
| Reason | Cycle count, damage, theft, expiry write-off. |
| Product lines | Qty change, unit cost for GL valuation impact. |
Detail route: /inventory/stockadjustments/{id}
Step 7 — Product Valuation Report
Menu: Stock → Product Valuation Report | Route: /inventory/productvaluationreport
Total inventory value by product using each item's costing method. Reconcile with Financials balance sheet inventory asset.
Step 8 — Stock reports
Menu: Stock → Reports | Route: /inventory/stock/reports

Example — Run below-minimum stock
- Open Stock → Reports and choose Below Minimum Stock.
- Filter by branch/warehouse and export for replenishment.
Result: Ops gets a list of SKUs under threshold to transfer or purchase.
| Report | Route |
|---|---|
| Stock on hand | /inventory/stock/reports/stock-on-hand |
| Branch stock summary | /inventory/stock/reports/branch-stock-summary |
| Below minimum stock | /inventory/stock/reports/below-minimum-stock |
| Overstock | /inventory/stock/reports/overstock |
| Stock transfer register | /inventory/stock/reports/stock-transfer-register |
| Stock adjustment register | /inventory/stock/reports/stock-adjustment-register |
| Opening stock summary | /inventory/stock/reports/opening-stock-summary |
| Stock in/out summary | /inventory/stock/reports/stock-in-out-summary |
| Reserved vs available | /inventory/stock/reports/reserved-vs-available |
| Costing method summary | /inventory/stock/reports/costing-method-summary |
| Reorder policy coverage | /inventory/stock/reports/reorder-policy-coverage |
WMS (Warehouse Management)
The WMS menu covers physical warehouse structure and floor operations — warehouses, zones, racks, bins, putaway rules, picking lists, internal stock moves, reorder suggestions, and warehouse performance reports.
Recommended setup order
Routes at a glance
Navigation & permissions
| Menu path (WMS group) | Route | Permission page |
|---|---|---|
| WMS → Warehouses | /inventory/warehouses | Warehouses |
| WMS → Putaway Rules | /inventory/putaway-rules | PutawayRules |
| WMS → Picking Lists | /inventory/picking-lists | PickingLists |
| WMS → Stock Moves | /inventory/stock-moves | StockMoves |
| WMS → Reorder Suggestions | /inventory/reorder-suggestions | ReorderSuggestions |
| WMS → Reports | /inventory/wms/reports | Report-specific permissions |
Part 1 — Warehouse structure (in order)
Step 1 — Warehouses
Menu: WMS → Warehouses | Route: /inventory/warehouses
Create at least one warehouse per operating branch before stock entry, GRN, or POS stock deduction. Requires branch from Branching module.

Example — Add Main Store as default
- Open WMS → Warehouses and click Add Warehouse.
- Enter name Main Store, select branch, type Standard, mark Default and Active.
- Save, then use Zones to build zone → rack → bin (Steps 2–4).
Result: Opening stock, GRN, and POS can select this warehouse; default is used when none is set on the product.
- Click Add Warehouse.
- Complete dialog fields below.
- Mark as Default (star badge) if primary warehouse for the branch — one default per branch.
- Use row Zones action to build bin structure (Steps 2–4).
Warehouse dialog fields
| Field | Required | Description |
|---|---|---|
| Warehouse Name | Yes | Descriptive name (Main Store, Cold Room). |
| Branch | Yes | Branch this warehouse belongs to — stock is branch-scoped. |
| Address | No | Physical location (multi-line). |
| Warehouse Type | Yes | Standard, Bonded, Cold storage, Hazmat — affects handling rules in reports. |
| Active | Yes | Inactive warehouses excluded from operational pickers. |
| Default | No | Primary warehouse for branch — used when product has no explicit default. |
FAQ — Warehouses
Create an active warehouse for the user's branch and set a default warehouse on products where required.
Step 2 — Warehouse Zones
Route: /inventory/warehouses/{warehouse-id}/zones
Divide a warehouse into zones (Receiving, Bulk, Picking, Cold storage, Quarantine). Open from Warehouses list → Zones action.

Example — Add Receiving and Picking zones
- On Warehouses list, open Zones for Main Store.
- Add Receiving (type Receiving) and Picking (type Picking); keep Active.
Result: Zones appear for rack creation and putaway rule targets.
| Field | Description |
|---|---|
| Zone Name / Code | Identifier within warehouse. |
| Zone Type | Receiving, Storage, Picking, Staging, etc. |
| Active | Inactive zones hidden from putaway rules. |
Step 3 — Racks
Route: /inventory/warehouses/{warehouse-id}/zones/{zone-id}/racks
Aisle/rack identifiers within a zone. Required before bin-level putaway and picking.

Example — Add rack A-01 in Picking
- Open the Picking zone → Racks.
- Add rack code A-01 with optional capacity, then save.
Result: Rack is ready for bin slots used by putaway and picking.
| Field | Description |
|---|---|
| Rack Name / Code | e.g. A-01, B-02. |
| Capacity | Optional max weight/volume for utilization reports. |
Step 4 — Bins
Route: /inventory/warehouses/…/racks/{rack-id}/bins
Smallest storage location. Stock tracked at bin level on opening stock, GRN putaway, picking, and internal stock moves.

Example — Add pickable bin A-01-03
- Open rack A-01 → Bins and add code A-01-03.
- Set optional max capacity and mark Pickable.
- Use this path in putaway rules and opening stock location.
Result: Stock can sit at Zone / Rack / Bin; pickers and putaway resolve this slot.
| Field | Description |
|---|---|
| Bin Name / Code | Unique within rack (e.g. A-01-03). |
| Max Capacity | Qty or volume limit — feeds bin utilization report. |
| Pickable | Whether pickers can take stock from this bin. |
Part 2 — Warehouse operations (after structure + stock)
Step 5 — Putaway Rules (summary)
Menu: WMS → Putaway Rules | Route: /inventory/putaway-rules
Putaway tells CognitixERP where incoming stock should be stored — which zone, rack, and bin. Rules run automatically on goods receipt (GRN), opening stock (optional checkbox), and branch-level resolution. Full Putaway guide →

Example — Default putaway to Bulk storage
- Open WMS → Putaway Rules, select branch and warehouse.
- Add a default (All Products) rule targeting Bulk zone → rack → bin, priority 50.
- Optionally add a higher-priority product or category rule for fast movers.
Result: GRN and receipts resolve a target bin; audit trail shows the matched rule instead of default-warehouse warning.
Putaway Rules — detailed guide
Route: /inventory/putaway-rules | Permission: PutawayRules
When putaway runs
| Trigger | Behaviour |
|---|---|
| Procurement GRN | On goods receipt, system resolves putaway location per product and suggests/stores bin placement. |
| Branch Opening Stock | When you tick Also create Putaway Rule on opening stock, a product-level rule is seeded for future receipts. Location fields on the opening form also place stock at bin level immediately. |
| Branch-level resolution | When warehouse is not pre-selected, system checks all active warehouses in the branch (default warehouse first) for a matching rule. |
| No rule match | Falls back to default warehouse — logged as “default location” in audit trail (warning chip). |
Page layout
- Filter bar: select Branch → Warehouse (required before adding rules).
- Left panel: rules table sorted by priority.
- Right panel: Putaway Audit Trail — timeline of recent resolutions (product, location, reference doc, qty, timestamp). Expand “See more” for full history.
Rule resolution order (how the engine picks a rule)
For each product in a warehouse, the system evaluates rules in this order — first match wins within each tier (lowest priority number = highest precedence among ties):
- Product-specific rule — exact product ID match.
- Category rule — product's category (only when no product rule exists).
- Default rule — no product, no category (“All Products” chip in UI).
Among multiple rules in the same tier, lower Priority number wins (e.g. priority 5 beats priority 10).
Add / Edit Putaway Rule — dialog fields
| Section | Field | Description |
|---|---|---|
| Basic | Priority | 1–999. Lower = evaluated first among rules in the same tier. |
| Product (optional) | Most specific — rule applies only to this SKU. When set, category is disabled. | |
| Category (optional) | Applies to all products in category. Cannot combine with product on same rule. | |
| Target location | Zone | Warehouse zone (Receiving, Bulk, Cold, etc.). |
| Rack | Enabled after zone selected — aisle/rack within zone. | |
| Bin | Enabled after rack selected — precise storage slot. | |
| Notes | Operator instructions (e.g. “Heavy items — ground level only”). | |
| FEFO | Enable FEFO | First-Expiry-First-Out — for perishable goods; routes items with expiry dates to designated zones. |
| Max days to expiry | Only applies FEFO rule when product expiry is within N days (e.g. 30 for short-life dairy). | |
| Status | Active | Inactive rules are ignored; delete soft-deactivates (preserves audit history). |
Recommended setup patterns
| Pattern | Example rules (priority order) |
|---|---|
| General retail | 10 = Fast movers → Picking zone bin · 50 = Default → Bulk storage zone |
| Cold chain | 10 = Category “Dairy” + FEFO → Cold zone · 20 = Category “Frozen” → Frozen zone |
| High-value serial items | 5 = Product “iPhone 15” → Secure cage bin · 100 = Default |
Go-live workflow with Opening Stock
- Create warehouse structure (zone/rack/bin).
- Post opening stock with bin location + tick Also create Putaway Rule.
- Verify rules appear on Putaway Rules page for that warehouse.
- Post first GRN — confirm audit trail shows resolved location (not default warehouse warning).
- Run /inventory/wms/reports/putaway-rule-coverage — find products without rules.
FAQ — Putaway
No matching active rule existed for that product/category. Create a product or category rule, or a catch-all default rule with low priority number.
Product-specific always beats category. Category beats generic default.
Yes, but only the highest-precedence (lowest priority number) product rule applies per receipt. Use different priorities intentionally — not duplicates at same priority.
FEFO on putaway rules controls where to store incoming expiry-dated goods. FIFO on picking lists controls which bin to pick from when fulfilling orders.
Step 6 — Picking Lists (summary)
Menu: WMS → Picking Lists | Route: /inventory/picking-lists
Warehouse pick documents generated from sales orders/invoices — tells pickers which bin to take stock from. Full Picking List guide →

Example — Complete a pick for a sales order
- Confirm a sales order (or approve invoice) so a picking list is generated.
- Open WMS → Picking Lists, assign a picker, confirm each line qty.
- Mark Done when all lines are picked.
Result: Stock is deducted from bins; fulfilment advances; picking register shows Done.
Picking Lists — detailed guide
Route: /inventory/picking-lists | Permission: PickingLists
How picking lists are created
| Source | When |
|---|---|
| Sales Order confirmed | System auto-generates picking list for the order warehouse (event-driven). |
| Sales Invoice approved | Direct invoices (no prior order) trigger picking list generation — idempotent (won't duplicate if already exists). |
| API / manual | Warehouse managers can generate via API with pick strategy parameter. |
Each list has a unique number (e.g. PICK-2026-0001) and links to source order/invoice number shown in detail dialog subtitle.
Pick strategies
When generating, the system selects source bins using:
| Strategy | Logic | Best for |
|---|---|---|
| FIFO (default) | First In, First Out — oldest stock in bin first. | General merchandise, standard retail. |
| FEFO | First Expiry, First Out — bins with nearest expiry date first. | Food, pharma, cosmetics with batch expiry. |
| Nearest Bin | Minimizes travel distance from dispatch area. | Large warehouses with long aisles. |
| Batch | Groups picks by batch/lot number. | Regulated industries requiring lot traceability. |
List page — filters and tabs
- Select Branch → Warehouse.
- Tabs filter by status with badge counts: All · Draft · Assigned · In Progress · Done · Cancelled.
- Click a row to open the detail dialog.
Picking list status workflow
| Status | Code | Meaning | Next actions |
|---|---|---|---|
| Draft | 0 | Generated, not yet assigned to a worker. | Assign worker · Cancel |
| Assigned | 1 | Picker assigned; picking not started. | Confirm line picks · Cancel |
| In Progress | 2 | At least one line picked; others pending. | Continue picking · Complete · Backorder |
| Done | 3 | All lines picked (or backorder completed). Stock deducted. | View only · reports |
| Cancelled | 4 | Pick aborted — no stock movement. | View only |
Detail dialog — picker workflow
Summary section: Pick strategy, scheduled date, item count, source order/invoice reference.
Assign Worker: Search user by name/username → Assign. Shows currently assigned picker name.
Pick Items table — one row per bin pick:
| Column | Description |
|---|---|
| Product | Product name. |
| Bin | Formatted location chip — e.g. Picking Zone / Rack B2 / Bin B2-04. |
| Batch | Lot number when batch-tracked. |
| Serial | For serial-tracked products: Scan button opens serial picker; must scan before confirm. |
| Qty to Pick | Required quantity from this bin. |
| Qty Picked | Editable — defaults to full qty; can enter partial for short pick. |
| Status | Pending · Picked · Short (partial). |
| Action | Enter qty → click ✓ checkmark to confirm line pick. |
Progress bar at bottom shows picked lines vs total lines.
Footer actions:
- Cancel — abort entire pick list.
- Backorder — visible when short-pick lines exist; completes picked qty and creates follow-up for remainder.
- Complete — enabled when no line is still Pending; deducts stock, records stock moves, may trigger billing fulfilment event.
Line item status
| Status | Meaning |
|---|---|
| Pending (0) | Not yet picked from bin. |
| Picked (1) | Full or accepted quantity confirmed. |
| Short (2) | Partial quantity — less than qty to pick; triggers backorder option. |
End-to-end fulfilment flow
- Customer order confirmed or invoice approved in Billing.
- Picking list auto-generated with bin lines per pick strategy.
- Warehouse supervisor assigns picker.
- Picker walks bins, confirms each line (scans serial if required).
- Supervisor clicks Complete — stock deducted from bins; stock move audit created.
- Invoice/order fulfilment status updates; goods ready for dispatch/packing.
Reports
- /inventory/wms/reports/picking-list-register — all picks by period.
- /inventory/wms/reports/picking-performance — picker productivity metrics.
- /inventory/wms/reports/pending-warehouse-tasks — open picks and transfers.
FAQ — Picking Lists
Invoice must contain stockable products with stock in the selected warehouse. Check warehouse on invoice and stock on hand report.
Click Scan on the serial column and select/enter valid serial number in stock at that bin before pressing ✓.
Every line must be Picked or Short — no Pending lines remaining. Confirm each line with checkmark first.
Use Backorder to close the pick with partial fulfilment; system can generate follow-up pick for unpicked quantity.
Generation is idempotent — active list reused. Cancelled lists (status 4) are ignored; new generation allowed if previous was cancelled.
Stock may be at warehouse level without bin assignment. Run putaway or opening stock with bin location; regenerate pick after re-slotting.
Step 7 — Stock Moves
Menu: WMS → Stock Moves | Route: /inventory/stock-moves
Internal movements between bins/zones within the same warehouse (replenishment, re-slotting). Distinct from inter-warehouse Stock Transfers.

Example — Replenish picking bin from bulk
- Open WMS → Stock Moves and create a move in the same warehouse.
- Select product, qty, from Bulk bin → to Picking bin.
- Confirm the move.
Result: Bin balances update; stock movements register logs the internal move.
Step 8 — Reorder Suggestions
Menu: WMS → Reorder Suggestions | Route: /inventory/reorder-suggestions
Review system-generated purchase suggestions from Reorder Policies and current stock levels. Convert to procurement PO where integrated.

Example — Convert low-stock suggestion to PO
- Open WMS → Reorder Suggestions after policies/stock are below min.
- Review suggested qty and preferred supplier, then convert to a procurement PO.
Result: Purchasing gets an actionable PO draft instead of guessing reorder qty.
Step 9 — WMS reports
Menu: WMS → Reports | Route: /inventory/wms/reports

Example — Check putaway rule coverage
- Open WMS → Reports and choose Putaway Rule Coverage.
- Find products without rules and add rules before the next GRN wave.
Result: Fewer receipts fall back to default warehouse; bins stay consistent.
| Report | Route |
|---|---|
| Stock movements register | /inventory/wms/reports/stock-movements-register |
| Picking list register | /inventory/wms/reports/picking-list-register |
| Picking performance | /inventory/wms/reports/picking-performance |
| Putaway log | /inventory/wms/reports/putaway-log-report |
| Putaway rule coverage | /inventory/wms/reports/putaway-rule-coverage |
| Warehouse capacity utilization | /inventory/wms/reports/warehouse-capacity-utilization |
| Bin/rack utilization | /inventory/wms/reports/bin-rack-utilization |
| Reorder suggestions report | /inventory/wms/reports/reorder-suggestions |
| Pending warehouse tasks | /inventory/wms/reports/pending-warehouse-tasks |
| Zone stock distribution | /inventory/wms/reports/zone-stock-distribution |
Setup dependency reference
| You want to… | Complete these WMS steps first |
|---|---|
| Post GRN or POS stock deduction | 1 Warehouse (minimum) |
| Bin-level opening stock | 1–4 Warehouse → Zone → Rack → Bin |
| Auto putaway on receipt | 1–4 structure · 5 Putaway rules |
| Fulfil sales order picking | 1–4 · 6 Picking lists · stock on hand (Stock) |
| Internal bin transfer | 1–4 · 7 Stock moves |
Billing (Sales)
Billing covers the full order-to-cash cycle — customer quotations, sales orders, sales invoices, sales returns, credit notes, customer receipts, receivables aging, and billing analytics. Shipped or Delivered invoices deduct stock and post sales/COGS journals to the general ledger. Customer receipts reduce AR through Financials payment journals.
Recommended setup order
Order-to-cash flow
- Quotation — price proposal (Draft → Approve).
- Sales Order — convert from approved quotation or create manually (Pending → Confirm).
- Picking — WMS picking list auto-created on order confirm.
- Invoice — convert from confirmed/shipped order or create manually (Draft → Approved).
- Fulfilment — mark Shipped or Delivered → stock OUT + sales GL.
- Receipt — customer payment from invoice, Customer Receipt page, or Customer Details.
- Adjustments — sales return (qty/stock) or credit note (monetary AR credit) from invoice actions.
Routes at a glance
Navigation & permissions
| Menu path (Billing) | Route | Permission page |
|---|---|---|
| Billing → Dashboard | /billing | BillingDashboard |
| Billing → Quotations | /billing/quotations | Quotations |
| Billing → Orders | /billing/orders | Orders |
| Billing → Invoices | /billing/invoices | Invoices |
| Billing → Customer Receipt | /billing/customer-receipt | CustomerReceipt |
| Billing → Reports | /billing/reports | BillingReports + report-specific |
Dashboard
Menu: Billing → Dashboard | Route: /billing
KPI overview — quotation pipeline value, open orders, invoice totals by workflow status, receivables snapshot, and quick links to create quotation, order, or invoice.
Part 1 — Sales documents
Step 1 — Customer quotations
Menu: Billing → Quotations | Routes: /billing/quotations · editor /billing/quotation/{id?} · preview /billing/quotation-preview/{id} · from CRM /billing/quotation?opportunityId={id}
Price proposal to customer before committing to an order. Can be created from a CRM opportunity (prefilled customer and value). Approved quotations convert to sales orders.

Example — Quote → Approve → Convert
- Open Billing → Quotations → Add Quotation; select customer and line items.
- Save as Draft, optionally Send Email, then Approve.
- Click Convert to Order.
Result: Status becomes Converted and a sales order is created from the quote.
Status workflow
| Status | Meaning | How reached |
|---|---|---|
| Draft | Saved, editable. | Save in editor. |
| Sent | Emailed to customer. | Send Email action (PDF/email dialog). |
| Approved | Accepted internally. | Approve action on list. |
| Rejected | Declined. | Reject action (with notes). |
| Expired | Past expiry date. | After Expiry Date passes. |
| Converted | Linked to sales order. | Convert to Order (requires Approved). |
| Cancelled | Voided. | Cancel action. |
List actions
Add Quotation · Edit · Preview · Send Email · Approve · Convert to Order · Reject · Duplicate · Cancel · Delete.
Quotation editor — header fields
| Field | Required | Description |
|---|---|---|
| Quotation Number | No | Auto-generated if left empty. |
| Quotation Date | Yes | Document date. |
| Expiry Date | Yes | Quote validity end date. |
| Branch | No | Posting branch — disabled unless Admin/Branch Manager. |
| Branch Code | Read-only | Derived from branch. |
| Customer Name | Yes | CRM customer autocomplete — defaults to Walking Customer on new quotes. New Customer opens CRM. |
| Shipping Address | Read-only | From customer address records. |
| Billing Address | Read-only | From customer address records. |
| Currency | No | Transaction currency — defaults from customer preferred currency or base. |
| Exchange Rate | Read-only | Daily rate for BC equivalent in summary. |
| Shipping Charge | No | Document-level freight. |
| Service Charge | No | Document-level service fee. |
| Prepared By | No | HRM employee — editable for Admin/Branch Manager only. |
| Note to Customer | No | Customer-facing remarks on PDF/email. |
Line items
| Column | Required | Description |
|---|---|---|
| Product | Per line | Inventory product autocomplete. |
| SKU | Read-only | Product SKU. |
| QTY | Per line | Quoted quantity in base UoM. |
| Unit | Read-only | Unit of measure. |
| Unit Price | Per line | Branch/customer price — shows price source chip. |
| VAT % | No | Line tax rate (0–100). |
| Discount % | No | Line discount (0–100). |
| Subtotal | Read-only | Calculated line total. |
Toolbar: Add Item · Scan Barcode (barcode input + Enter).
Step 2 — Sales orders
Menu: Billing → Orders | Routes: /billing/orders · new /billing/orders/new · from quote /billing/orders/new?fromQuotationId={id} · edit /billing/orders/edit/{id} · preview /billing/orders/{id}
Formal sales commitment. Confirming an order reserves stock and auto-generates a WMS picking list. Confirmed or Shipped orders convert to invoices.

Example — Confirm order and convert to invoice
- Create or open a Pending sales order with customer and lines.
- Click Confirm — stock reserves and a picking list is created.
- After pick/ship, click Convert to Invoice.
Result: Order is Converted; invoice draft carries customer and lines for fulfilment billing.
Status workflow
| Status | Meaning | Available actions |
|---|---|---|
| Pending | Default on save — editable. | Edit · Confirm · Reject · Cancel · Delete · Send Email · PDF |
| Confirmed | Stock reserved; picking list created. | Convert to Invoice · Reject · Cancel · PDF |
| Shipped | Goods dispatched. | Convert to Invoice · PDF |
| Delivered | Fulfilment complete. | View only |
| Rejected / Cancelled | Voided — stock reservation released. | View only |
| Converted | Invoice created from order. | View only |
Rule: Order must be Confirmed or Shipped before Convert to Invoice. Quotation must be Approved before Convert to Order.
Picking column on list links to /inventory/picking-lists when picking list exists — see Picking guide.
Order editor — header fields
Same structure as quotation, with these differences:
| Field | Required | Description |
|---|---|---|
| Order Number | No | Auto-generated if empty. |
| Order Date | Yes | Order document date. |
| Expiry Date | Yes | Order validity end. |
| Branch | No | Changing branch reloads branch-scoped products and stock display. |
| Currency | No | Filtered by customer currency policy. |
| Customer / Addresses / Charges / Prepared By / Note | — | Same as quotation. |
Line items show branch stock availability. Edit and Delete allowed only while Pending.
Step 3 — Sales invoices
Menu: Billing → Invoices | Routes: /billing/invoices · new /billing/invoices/new · from order /billing/invoices/new?fromOrderId={id} · edit /billing/invoices/edit/{id} · preview /billing/invoices/{id}

Example — Approve then Deliver
- Create invoice (from order or direct) with customer, due date, and lines.
- Approve, then mark Shipped or Delivered.
- Optionally record payment inline or via Customer Receipt.
Result: Stock decreases, revenue/COGS post to GL, and AR shows Due until paid.
Workflow status
| Status | Stock / GL effect | Payment allowed |
|---|---|---|
| Draft | None — fully editable; FX editable. | No |
| Approved | AR recognized; direct invoice may trigger picking. | Yes |
| Shipped | Stock OUT + Sales/COGS GL posted. | Yes |
| Delivered | Final fulfilment — same stock/GL path if Shipped skipped. | Yes |
| Cancelled | Locked — no edits. | No |
Payment status (separate axis)
| Status | Meaning |
|---|---|
| Due | No payment recorded. |
| Partial | Some receipt allocated. |
| Paid | Fully settled. |
Invoice editor — header fields
| Field | Required | Description |
|---|---|---|
| Invoice Number | No | Auto-generated if empty (e.g. INV-xxxxxxxx). |
| Issue Date | Yes | Invoice date. |
| Due Date | Yes | Payment due — drives AR aging. |
| Branch / Branch Code | No / Read-only | Scopes stock, numbering, and journals. |
| Customer Name | Yes | CRM customer autocomplete. |
| Shipping / Billing Address | Read-only | From customer records. |
| Currency | No | May lock when customer has single allowed currency. |
| Rate Type | No (Draft only) | Spot / Corporate / Custom / Contract. |
| Exchange Rate | No (Draft only) | Editable in Draft; read-only after save. |
| Shipping Charge / Service Charge | No | Document-level charges. |
| Prepared By | No | Sales employee. |
| Note to Customer | No | Printed on invoice PDF. |
| Payment Terms | No | Due On Receipt · Net 7 · Net 14 · Net 30. |
| Status (workflow) | Yes | Draft / Approved / Shipped / Delivered selector. |
Line items
Same columns as quotation/order — Product, SKU, QTY, Unit, Unit Price, VAT %, Discount %, Subtotal. Totals refreshed from backend tax engine.
Inline payment section (when status = Approved, Shipped, or Delivered)
| Field | Required | Description |
|---|---|---|
| Payment method toggles | No | Cash, Bank, dynamic methods, MFS, Card, Credit Note, Advance Payment. |
| MFS Method / Card Method | Yes (if active) | Sub-method selection. |
| Bank Account | Yes (Bank) | Payment journal / bank account picker. |
| Payment Journal | Yes | Auto-resolved GL journal — branch + payment method + document currency. See Payment Journals guide. |
| Pay Amount | No | Cash collection at save. |
| Change / Return | Read-only | Overpayment change due. |
| Due | Read-only | Remaining outstanding preview. |
| Payment Status preview | Read-only | Due / Partial / Paid chip. |
Save persists as Draft first, then applies selected workflow status and optional inline payment.
Invoice list actions
Edit · Preview · Download PDF · Send Email · Approve · Shipped · Delivered · Make Payment · Sales Return · Credit Note · Delete (Draft only).
Payment filter chips: All · Due · Partial · Paid.
The downloaded/emailed invoice PDF prints the total as Amount in Words below the totals block, localized to the active language and driven by the document currency's numbering system and unit names. Configure these on the currency — see Financials → Currency Management (Amount in Words).
FAQ — Sales invoices
Stock OUT posts on Shipped or Delivered, not on Approved alone (unless your pipeline config differs). Mark Shipped after approval.
Order-based invoices inherit picking from confirmed sales order. Direct invoices may generate picking on Approve — verify warehouse and stockable products.
Delivered and Cancelled invoices are locked. Create credit note or sales return for corrections.
Receipt blocked until invoice is at least Approved. Draft invoices cannot record payments.
Step 4 — Sales returns
Route: /billing/sales-return/{invoiceId} | Accessed from Invoices list → Sales Return action.
Return goods from customer against a shipped/delivered invoice. Restores inventory stock and posts revenue reversal journal. Separate from credit notes — does not auto-create a credit note.

Example — Return 2 units from an invoice
- On Invoices list, open Sales Return for a Shipped/Delivered invoice.
- Enter Return Qty on the lines (e.g. 2), optional reason, then Submit.
Result: Stock increases; revenue reverses; return appears on Sales Returns report.
Status workflow
| Status | Effect |
|---|---|
| Created | Return document saved. |
| Received | Atomic on submit — stock IN + revenue reversal GL posted. |
Return editor fields
Invoice summary (read-only): Invoice Number, Customer, Total Amount.
| Column | Required | Description |
|---|---|---|
| Product | Display | Original invoice line. |
| Sold Qty | Display | Original invoiced quantity. |
| Previously Returned | Display | Qty already returned on this invoice. |
| Return Qty | Yes (selected lines) | Qty to return now — max = available; disabled if fully returned. |
| Field | Required | Description |
|---|---|---|
| Reason | No | Free-text return reason for audit trail. |
Submit requires sum of Return Qty > 0.
Step 5 — Credit notes
Route: /billing/credit-note/{invoiceId} | Accessed from Invoices list → Credit Note action | Permission: CreditNotes
Monetary credit against invoice (price adjustment, goodwill credit, billing error). Reduces AR; optional immediate refund to cash/bank or hold as customer advance. GST/e-invoice compliance submission when enabled.

Example — Issue a price-adjustment credit
- From Invoices list, open Credit Note for the invoice.
- Enter amount (≤ invoice total), reason, leave Refund Now off to hold as advance (or turn on for cash refund).
- Issue the credit note.
Result: AR reduces; advance or refund posts; no stock movement (unlike Sales Return).
Status workflow
| Status | Meaning |
|---|---|
| Issued | Created on Issue — GL posted; compliance submitted if configured. |
| Applied | Credit applied to customer AR balance. |
| Cancelled | Reversed — journal entry reversed. |
Credit note editor fields
Invoice summary (read-only): Invoice Number, Invoice Total (maximum credit), Customer, Currency.
| Field | Required | Description |
|---|---|---|
| Amount | Yes | Credit amount — min 0, max = invoice total. |
| Reason | No | Explanation — defaults to “Return” if blank on submit. |
| Refund Now | No | Off = credit held as customer advance. On = immediate cash/bank refund. |
| Payment Account | Yes (if Refund Now) | Cash or Bank GL account for refund posting. |
Post-issue view: GST breakdown, compliance QR/status, Download Receipt PDF, Back to Invoices.
Part 2 — Receipts & receivables
Step 6 — Customer receipts
Menu: Billing → Customer Receipt | Routes: /billing/customer-receipt · pre-selected /billing/customer-receipt/{customerId}
Record customer payments against open invoices, opening balances, or advance deposits. Posts Dr Cash/Bank (net) / Dr WHT Receivable / Cr AR via payment journals. FIFO allocation across oldest open invoices first.

Example — Collect full due balance
- Open Billing → Customer Receipt and select the customer.
- Confirm open invoices and Pay Amount (defaults to total due).
- Choose payment method/journal and submit.
Result: Oldest invoices settle first; invoice payment status becomes Partial/Paid; cash/bank journal posts.
Payment entry points
- Customer Receipt page — bulk pay with FIFO allocation.
- Customer Payment dialog — from invoice list Make Payment or Customer Details.
- Invoice editor inline payment — pay while saving approved invoice.
- Customer Details → Make Payment / Pay Advance — navigates to receipt or advance dialog.
Customer Receipt page — Step 1: Select customer
| Field | Required | Description |
|---|---|---|
| Search Customer | Yes | Autocomplete by name or phone — pre-filled from route param. |
| Summary table | Read-only | Total Sales, Total Paid, Due Balance (BC + FC columns). |
Step 2: Open invoices (read-only)
Invoice list with FIFO allocation preview — oldest due invoices paid first on submit.
Step 3: Payment form
| Field | Required | Description |
|---|---|---|
| Pay Amount | Yes | Min 0.01 — pre-filled to total due balance. |
| Payment Date | Yes | Receipt posting date (defaults today). |
| Payment Method | No | CASH, BANK, or dynamic Financials payment methods. |
| Payment Journal | Yes | Auto-resolved GL journal — branch + payment method + document currency. See Payment Journals guide. |
| Bank Account | Yes (Bank) | Bank journal picker. |
| WHT Tax | No | Withholding tax record from Taxation. |
| WHT Rate (manual) | No | Manual WHT % when no tax record. |
| WHT Amount | Read-only | GL breakdown preview. |
| Notes | No | Payment reference or memo. |
Step 4: Result (read-only)
Payment ID, per-invoice allocation breakdown, unallocated advance amount, Download Receipt PDF, New Receipt / View Invoices buttons.
FAQ — Customer receipts
Bulk receipt uses FIFO (oldest due first). For a specific invoice, use Make Payment from that invoice row or Customer Payment dialog with invoice context.
Excess over all open invoices is held as customer advance — visible on Customer Details Advance Applied tab.
Step 7 — AR aging & receivables
Routes: Report /billing/reports/ar-aging · Legacy dashboard /billing/ar-aging · Customer statement /billing/reports/customer-statement
Monitor outstanding customer invoices by aging bucket and follow up on overdue receivables.
Customer-level ledger and statement available on Customer Details Ledger and Sales tabs.
Part 3 — Reports
Step 8 — Billing reports hub
Menu: Billing → Reports | Route: /billing/reports
9 analytics reports — each card visible when user has matching report permission.

Example — Run AR Aging
- Open Billing → Reports and choose AR Aging.
- Filter by as-of date/branch and export for collections follow-up.
Result: Outstanding invoices appear by aging bucket for credit control.
| Report | Route | Permission | Purpose |
|---|---|---|---|
| AR Aging | /billing/reports/ar-aging | ReceivablesAging | Outstanding receivables by bucket. |
| Customer Statement | /billing/reports/customer-statement | BillingCustomerStatement | Customer ledger for date range. |
| Collections | /billing/reports/collections | BillingCollectionReport | Receipts collected by period. |
| Sales Summary | /billing/reports/sales-summary | BillingSalesSummary | Total sales by period/customer/product. |
| Tax Summary | /billing/reports/tax-summary | BillingTaxSummary | Output VAT/GST by period. |
| Credit Notes | /billing/reports/credit-notes | BillingCreditNoteReport | Credit note register. |
| Sales Returns | /billing/reports/sales-returns | BillingSalesReturnReport | Return register. |
| Quotation Conversion | /billing/reports/quotation-conversion | BillingQuotationConversion | Quote-to-order conversion rate. |
| Audit Trail | /billing/reports/audit-trail | BillingAuditTrail | Document change history. |
Cross-module integration summary
| Module | Integration point |
|---|---|
| CRM | Customer master, addresses, preferred currency, WHT default, opportunity → quotation, Customer Details payments. |
| Inventory | Product lines, branch prices, stock display on orders; stock reservation on order confirm; stock OUT on invoice Shipped/Delivered; stock IN on sales return. |
| WMS / Picking | Picking list auto-generated on sales order confirm — see Picking guide. |
| Financials | Sales/COGS journals on Shipped/Delivered; AR on invoice; payment journals on receipt; WHT Receivable; credit note GL. |
| Tax & Compliance | Line VAT, WHT on receipts, credit note e-invoice/GST submission. |
| POS | POS sales create linked invoices — see POS guide; appear on Customer Details Sales tab and AR reports. |
Sales return vs credit note
| Document | Use when | Stock | GL |
|---|---|---|---|
| Sales Return | Physical goods returned — qty-based. | Stock IN | Revenue reversal + COGS reversal |
| Credit Note | Price correction, billing error, goodwill — amount-based. | No stock movement | AR credit; optional cash refund or advance |
Before go-live checklist
| Task | Depends on |
|---|---|
| Register customers with credit limit | CRM Customers · Financials currencies |
| First Quote → Order → Confirm → Pick → Invoice → Deliver | Products · Warehouse · GL revenue/COGS mappings |
| Verify stock after Deliver | /inventory/stock |
| Test customer receipt with WHT | Payment journals · WHT GL mapping |
| Reconcile AR GL vs customer ledger | Customer Details · AR Aging report |
Point of Sale (POS)
POS is CognitixERP’s retail checkout module — cashier sessions, product search, cart management, multi-tender payments, receipt printing, stock deduction, billing invoice creation, and automatic GL posting. Every completed sale creates a POS transaction, reduces branch stock, posts revenue/VAT/cash (or AR for credit sales), and optionally submits e-invoice compliance (ZATCA/GST).
appsettings.json (WalkInCustomerId).
Recommended setup order
Retail sale flow
- Configure — POS Settings (branch default, business rules, receipt footer).
- Open session — select branch, count opening cash in drawer.
- Sell — search/scan products → cart → customer (optional) → payment → checkout.
- Receipt — print/PDF; compliance QR when enabled.
- Close session — count closing cash; system shows variance vs expected.
- Review — Sales History, Cash Reconciliation, Session Summary reports.
Routes at a glance
Navigation & permissions
| Menu path (POS) | Route | Permission page |
|---|---|---|
| POS → Terminal | /pos/terminal | POSTerminal |
| POS → Sales History | /pos/sales-history | POSSalesHistory |
| POS → Sessions | /pos/sessions | POSSessions |
| POS → Coupons | /pos/discounts | POSDiscounts (Manager/Admin role) |
| POS → Settings | /pos/settings | POSSettings |
| POS → Reports | /pos/reports | POSReports + report-specific |
Part 1 — Setup
Step 1 — POS Settings
Menu: POS → Settings | Route: /pos/settings
Global POS behaviour — default branch, receipt footer, stock rules, credit policy, and compliance QR toggle. Save once before cashiers open the terminal.

Example — Configure before first shift
- Open POS → Settings and set Default Branch.
- Enter receipt footer text; leave Allow Negative Stock off; keep Require Customer for Credit on.
- Save, then open the terminal for cashiers.
Result: New sessions pre-select the branch; credit sales need a CRM customer; overselling is blocked.
Terminal configuration
| Field | Required | Description |
|---|---|---|
| Default Branch | No | Pre-selected branch when terminal loads and session overlay opens. Cashiers can change per session. |
| Receipt Footer Note | No | Text printed at bottom of every receipt (e.g. return policy, thank-you message). Default: “Thank you for your purchase!” |
Business rules
| Setting | Default | Description |
|---|---|---|
| Allow Negative Stock | Off | When off, checkout blocks if cart quantity exceeds available stock (unless setting enabled). When on, sale proceeds and stock can go negative. |
| Require Customer for Credit | On | When on, Due (credit) sales require a selected CRM customer — walk-in cannot run on account. When off, walk-in credit is allowed (not recommended). |
Compliance section
| Field | Description |
|---|---|
| Show QR on POS Receipt | When e-invoice compliance is configured (/settings/e-invoice-compliance), toggles compliance QR printing on POS receipts after successful submission. |
| Open Compliance Settings | Link to global compliance profile — ZATCA, GST India, NBR (future). |
Walk-in customer
Anonymous retail sales attach to the system walk-in customer ID configured in
appsettings.json under WalkInCustomerId. Ensure this CRM customer exists
before go-live. Cannot be changed from the POS Settings UI.
Step 2 — Coupons (discount codes)
Menu: POS → Coupons | Route: /pos/discounts | Access: Manager or Admin role + POSDiscounts
Promotional coupon codes cashiers apply at the terminal. Backend validates eligibility (dates, min order, usage limits) when Apply is clicked on the terminal.

Example — Create SUMMER25 (25% off)
- Open POS → Coupons and add code SUMMER25, type Percentage, value 25.
- Set Valid From/Until and optional min order / max discount.
- Save Active; cashiers enter the code on the terminal and click Apply.
Result: Eligible carts get the discount; usage count increments against the max limit.
List filters
| Filter | Options |
|---|---|
| Search | Code or description text. |
| Discount Type | All · Percentage · Fixed Amount. |
| Status | All · Active · Inactive. |
Coupon list columns
| Column | Description |
|---|---|
| Code | Unique coupon code entered at terminal (immutable after create). |
| Description | Internal label. |
| Type / Value | Percentage (e.g. 25%) or fixed amount. |
| Min Order / Max Discount | Floor and cap on discount application. |
| Usage | Times used vs max (0 max = unlimited ∞). |
| Valid Until | Expiry date; red when past. |
| Status | Active / Inactive chip. |
Add / Edit coupon dialog — fields
| Field | Required | Description |
|---|---|---|
| Coupon Code | Yes | Uppercase-style code (e.g. SUMMER25) — locked on edit. |
| Description | No | Human-readable note. |
| Discount Type | Yes | Percentage or Fixed. |
| Value | Yes | Percent or fixed currency amount. |
| Minimum Order Amount | No | Cart subtotal must meet this before coupon applies. |
| Max Discount Amount | No | Cap on percentage discounts. |
| Max Usage Count | No | 0 = unlimited redemptions across all terminals. |
| Valid From | Yes | Start date. |
| Valid Until | No | End date — leave empty for no expiry. |
| Branch | No | Scope coupon to one branch, or all branches when empty. |
| Active | Edit only | Inactive coupons rejected at terminal. |
Part 2 — Terminal operations
Step 3 — POS Terminal
Menu: POS → Terminal | Route: /pos/terminal
Full-screen retail UI. Blocked until a session is open. Layout: left sidebar (categories, customer, discount) · centre product grid · right cart and payment panel.

Example — Complete a cash sale
- Open POS → Terminal, select branch, and open a session with opening cash.
- Scan/add products, optional customer or coupon, then tender Cash.
- Complete sale and print/email receipt.
Result: Stock deducts, payment journal posts, and a Billing-linked invoice/receipt is created.
Session gate (overlay)
Shown when no active session exists for the cashier.
| Field / action | Description |
|---|---|
| Select Branch | Branch for this session — defaults from POS Settings. |
| Open Session | Opens dialog — enter opening cash balance (0 allowed). |
Open session dialog
| Field | Required | Description |
|---|---|---|
| Branch | Read-only | Selected branch name. |
| Cashier | Read-only | Logged-in user. |
| Opening Cash Balance | Yes | Physical cash counted in drawer before first sale. Min 0. |
Header bar
| Display | Description |
|---|---|
| Company name | From company profile. |
| Branch / Cashier | Active session context. |
| Clock | Company timezone date/time. |
| Close Session | Opens close-session dialog (count closing cash). |
Left sidebar — customer & discount
| Field | Description |
|---|---|
| Categories | Filter product grid — All Products or inventory category name. |
| Search Customer | CRM autocomplete — sets transaction customer and preferred currency/FX rate. Clear = Walk-in. |
| Currency chip | Shown when customer uses foreign currency — displays code and exchange rate. |
| Discount amount | Manual cart-level discount in document currency. |
| Coupon Code + Apply | Validates coupon via backend; replaces/adds to discount. |
| Hold Sale | Parks current cart — resume from held list. Multiple held sales supported. |
Product grid
| Element | Description |
|---|---|
| Search / barcode | Text search by name/SKU; USB barcode scanners append digits + Enter (auto-add to cart). |
| Product card | Image, name, category, branch sale price, stock qty. Click or Add button adds to cart. |
| Stock display | Branch warehouse available qty — red when zero. |
Cart line fields
| Field | Description |
|---|---|
| Quantity | Editable — step 1 for normal UoM; 0.001 for weight-based products. |
| Scale Read | Weight products — reads connected scale (/settings/weightmachine). |
| Item Discount | Per-line discount amount sent to backend. |
| UoM hint | Conversion factor when sales UoM differs from stock UoM (e.g. 1 Box = 12 units). |
| Line total | Qty × price − item discount + tax. |
Cart summary
| Row | Description |
|---|---|
| Subtotal | Sum of line nets before cart discount. |
| VAT | Output tax from product tax rates. |
| Discount | Cart-level + coupon discount. |
| Total Payable | Amount due in document currency. |
| FX panel | When customer currency ≠base — shows BC equivalent and rate source (Spot/Corporate/Custom). |
Payment panel — every field
| Control | Description |
|---|---|
| Cash | Cash tender — uses Cash-type payment journal. Shows tendered amount and change for full cash sales. |
| Bank | Bank transfer — select bank payment journal from dropdown (one per linked bank account). |
| MFS | Mobile financial services — sub-select bKash/Nagad/etc. from Financials payment methods. |
| Card | Card terminal — sub-select Visa/MasterCard/etc. |
| Dynamic methods | Other active payment methods from Financials (Cheque, Gateway, Other). |
| Due | Credit sale — no payment collected; posts full amount to AR. Requires customer when setting enabled. |
| Split | Multi-tender dialog — divide total across Cash/Bank/MFS/Card methods in one sale. |
| Payment Journal | Read-only auto-resolved field — branch + method + currency. Required before checkout. See Payment Journals guide. |
| Full / Partial | Full pays entire total; Partial collects less and leaves remainder as customer due (requires customer). |
| Amount Paid | Partial payment amount — remaining due shown below. |
| Tendered Amount | Cash full payment — customer handed cash; change calculated. |
| Reference | Optional transaction ID for Card/MFS/Bank/dynamic methods. |
Checkout actions
| Button | Action |
|---|---|
| Cancel / New Sale | Clears cart (with confirmation if items present). |
| Checkout | Completes sale — stock OUT, invoice create, GL post, receipt modal. |
Keyboard shortcuts
| Key | Action |
|---|---|
| F1 | New sale (clear cart). |
| F2 | Clear search / focus product search. |
| F4 | Hold current sale. |
| F8 | Checkout (when cart not empty and session open). |
| Escape | Close receipt modal. |
| Barcode scanner Enter | Rapid digit sequence + Enter adds matching SKU to cart. |
Close session dialog
| Field | Description |
|---|---|
| Session summary | Opening balance, cash collected, total sales, transaction count, expected cash. |
| Actual Closing Cash Balance | Physical count — variance vs expected shown (overage/shortage). |
Cash variance posts to GL via POSCashVarianceEvent when session closes with non-zero variance.
Receipt modal (post-checkout)
Print receipt, download PDF, start new sale. Compliance QR embedded when submission succeeds and setting enabled.
FAQ — POS Terminal
Create active payment journals for the session branch with Payment Method Lines for each tender type. See Payment Journals guide.
Enable Allow Negative Stock in POS Settings, or reduce quantity / receive stock via GRN or Branch Opening Stock.
Select a CRM customer first, or disable Require Customer for Credit in settings (not recommended).
Verify SKU/barcode on product master, branch price exists, and product status is Active.
Part 3 — Sessions, history & controls
Step 4 — POS Sessions
Menu: POS → Sessions | Route: /pos/sessions
Supervisor view of cashier sessions per branch — open/close, expand transactions, void/refund, X/Z reports.

Example — Close shift and run Z report
- Open POS → Sessions and select the branch.
- Close the open session after counting closing cash (or close from Terminal).
- Run Z Report for the closed session; use Void/Refund on a txn only with a reason.
Result: Shift is closed with cash variance; Z report is available for end-of-day reconciliation.
Filter
| Field | Description |
|---|---|
| Branch | Required branch selector — reloads session list. |
Session table
| Column | Description |
|---|---|
| Cashier | User who opened the session. |
| Opened At / Closed At | Session timestamps. |
| Status | Open (green) or Closed. |
| Total Sales / Transactions | Aggregates for the session. |
| Actions menu | Close Session (open only) · X Report · Z Report (closed only). |
Expanded transaction list
Click expand icon to load transactions for that session.
| Column / action | Description |
|---|---|
| Transaction # | POS receipt number. |
| Customer | CRM name or Walk-in. |
| Status | Completed · Voided · Refunded. |
| Void | Manager action — requires reason; reverses stock and GL. |
| Refund | Manager action — requires reason; reverses stock and posts refund GL. |
Void / Refund dialogs
| Field | Required | Description |
|---|---|---|
| Void Reason / Refund Reason | Yes | Audit text — mandatory before confirm. |
Step 5 — Sales History
Menu: POS → Sales History | Route: /pos/sales-history
Read-only transaction register with KPI bar, search, branch filter, detail preview, print/PDF receipt, and compliance status column.

Example — Find and reprint a receipt
- Open POS → Sales History and filter by branch or search transaction number.
- Select a row to open the detail panel (lines, payments, compliance).
- Use Print / PDF to reprint the receipt if needed.
Result: Cashiers/managers can audit completed sales and reprint receipts without reopening the terminal.
Filters & KPI bar
| Element | Description |
|---|---|
| Search | Transaction number or customer name. |
| Branch | All Branches or specific branch. |
| KPI tiles | Total txns, Completed, Voided, Total Sales (BC). |
Detail panel (selected transaction)
| Section | Contents |
|---|---|
| Transaction info | Customer, currency, FX rate, linked Billing invoice ID. |
| Line items | Product, qty, unit price, discount, tax, line total. |
| Payments | Method, amount, journal, reference per tender line. |
| Compliance | Submission status chip (Success/Failed/Pending). |
| Print / PDF | Reprint receipt — logged in Receipt Audit report. |
Part 4 — Reports
Step 6 — POS reports hub
Menu: POS → Reports | Route: /pos/reports
15 operational reports — each card visible when user has matching report permission or hub access.

Example — Run Session Summary
- Open POS → Reports and choose Session Summary.
- Filter by date range and branch, then export for management.
Result: Multi-session sales and tender totals are ready for daily reconciliation.
| Report | Route | Permission | Purpose |
|---|---|---|---|
| Session Summary | /pos/reports/session-summary | POSSessionSummaryReport | Multi-session rollup for period. |
| Cash Reconciliation | /pos/reports/cash-reconciliation | POSCashReconciliationReport | Drawer audit per session — opening, sales, variance. |
| Cashier Performance | /pos/reports/cashier-performance | POSCashierPerformanceReport | Productivity and accuracy by cashier. |
| Void & Refund Audit | /pos/reports/void-refund-audit | POSVoidRefundReport | Control report for voided/refunded txns. |
| Sales Detail | /pos/reports/sales-detail | POSSalesDetailReport | Line-level sales register. |
| Product Mix | /pos/reports/product-mix | POSProductMixReport | Top sellers by product/category. |
| Tender Mix | /pos/reports/tender-mix | POSTenderMixReport | Payment breakdown Cash/Card/MFS/Bank/Due. |
| Hourly Sales | /pos/reports/hourly-sales | POSHourlySalesReport | Peak-hour patterns. |
| Coupon Usage | /pos/reports/coupon-usage | POSCouponUsageReport | Discount code redemptions. |
| Tax Summary | /pos/reports/tax-summary | POSTaxSummaryReport | Output VAT by rate (POS only). |
| Due Sales | /pos/reports/due-sales | POSDueSalesReport | Walk-in/credit sales with unpaid balance. |
| Multi-Currency | /pos/reports/multi-currency | POSMultiCurrencyReport | FC vs BC totals by currency code. |
| Session Comparison | /pos/reports/session-comparison | POSSessionComparisonReport | Current vs prior equal-length period. |
| Inventory Impact | /pos/reports/inventory-impact | POSInventoryImpactReport | Stock movement from POS sales. |
| Receipt Audit | /pos/reports/receipt-audit | POSReceiptAuditReport | Reprint audit trail. |
GL posting on completed sale
POSTransactionCompletedEvent posts journal entry reference POS-{transactionNumber}:
| Line | Debit | Credit | Account source |
|---|---|---|---|
| Cash/Bank/MFS/Card (per payment line) | ✓ | Payment Journal Default/Outstanding GL | |
| Discount | ✓ | Sales discount GL mapping (when discount > 0) | |
| Sales revenue | ✓ | GL Mapping SalesRevenue or product income account | |
| Output VAT | ✓ | Tax record GL or OutputVAT mapping | |
| Due / partial unpaid | ✓ | AR account (GlMappingType.AR) for remaining balance |
Stock deducts at checkout via inventory shipment — same product/warehouse as branch default WMS flow.
Transaction status reference
| Status | Code | Meaning |
|---|---|---|
| Draft | 0 | Cart in progress (not persisted as completed sale). |
| Completed | 1 | Sale finalized — stock OUT, GL posted, invoice linked. |
| Voided | 2 | Cancelled after completion — stock restored, GL reversed. |
| Refunded | 3 | Money returned — stock restored, refund GL posted. |
Cross-module integration
| Module | Integration point |
|---|---|
| Inventory | Branch products, prices, stock qty on grid; stock OUT on checkout; IN on void/refund. |
| Billing | Linked sales invoice per transaction — appears on Customer Details Sales tab and AR reports. |
| CRM | Customer picker, credit limit, preferred currency and FX on terminal. |
| Financials | Payment journals, tax rates, GL mappings (Sales/POS category), cash variance JE on session close. |
| Tax & Compliance | Line VAT; optional QR/IRN on receipt — see Compliance guide. |
| WMS | Warehouse stock source for availability and deduction. |
Before go-live checklist
| Task | Depends on |
|---|---|
| Configure POS Settings (branch, rules, footer) | Branches · /pos/settings |
| Cash + MFS/Card payment journals per branch | Payment Journals |
| Walk-in customer ID in appsettings | CRM customer record |
| Test sale: Cash → receipt → Trial Balance | Products · warehouse stock · GL POS mappings |
| Test session close with cash count | Open session · at least one cash sale |
| Run Cash Reconciliation report | Closed session |
| Test barcode / weight product (if used) | SKU barcode · weight machine settings |
Procurement (Purchasing)
Procurement covers the full procure-to-pay cycle — supplier master data, supplier quotations, purchase orders, goods receipt (GRN), purchase invoices, purchase returns, supplier debit notes, supplier payments, payables aging, and analytics. Approved purchase invoices post to accounts payable; marking an invoice Received increases branch stock and posts inventory GL entries. Payments reduce AP through Financials payment journals.
Recommended setup order
Procure-to-pay flow
- Quotation — capture supplier prices (Draft → Approve).
- Purchase Order — convert from approved quotation or create manually (Pending → Confirm).
- Purchase Invoice — convert from confirmed PO or create manually (Draft → Approved).
- GRN — mark invoice Received → stock in + inventory GL + optional serial/batch.
- Payment — pay from invoice, Supplier Payment page, or Supplier Details (with WHT/FX).
- Settlement — allocations update invoice payment status; full payment sets workflow Paid.
Routes at a glance
Navigation & permissions
| Menu path (Procurement) | Route | Permission page |
|---|---|---|
| Procurement → Suppliers | /procurement/suppliers | Suppliers |
| Procurement → Quotations | /procurement/quotations | SupplierQuotations |
| Procurement → Orders | /procurement/purchase-orders | PurchaseOrders |
| Procurement → Invoices | /procurement/invoices | PurchaseInvoices |
| Procurement → Supplier Payment | /procurement/supplier-payment | SupplierPayment |
| Procurement → Reports | /procurement/reports | ProcurementReports + report-specific |
Part 1 — Supplier master
Step 1 — Suppliers
Menu: Procurement → Suppliers | Routes: /procurement/suppliers · new /procurement/suppliers/new · details /procurement/suppliers/{id}
Vendor party master for all procurement documents. Each supplier belongs to a branch, carries AP opening balance, preferred currency, optional WHT default, and repeatable addresses. Supplier Details is a read-only dashboard (ledger, purchases, payments); edit via dialog from list or details page.

Example — Register a B2B supplier
- Open Procurement → Suppliers → New.
- Complete Profile (Business, company, branch), Financials, Currency, and Addresses.
- Save, then open Supplier Details to view ledger and purchase tabs.
Result: Supplier appears in PO/invoice pickers and can receive payments against AP.
Create supplier — 4-step wizard (/procurement/suppliers/new)
Step 1 — Profile
| Field | Required | Description |
|---|---|---|
| Supplier Type | Yes | Individual or Business — controls which name fields are mandatory. |
| Company Name | Yes (Business) | Legal or trade name of vendor organization. |
| First Name / Last Name | Yes (Individual); optional (Business) | Contact person name. |
| No | Primary contact email for PO/invoice correspondence. | |
| Phone Number | No | Contact phone — searchable on Supplier Payment screen. |
| Tax ID | No | Supplier tax registration number (VAT/GST/TIN). |
| Branch | Yes | Owning branch — scopes supplier ledger and default warehouse context. |
Step 2 — Financials
| Field | Required | Description |
|---|---|---|
| Opening Balance | No (default 0) | Accounts payable opening balance for migration — reconcile with Financials AP GL. |
| Is Active | No (default true) | Inactive suppliers hidden from new document pickers but preserved on history. |
| Default WHT Tax | No | Withholding tax record — auto-fills WHT rate on new purchase invoices for this supplier. |
Step 3 — Currency
| Field | Required | Description |
|---|---|---|
| Preferred Currency | No | Default transaction currency on quotations, POs, and invoices. |
| Preferred Rate Type | No | Spot or Corporate — which exchange rate table to use. |
| Allow Multiple Currencies | No | When enabled, supplier can transact in currencies beyond preferred currency. |
| Allowed Currencies | No | Multi-select of permitted currencies — shown when multi-currency is enabled. |
Step 4 — Addresses (repeatable rows)
| Field | Required | Description |
|---|---|---|
| Address Type | No | Billing, Shipping, or other address classification. |
| Street 1 / Street 2 | No | Address lines. |
| City / State / Postal Code / Country | No | Location fields for supplier correspondence and tax jurisdiction. |
Quick edit — Supplier dialog (from list)
Same profile, currency, and address fields as wizard. Additional behaviour in edit mode:
- Opening Balance is required in dialog (migration/correction use).
- Currency change may be blocked if transactions exist — alert shown with option to Duplicate With New Currency (clone supplier in new currency).
- Dialog does not include Default WHT Tax — set WHT on wizard create or on individual invoices.
Supplier Details page (/procurement/suppliers/{id})
Read-only dashboard with actions:
| Section | Content |
|---|---|
| Profile header | Name, type chip, currency, email, phone, tax ID, due balance, advance balance, opening balance, last payment date, addresses. |
| Ledger tab | AP sub-ledger: Date, Description, Debit, Credit, Balance. Filter by Date Range. |
| Purchases tab | Invoice Number, Date, Due Date, Total, Paid, Outstanding per invoice. |
| Payments tab | Payment history + Advance Applied table (with reverse advance action). |
| Actions | Make Payment · Pay Advance · Edit (opens dialog) · Delete. |
FAQ — Suppliers
Currency is locked once transactions exist. Use Duplicate With New Currency in edit dialog to create a parallel supplier record.
Supplier opening balance here feeds supplier ledger. Financials GL opening AP must match total supplier opening balances — reconcile before go-live.
Part 2 — Procurement documents
Step 2 — Supplier quotations
Menu: Procurement → Quotations | Routes: /procurement/quotations · editor /procurement/quotation/{id?} · preview /procurement/quotation-preview/{id}
Capture supplier price offers before committing to a purchase order. Use when comparing vendors or recording RFQ responses. Approved quotations convert directly to purchase orders.

Example — Quote → Approve → Convert to PO
- Add a quotation with supplier, lines, and expiry date.
- Approve, then click Convert to Order.
Result: Status becomes Converted and a Pending purchase order is created from the quote.
Status workflow
| Status | Meaning | How reached |
|---|---|---|
| Draft | Saved, not finalized. | Save in editor. |
| Sent | Communicated to supplier. | Send Email action (PDF/email). |
| Approved | Accepted internally. | Approve action on list. |
| Rejected | Declined. | Reject action (with notes). |
| Expired | Past expiry date. | System/business rule after Expiry Date. |
| Converted | Linked to PO. | Convert to Order (requires Approved). |
| Cancelled | Voided. | Cancel action. |
List actions
Preview · Edit · Send Email · Approve · Convert to Order · Reject · Cancel · Delete · Download PDF.
Quotation editor — header fields
| Field | Required | Description |
|---|---|---|
| Quotation Number | No | Auto-generated or manual document number. |
| Quotation Date | Yes | Document date. |
| Expiry Date | Yes | Last valid date for supplier offer. |
| Branch | No | Receiving branch — disabled if user cannot access all branches. |
| Branch Code | Read-only | Derived from selected branch. |
| Deliver To | Read-only | Branch delivery address display. |
| Supplier Name | Yes | Supplier autocomplete — New Supplier button opens Supplier dialog. |
| Currency | No | Document currency — defaults from supplier preferred currency. |
| Exchange Rate | Read-only | FX rate for base currency equivalent in summary. |
| Shipping Charge | No | Freight amount added to document total. |
| Service Charge | No | Additional service fee. |
| Remarks | No | Internal or supplier-facing notes. |
Line items
| Column | Required | Description |
|---|---|---|
| Product | Per line | Inventory product autocomplete. |
| SKU | Read-only | Product SKU after selection. |
| QTY | Per line | Quoted quantity in product base UoM. |
| Unit | Read-only | Unit of measure from product master. |
| Unit Price | Per line | Supplier quoted unit price — editable from product default. |
| VAT % | No | Tax rate per line — from product/tax setup. |
| Discount % | No | Line discount percentage. |
Toolbar: Add Item · Scan Barcode · Add by Barcode.
Summary panel (read-only): Subtotal, Shipping, Service, VAT, Discount, Total Amount, FX note.
Step 3 — Purchase orders
Menu: Procurement → Orders | Routes: /procurement/purchase-orders · new /procurement/purchase-orders/new · edit /procurement/purchase-orders/edit/{id} · preview /procurement/purchase-orders/{id}
Formal commitment to supplier. Create manually or convert from an approved quotation. Confirmed POs convert to purchase invoices. Does not affect stock or GL until invoice is received.

Example — Confirm PO and convert to invoice
- Create or open a Pending PO with supplier and lines.
- Confirm the order, then Convert to Invoice.
Result: PO becomes Completed; invoice draft carries supplier and lines for GRN/AP.
Status workflow
| Status | Meaning | Available actions |
|---|---|---|
| Pending | Default on save — editable. | Edit · Confirm · Reject · Cancel · Delete · Duplicate · Send Email · PDF |
| Confirmed | Approved for procurement. | Convert to Invoice · Reject · Cancel · Duplicate · PDF |
| Rejected | Declined. | View only |
| Cancelled | Voided before fulfilment. | View only |
| Completed | Converted to invoice. | View only |
Rule: PO must be Confirmed before Convert to Invoice. Quotation must be Approved before Convert to Order.
PO editor — header fields (same structure as quotation, plus)
| Field | Required | Description |
|---|---|---|
| Purchase Order Number | Read-only | System-generated PO number. |
| Order Date | Yes | PO document date. |
| Processed By | No | Employee autocomplete — buyer/processor from HRM employee master. |
| Branch / Branch Code / Deliver To | — | Same as quotation. |
| Supplier / Currency / Exchange Rate | — | Same as quotation. |
| Shipping Charge / Service Charge / Remarks | No | Same as quotation. |
Line items
Same columns as quotation: Product, SKU, QTY, Unit, Unit Price, VAT %, Discount %, line Subtotal.
Save on create sets status Pending. Edit and Delete allowed only while Pending.
Step 4 — Purchase invoices & goods receipt (GRN)
Menu: Procurement → Invoices | Routes: /procurement/invoices · editor /procurement/invoice/{id?} · preview /procurement/invoice-preview/{id}

Example — Receive goods (GRN)
- Open or create a purchase invoice from a Confirmed PO.
- Approve if needed, then set Purchase Status to Received and save.
- Verify stock on hand and putaway audit for bin placement.
Result: Stock increases, AP and inventory journals post, and payment status remains Due until paid.
Workflow status
| Status | Stock / GL effect | Payment allowed |
|---|---|---|
| Draft | None — fully editable; FX/rate editable. | No |
| Approved | AP recognized on ledger. | Yes |
| Shipped | In transit — no stock receipt yet. | Yes |
| Received | GRN — stock in + inventory GL posted (once). | Yes |
| Paid | Set when fully paid. | — |
| Cancelled | Locked — no edits. | No |
Payment status (separate from workflow)
| Status | Meaning |
|---|---|
| Due | No payment recorded. |
| Partial | Some payment allocated; outstanding remains. |
| Paid | Fully settled including debit note adjustments. |
Invoice editor — header fields
| Field | Required | Description |
|---|---|---|
| Issue Date | Yes | Supplier invoice date. |
| Due Date | No | Payment due date — drives AP aging buckets. |
| Branch | No | Branch receiving goods. |
| Branch Code | Read-only | Branch identifier. |
| Shipping Address | Read-only | Branch ship-to address. |
| Purchase Status | Yes | Workflow selector: Draft / Approved / Shipped / Received. |
| Supplier Name | Yes | Supplier autocomplete. |
| Currency | No | Document currency — may lock after first save. |
| Rate Type | No (Draft only) | Spot / Corporate / Custom / Contract — FX source. |
| Exchange Rate | No (Draft only) | Base per FC unit — editable only in Draft. |
| Shipping Charge | No | Freight added to invoice total. |
| Service Charge | No | Service fee. |
| WHT Rate % | No | Withholding tax rate — defaults from supplier WHT setup. |
| Supplier GSTIN | Conditional | Required for taxable invoices before Received (GST India). |
| Supplier IRN | Conditional | E-invoice IRN — required for GST India Received status. |
| Verify Supplier IRN | — | Button — validates IRN via compliance API (edit mode). |
| Notes | No | Free-text remarks. |
Line items (card layout per row)
| Field | Required | Description |
|---|---|---|
| Product | Per line | Inventory product selection. |
| SKU | Read-only | Product SKU. |
| QTY | Per line | Invoice quantity. When Received + weight-based product: Scale Read button reads weight from connected scale. |
| Unit | Read-only | Product UoM. |
| Unit Price | Per line | Cost per unit — drives inventory valuation on receipt. |
| VAT % | No | Input tax rate per line. |
| Discount % | No | Line discount. |
GRN capture — when status = Received
| Feature | When shown | Description |
|---|---|---|
| Serial Numbers panel | Received + serial-tracked product | Open serial picker — count must match QTY exactly before save. |
| Batch Number panel | Received + batch-tracked product | Set batch/lot number and expiry date via batch dialog. |
| Scale Read | Received + weight-based product | Reads live weight into QTY field. |
Saving with Received status: system may create invoice as Approved first, then call status API to Received — triggering stock increment, inventory items, and GL posting in one pipeline.
Inline payment section (when status = Approved, Shipped, or Received)
| Field | Required | Description |
|---|---|---|
| Payment method toggles | No | Cash, Bank, dynamic methods, MFS, Card, Credit Note, Advance. |
| MFS Method | Yes (if MFS) | bKash, Nagad, etc. |
| Card Method | Yes (if Card) | Visa, MasterCard, etc. |
| Bank Account | Yes (Bank) | Payment journal / bank account picker. |
| Payment Journal | Yes | Auto-resolved GL journal — branch + payment method + document currency. See Payment Journals guide. |
| Pay Amount | No | Payment amount — label shows FC or BC context. |
| Change / Return | Read-only | Overpayment change due. |
| Due | Read-only | Remaining outstanding after payment. |
Invoice list actions
Edit · Approve · Mark Shipped · Mark Received · Make Payment · Purchase Return · Debit Note · Delete (Draft only).
FAQ — Purchase invoices & GRN
Invoice must be status Received, not merely Approved or Shipped. Shipped records AP but does not receipt stock.
For taxable GST India invoices, enter Supplier GSTIN and IRN, then verify IRN before setting Received.
When status is Received and product is serial-tracked, enter exactly one serial number per unit in the serial panel.
Payment is blocked until invoice is at least Approved. Draft invoices cannot record payments.
The purchase invoice PDF prints the total as Amount in Words below the totals block, localized to the active language and driven by the document currency's numbering system and unit names. Configure these on the currency — see Financials → Currency Management (Amount in Words).
Step 5 — Purchase returns
Route: /procurement/purchase-return/{invoiceId} | Accessed from Invoices list → Purchase Return action on Received invoice.
Return goods to supplier against a received purchase invoice. Decrements branch stock on receive. Not in main menu — open from invoice row action.

Example — Return damaged units
- On a Received invoice, open Purchase Return.
- Enter Return Qty on affected lines and Submit.
Result: Stock decreases; return register updates; follow with debit note if AP credit is needed.
Status workflow
| Status | Effect |
|---|---|
| Approved | Created on submit via API. |
| Received | Auto-called after create — stock decremented via receipt reverse. |
| Credited | Supplier credit applied (domain state). |
| Cancelled | Reverses stock if already received. |
Return editor fields
Invoice summary (read-only): Invoice Number, Supplier, Total Amount.
| Column | Required | Description |
|---|---|---|
| Product | Display | Original invoice line product. |
| Purchased Qty | Display | Net purchased quantity after prior returns. |
| Previously Returned | Display | Quantity already returned on this invoice. |
| Return Qty | Yes (selected lines) | Quantity to return — max = available (purchased minus prior returns). |
Submit creates return and auto-receives — stock out immediately.
Step 6 — Supplier debit notes
Route: /procurement/debit-note/{invoiceId} | Accessed from Invoices list → Debit Note action.
Financial adjustment reducing amount owed to supplier (price correction, short shipment credit, quality claim). Reduces invoice payable and posts GL on issue. Reflected in payment dialogs as debit note deductions.

Example — Issue a price-correction debit
- From Invoices list, open Debit Note for the invoice.
- Enter amount (≤ invoice total) and reason, then Issue.
Result: Payable reduces; payment dialogs show the debit deduction; no stock change.
Status workflow
| Status | Meaning |
|---|---|
| Issued | Created on submit — GL posted; optional GST compliance submission. |
| Applied | Reduces invoice outstanding in payment calculations. |
| Cancelled | Reverses journal entry. |
Debit note editor fields
Invoice summary (read-only): Invoice Number, Invoice Total (maximum debit amount), Supplier.
| Field | Required | Description |
|---|---|---|
| Amount | Yes | Debit amount — cannot exceed invoice total. |
| Reason | No | Explanation for audit trail and supplier correspondence. |
| Supplier GSTIN | No | GST compliance — supplier tax ID. |
| Supplier IRN | No | E-invoice reference for GST India debit note submission. |
Part 3 — Payments & payables
Step 7 — Supplier payments
Menu: Procurement → Supplier Payment | Routes: /procurement/supplier-payment · pre-selected /procurement/supplier-payment/{supplierId}
Record payments against open invoices, opening balances, or advance deposits. Posts Dr AP / Cr Cash (net) / Cr WHT Payable via Financials payment journals. Supports multi-currency, WHT deduction, and FIFO bulk allocation across open invoices.

Example — Pay supplier due balance
- Open Procurement → Supplier Payment and select the supplier.
- Confirm open invoices; enter Payment Amount (defaults toward due).
- Choose method/journal (and WHT if applicable), then submit.
Result: Oldest invoices settle first; AP reduces; cash/bank and WHT journals post.
Payment entry points
- Supplier Payment page — bulk pay with FIFO allocation.
- Supplier Payment dialog — from invoice list or Supplier Details (single invoice or supplier-wide).
- Invoice editor inline payment — pay while editing approved invoice.
- Supplier Details → Make Payment / Pay Advance — supplier dashboard actions.
Supplier Payment page — Step 1: Select supplier
| Field | Required | Description |
|---|---|---|
| Search Supplier | Yes | Autocomplete by name or phone. |
| Summary table | Read-only | Total Purchase, Total Paid, Due Balance (BC + FC). |
Step 2: Open invoices (read-only)
Columns: Invoice Number, Issue Date, Due Date, Total, Rate, Paid, Outstanding, Aging days.
Step 3: Payment form
| Field | Required | Description |
|---|---|---|
| Payment Amount | Yes | Total payment — allocated FIFO across oldest invoices first. |
| Payment Date | Yes | Payment posting date. |
| Payment Method | No | CASH, BANK, or dynamic codes from Financials payment methods. |
| Payment Journal | Yes | Auto-resolved GL journal — branch + payment method + document currency. See Payment Journals guide. |
| Bank Account | Yes (Bank) | Bank journal picker — links to Banking accounts. |
| WHT Tax | No | Withholding tax record selection. |
| WHT Rate (manual) | No | Manual WHT % when no tax record selected. |
| WHT Amount | Read-only | Calculated withholding preview. |
| Notes | No | Payment reference or memo. |
Step 4: Result (read-only)
Payment ID, Total Paid, Journal reference, Unallocated amount, per-invoice allocation breakdown, Download Receipt.
Supplier Payment dialog — additional fields
| Field | Required | Description |
|---|---|---|
| Amount | Yes | Payment amount — FC/BC label based on context. |
| Payment Type | Yes | Due Payment · Opening Balance · Advance. |
| Paid On | Yes | Payment date. |
| Payment Note | No | Memo text. |
| Payment Method | Yes | Cash / Bank / Cheque / MFS / Card. |
| FX Rate Type | FC only | Spot / Corporate / Custom for foreign currency payment. |
| Custom Rate | No | Manual exchange rate override. |
| WHT Tax / WHT Rate (manual) | No | Withholding on payment — Dr AP full / Cr Cash net / Cr WHT Payable. |
Payment record status
| Status | Meaning |
|---|---|
| Pending | Recorded, awaiting approval (if workflow enabled). |
| Approved | Posted to GL. |
| Reversed | Payment reversed — AP restored. |
FAQ — Supplier payments
Bulk pay uses FIFO (oldest due first). For specific invoice payment, use Make Payment from that invoice row or Supplier Payment dialog with invoice context.
Excess over all open invoices is held as supplier advance — visible on Supplier Details Advance Applied tab.
Select WHT Tax record or enter manual WHT Rate before submitting. Verify WHT Payable GL mapping in Financials.
Step 8 — AP aging & payables
Routes: Dashboard /procurement/ap-aging · Report /procurement/reports/payables-aging · Open payables /procurement/reports/open-payables
Monitor outstanding supplier invoices by aging bucket and take action on overdue payables.
AP Aging dashboard (/procurement/ap-aging)
| Field / display | Description |
|---|---|
| As Of Date | Snapshot date for aging calculation. |
| Search | Filter by invoice number or supplier name. |
| KPI tiles | Outstanding totals per bucket: 0–30, 31–60, 61–90, 90+ days past due. |
| Detail table | Invoice Number, Supplier, Issue Date, Due Date, Days Past Due, Bucket, Currency, Rate, Outstanding FC, Outstanding BC. |
Part 4 — Reports
Step 9 — Procurement reports hub
Menu: Procurement → Reports | Route: /procurement/reports
18 analytics reports — each card visible only when user has the matching report permission.

Example — Run Payables Aging
- Open Procurement → Reports and choose Payables Aging.
- Filter by as-of date/branch and export for payment planning.
Result: Open supplier invoices appear by aging bucket for cash planning.
| Report | Route | Permission | Purpose |
|---|---|---|---|
| Payables Aging | /procurement/reports/payables-aging | PayablesAging | AP aging by supplier and bucket. |
| Supplier Statement | /procurement/reports/supplier-statement | ProcurementSupplierStatement | Supplier ledger for date range. |
| Payment Report | /procurement/reports/payments | ProcurementPaymentReport | All supplier payments by period. |
| Purchase Summary | /procurement/reports/purchase-summary | ProcurementPurchaseSummary | Total purchases by period/supplier. |
| Open Payables | /procurement/reports/open-payables | ProcurementOpenPayables | All unpaid invoice balances. |
| Tax Summary | /procurement/reports/tax-summary | ProcurementTaxSummary | Input VAT/GST by period. |
| WHT Deduction | /procurement/reports/wht-deduction | ProcurementWhtReport | Withholding tax deducted on payments. |
| Purchase Returns | /procurement/reports/purchase-returns | ProcurementPurchaseReturnReport | Return register. |
| Debit Notes | /procurement/reports/debit-notes | ProcurementDebitNoteReport | Supplier debit note register. |
| Quotation Conversion | /procurement/reports/quotation-conversion | ProcurementQuotationConversion | Quote-to-PO conversion rate. |
| PO Pipeline | /procurement/reports/po-pipeline | ProcurementPoPipeline | Open POs by status. |
| Supplier Spend Ranking | /procurement/reports/supplier-spend-ranking | ProcurementSupplierSpendRanking | Top suppliers by spend. |
| Multi-Currency | /procurement/reports/multi-currency | ProcurementMultiCurrency | FC purchase exposure. |
| PDC Maturity | /procurement/reports/pdc-maturity | ProcurementPdcMaturity | Post-dated cheque maturity schedule. |
| PO–Invoice Variance | /procurement/reports/po-invoice-variance | ProcurementPoInvoiceVariance | Price/qty differences PO vs invoice. |
| Receipt vs Invoice | /procurement/reports/receipt-vs-invoice | ProcurementReceiptVsInvoice | GRN received qty vs invoiced qty. |
| Supplier Performance | /procurement/reports/supplier-performance | ProcurementSupplierPerformance | Delivery and quality metrics. |
| Audit Trail | /procurement/reports/audit-trail | ProcurementAuditTrail | Document change history. |
Cross-module integration summary
| Module | Integration point |
|---|---|
| Inventory | Product lines on all documents; stock receipt on Invoice Received; stock out on purchase return; auto-reorder can create POs from reorder policies. |
| WMS / Putaway | Putaway rules resolve bin on GRN receipt — see Putaway guide. |
| Financials | AP journal on Received; payment journals on supplier payment; WHT Payable; FX revaluation on FC invoices. |
| Tax & Compliance | Line VAT, invoice WHT, GSTIN/IRN on Received, debit note GST submission. |
| Banking | Bank account selection on bank-method payments. |
| HRM | Processed By employee on purchase orders. |
Before go-live checklist
| Task | Depends on |
|---|---|
| Register suppliers with opening balance | Branches · Financials currencies · WHT taxes |
| First PO → Invoice → Received | Products · Warehouse · GL inventory mappings |
| Verify stock after GRN | /inventory/stock · putaway audit trail |
| Reconcile AP GL vs supplier ledger | Supplier Details ledger · Open Payables report |
| Test supplier payment with WHT | Payment journals · WHT GL mapping |
Manufacturing
Manufacturing covers the full plan-to-produce cycle — work centers (production capacity), bills of materials (recipes with components and routing), manufacturing orders (MO), shop-floor work orders (WO), quality checks, scrap handling, and production cost sheets with variance and yield analysis. Confirming a manufacturing order reserves and issues component stock, auto-generates work orders from BOM routing, and — on completion — receives finished goods into inventory and posts the work-in-progress (WIP) general ledger entries. All costing, stock movement, and GL posting rules run on the backend; the web client only drives the workflow.
Recommended setup order
Plan-to-produce flow
- Work center — define production stations with capacity and cost per hour.
- Bill of materials — set finished product, components, and routing operations (Draft → Active).
- Manufacturing order — plan a production quantity from a BOM (Draft → Confirmed).
- Component issue — on Confirm, component stock is reserved/issued and WIP is recognized.
- Work orders — auto-created from routing; shop floor runs them (Pending → In Progress → Done).
- Quality checks — inspect output; rejected quantity auto-routes to scrap.
- Complete — receive finished goods into stock, post WIP → finished-goods GL, compute cost sheet.
Routes at a glance
Navigation & permissions
| Menu path (Manufacturing) | Route | Permission page |
|---|---|---|
| Manufacturing → Dashboard | /manufacturing | ManufacturingDashboard |
| Manufacturing → Work Centers | /manufacturing/work-centers | WorkCenters |
| Manufacturing → Bill of Materials | /manufacturing/bill-of-materials | BillOfMaterials |
| Manufacturing → Manufacturing Orders | /manufacturing/manufacturing-orders | ManufacturingOrders |
| Manufacturing → Work Orders | /manufacturing/work-orders | WorkOrders |
| Manufacturing → Quality Checks | /manufacturing/quality-checks | QualityChecks |
| Manufacturing → Scrap Entries | /manufacturing/scrap-entries | ScrapEntries |
| Manufacturing → Cost Sheets | /manufacturing/cost-sheets | ProductionCostSheets |
| Manufacturing → Reports | /manufacturing/reports | ManufacturingReports + report-specific |
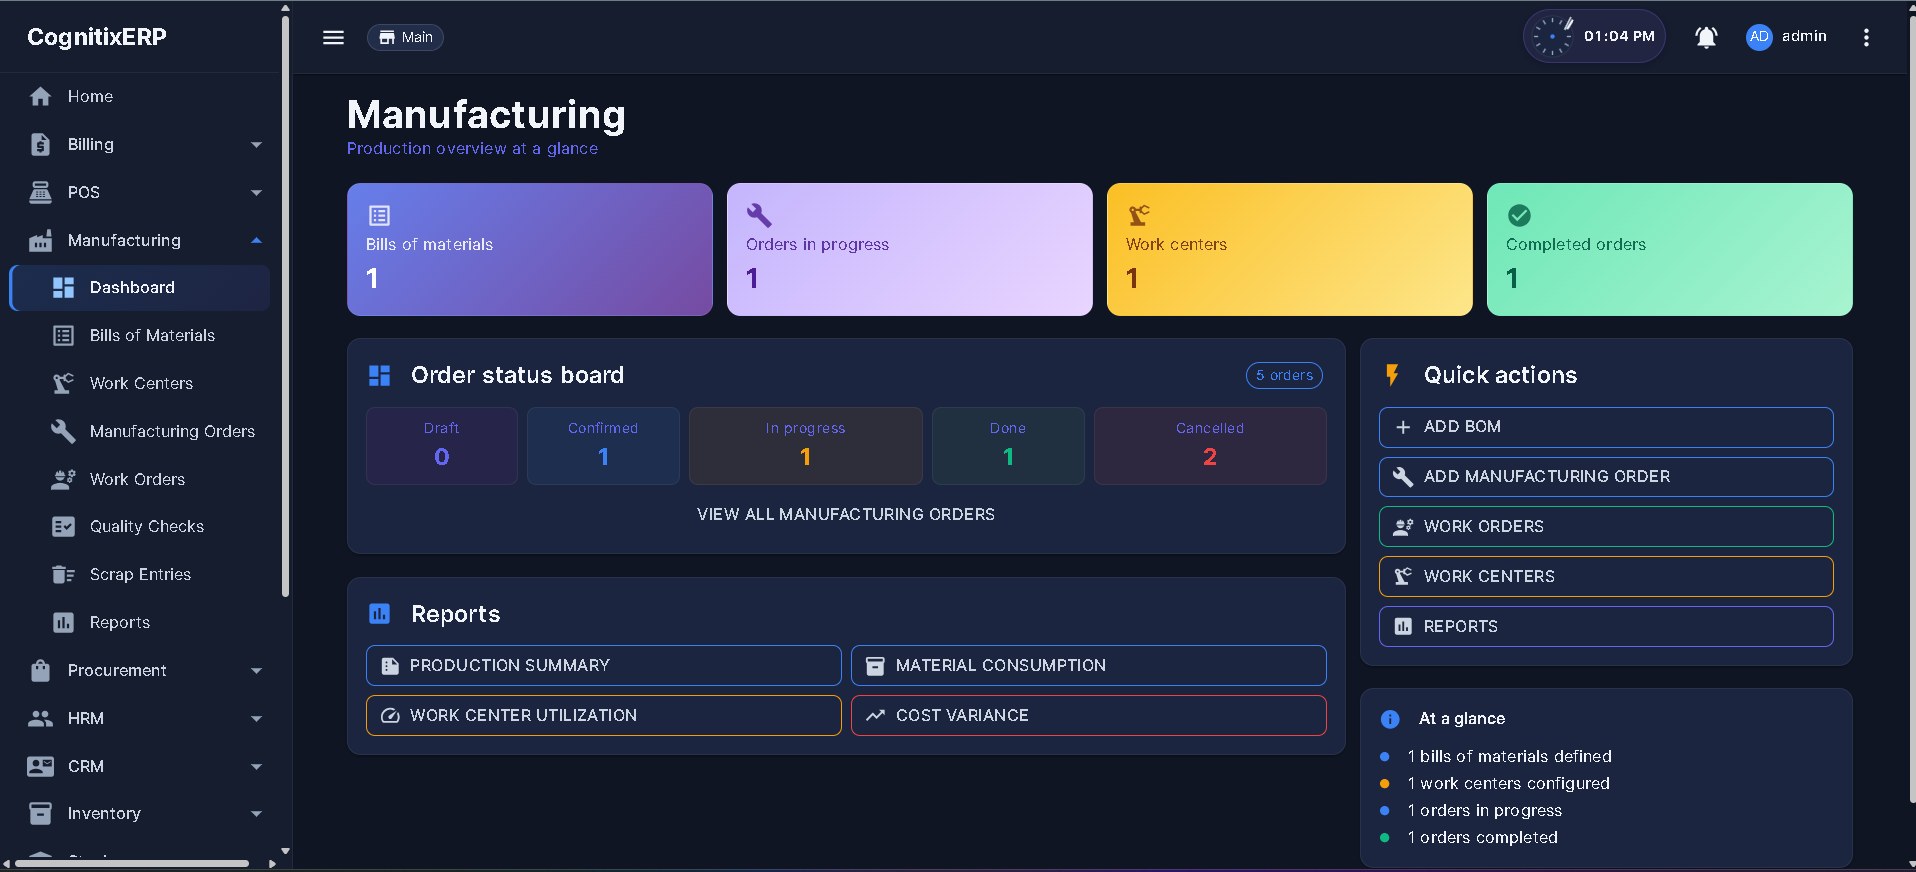
Step 0 — Manufacturing dashboard
Menu: Manufacturing → Dashboard | Route: /manufacturing
Landing page for the module. Shows open manufacturing orders by status, work-order progress, quality pass/fail rates, scrap totals, and cost variance summaries. Use the KPI tiles to jump into the underlying lists.
Part 1 — Production master data
Step 1 — Work centers
Menu: Manufacturing → Work Centers | Routes: /manufacturing/work-centers · new /manufacturing/work-centers/new · edit /manufacturing/work-centers/edit/{id}
A work center is a production station, machine, or team where a routing operation is performed. Capacity and cost-per-hour drive shop-floor scheduling and the labour/overhead lines on the cost sheet.
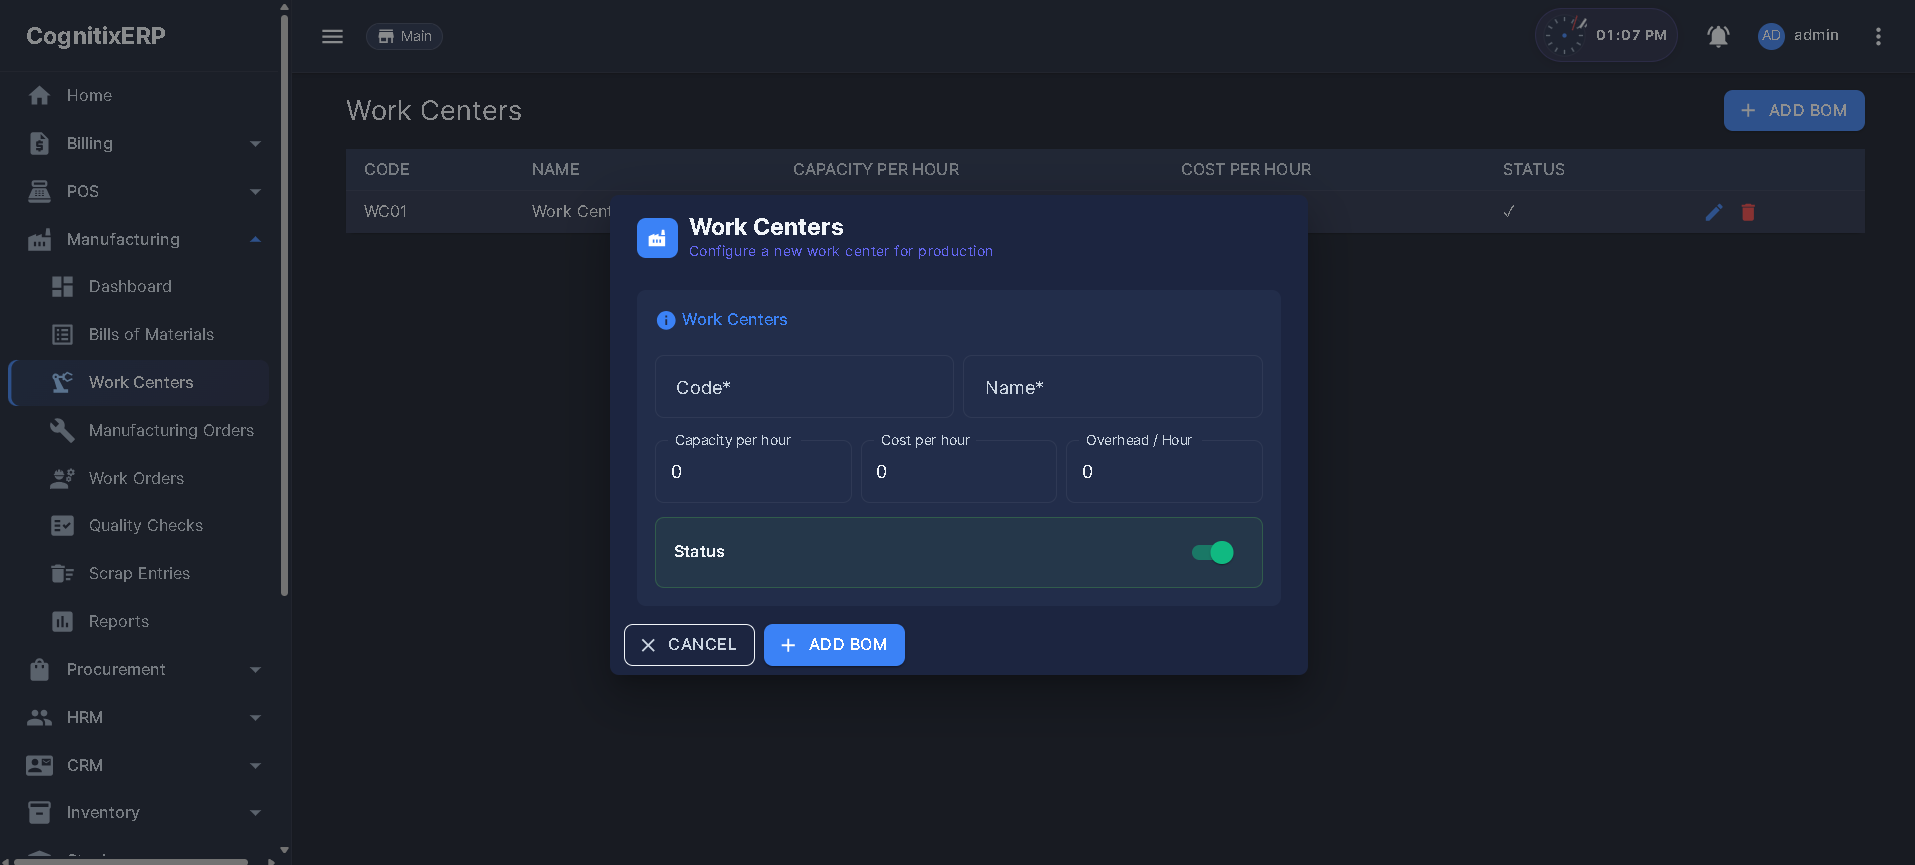
Example — Add an assembly line work center
- Open Manufacturing → Work Centers → New.
- Enter name (e.g. Assembly Line 1), branch, capacity per hour, and cost per hour.
- Save, then reference it in a BOM routing operation.
Result: The work center is selectable on BOM routing and receives work orders when an MO is confirmed.
Fields
| Field | Required | Description |
|---|---|---|
| Name | Yes | Work-center name (station, machine, or team). |
| Code | No | Short identifier used on shop-floor documents. |
| Branch | Yes | Owning branch — scopes the work center and its work orders. |
| Capacity / Hour | No | Throughput used for scheduling and load estimates. |
| Cost / Hour | No | Labour + overhead rate applied to cost-sheet operation time. |
| Is Active | No (default true) | Inactive centers are hidden from new routing pickers but preserved on history. |
Edit: open a row → Edit to change capacity, cost, or active state. Existing work orders keep their original rate.
FAQ — Work centers
Only if the BOM has routing operations. A BOM with components but no routing still produces — it just creates no work orders and applies no operation cost.
Cost sheets capture the rate at completion time. New rate applies to future manufacturing orders only.
Step 2 — Bill of materials (BOM)
Menu: Manufacturing → Bill of Materials | Routes: /manufacturing/bill-of-materials · new /manufacturing/bill-of-materials/new · edit /manufacturing/bill-of-materials/edit/{id}
The recipe for a finished product: the components consumed per unit and the routing operations (mapped to work centers) that build it. A BOM must be Active before it can be used on a manufacturing order.
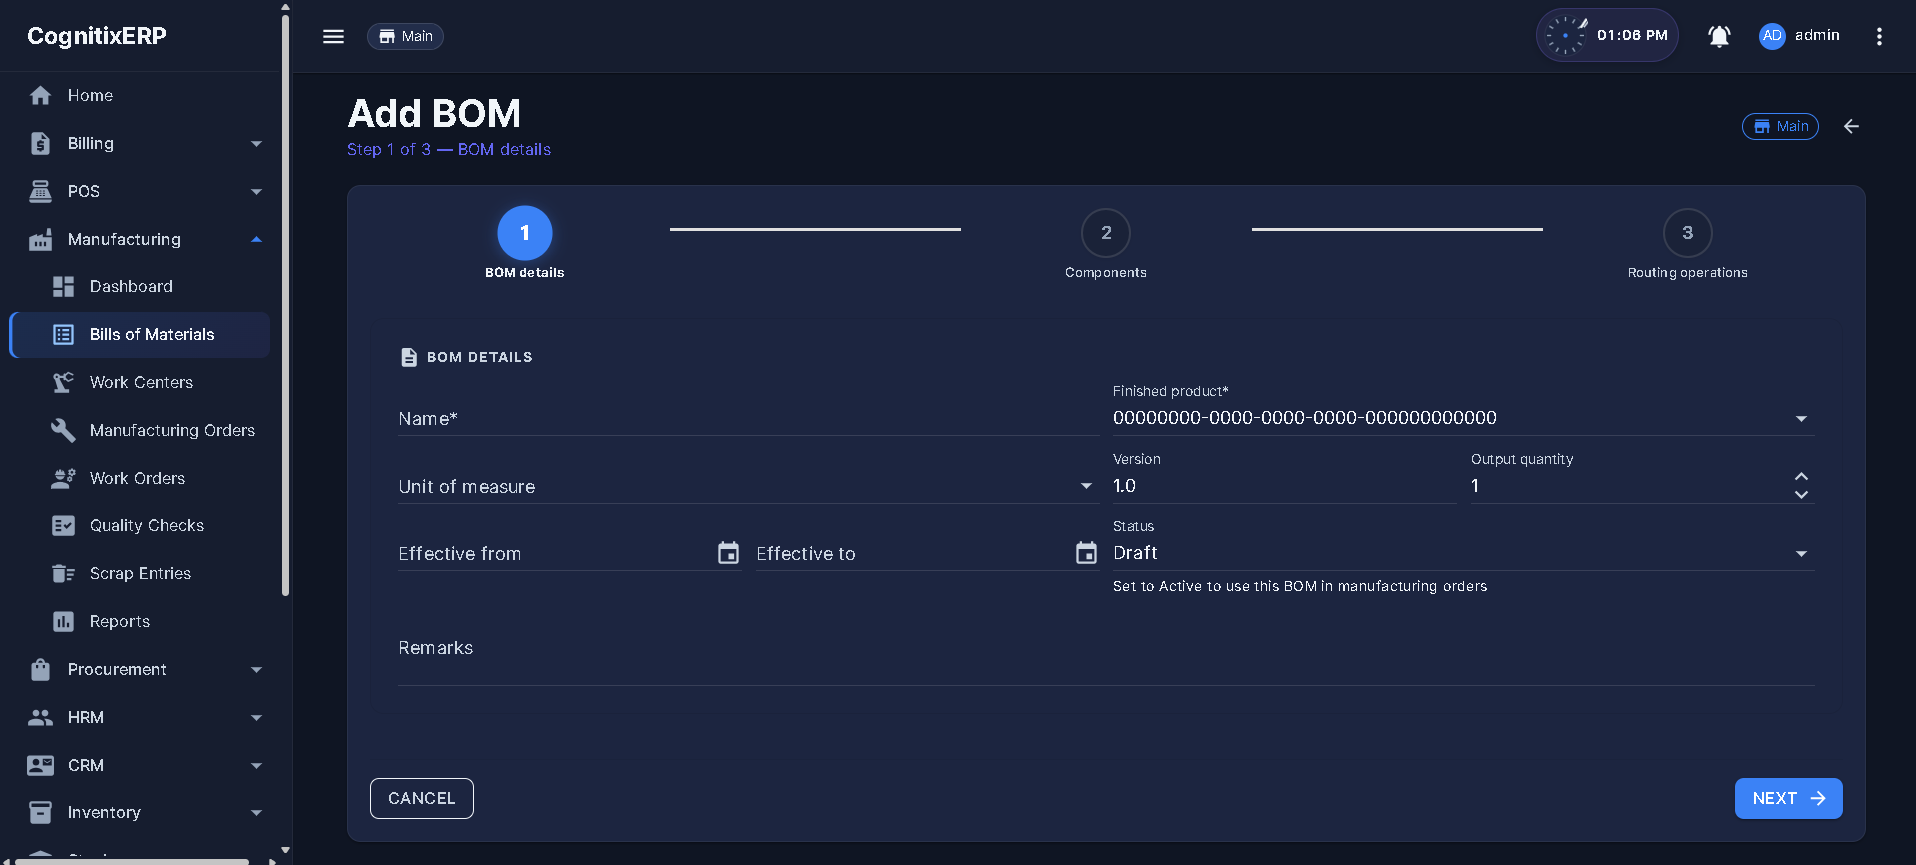
Example — Build a BOM for a finished product
- Open Bill of Materials → New, choose the finished product and output quantity.
- Add component lines (raw materials + quantity per unit + scrap %).
- Add routing operations, each mapped to a work center with an operation time.
- Set status Active.
Result: The BOM is selectable on new manufacturing orders and drives component issue + work-order generation.
Header fields
| Field | Required | Description |
|---|---|---|
| Finished Product | Yes | The product this BOM produces (inventory autocomplete). |
| Reference / Name | No | BOM label — a product can have more than one BOM variant. |
| Quantity | Yes | Output quantity this BOM produces (usually 1 base unit). |
| Branch | Yes | Owning branch. |
| Status | Yes | Draft (editable) or Active (usable on MO). Inactive/archived is hidden from pickers. |
Component lines
| Column | Required | Description |
|---|---|---|
| Component | Per line | Raw material / sub-assembly product. |
| Quantity | Per line | Consumed per one unit of finished product. |
| Unit | Read-only | Component UoM from product master. |
| Scrap % | No | Expected loss — inflates the issued quantity to cover wastage. |
Routing operations
| Column | Required | Description |
|---|---|---|
| Operation | Per line | Name of the shop-floor step (e.g. Cutting, Assembly, Packing). |
| Work Center | Per line | Where the operation runs — becomes the work order's work center. |
| Operation Time | No | Expected minutes/hours — drives work-center cost on the cost sheet. |
| Sequence | No | Execution order of work orders on the shop floor. |
FAQ — Bill of materials
The BOM must be Active. Draft BOMs are editable but not usable on production.
It increases the quantity issued to production to cover expected wastage, so on-hand consumption matches real usage.
Yes — use the Reference/Name to distinguish variants. Choose the correct BOM when creating the manufacturing order.
Part 2 — Production execution
Step 3 — Manufacturing orders (MO)
Menu: Manufacturing → Manufacturing Orders | Routes: /manufacturing/manufacturing-orders · new /manufacturing/manufacturing-orders/new · edit /manufacturing/manufacturing-orders/edit/{id} · details /manufacturing/manufacturing-orders/{id}
The production instruction: make a quantity of one finished product from a selected BOM. Confirming the order reserves/issues component stock, recognizes WIP, and auto-generates work orders from the BOM routing. Completion receives finished goods and posts the WIP → finished-goods journal.
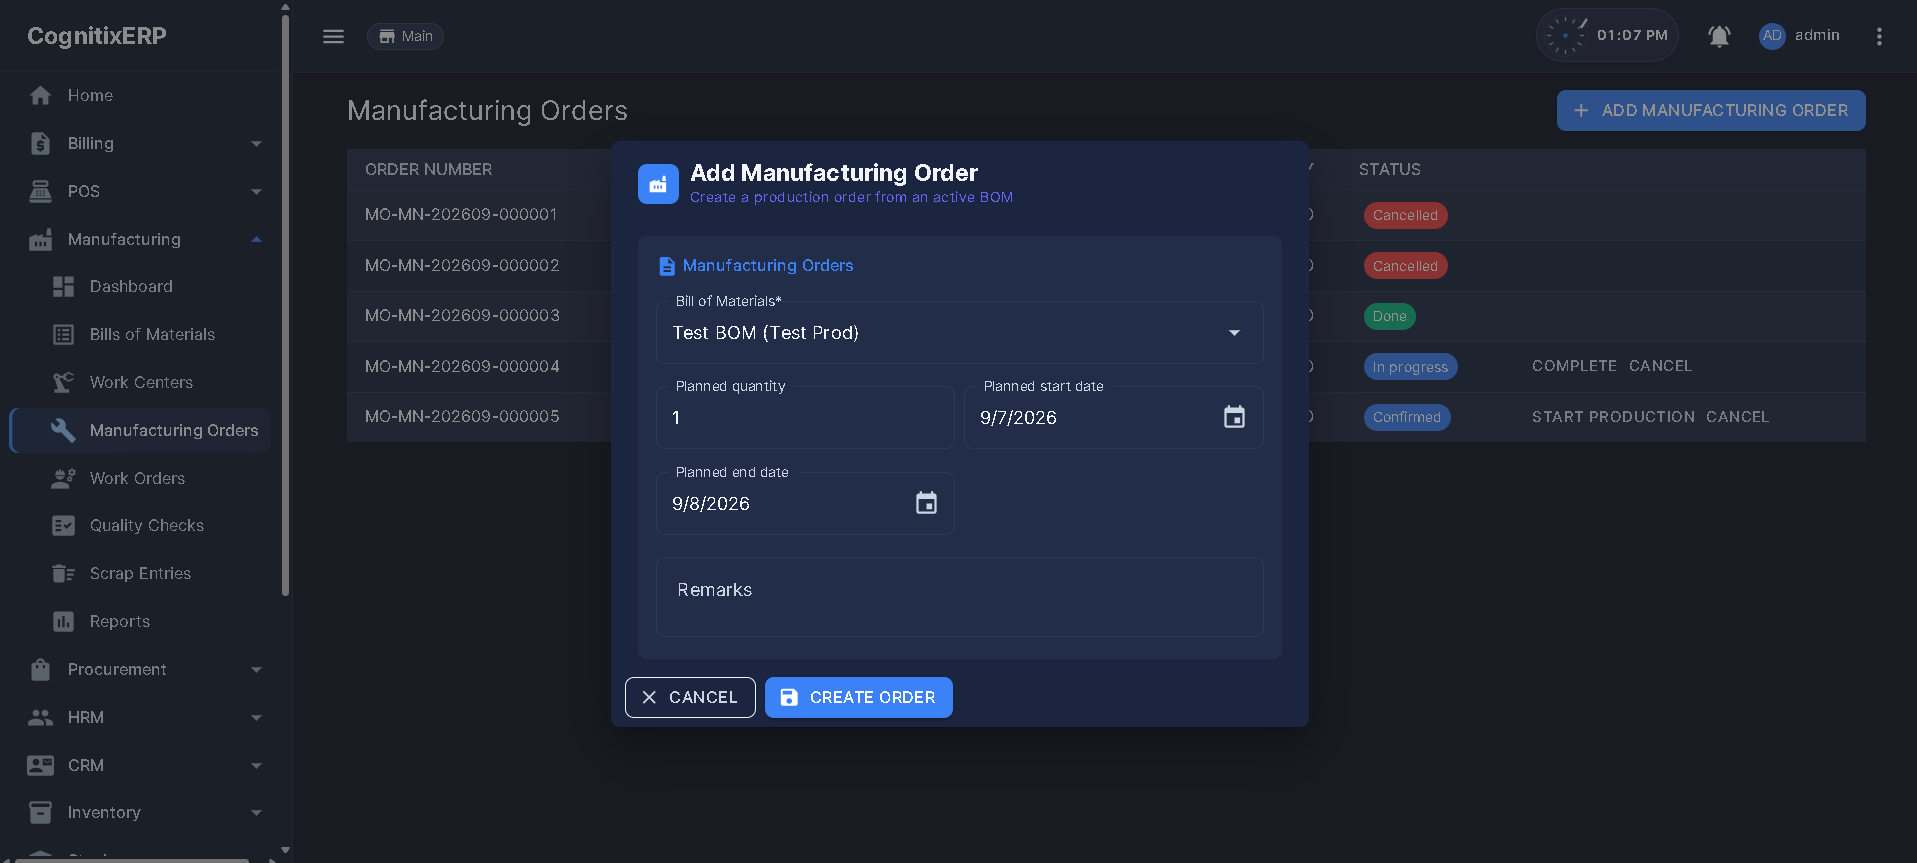
Example — Plan, confirm, and complete a build
- Open Manufacturing Orders → New; select finished product, its Active BOM, quantity, and planned date.
- Confirm — components are issued and work orders appear on the shop floor.
- Complete work orders and required quality checks, then Complete the MO.
Result: Finished goods are received into stock, WIP clears to finished-goods GL, and a production cost sheet is generated.
Status workflow
| Status | Meaning | Stock / GL effect |
|---|---|---|
| Draft | Planned — fully editable. | None. |
| Confirmed | Released to shop floor. | Components issued (stock out); WIP recognized; work orders generated. |
| In Progress | Work orders running. | WIP accumulates operation cost. |
| Done | Completed. | Finished goods received (stock in); WIP → finished-goods GL; cost sheet computed. |
| Cancelled | Voided. | Locked — reverses reservations if not yet issued. |
Header fields
| Field | Required | Description |
|---|---|---|
| Finished Product | Yes | Product to manufacture. |
| Bill of Materials | Yes | Active BOM for the product — sets components and routing. |
| Quantity | Yes | Units to produce — scales component quantities. |
| Branch | Yes | Producing branch — scopes stock issue/receipt. |
| Planned Date | No | Scheduled production date. |
| Scrapped Quantity | Read-only | Rolled up from scrap entries and rejected quality checks against this order. |
| Notes | No | Free-text remarks. |
Edit rule: product, BOM, and quantity are editable only in Draft. After Confirm, the order is edited through work orders, quality checks, and scrap entries.
FAQ — Manufacturing orders
Ensure component stock is available in the producing branch and the BOM is Active. Confirm issues all components in a single transaction; insufficient stock blocks the confirm.
Completion is gated by quality checks. If the BOM/order requires QC, all required checks must pass (or rejected quantity be scrapped) before Complete is allowed.
They are auto-generated from the BOM routing when the MO is confirmed — one work order per routing operation, in sequence.
Step 4 — Work orders (WO)
Menu: Manufacturing → Work Orders | Route: /manufacturing/work-orders
The shop-floor tasks that execute an MO's routing. Work orders are auto-created on MO confirm — one per routing operation — so operators do not create them manually. Each work order tracks the operation, its work center, and progress.
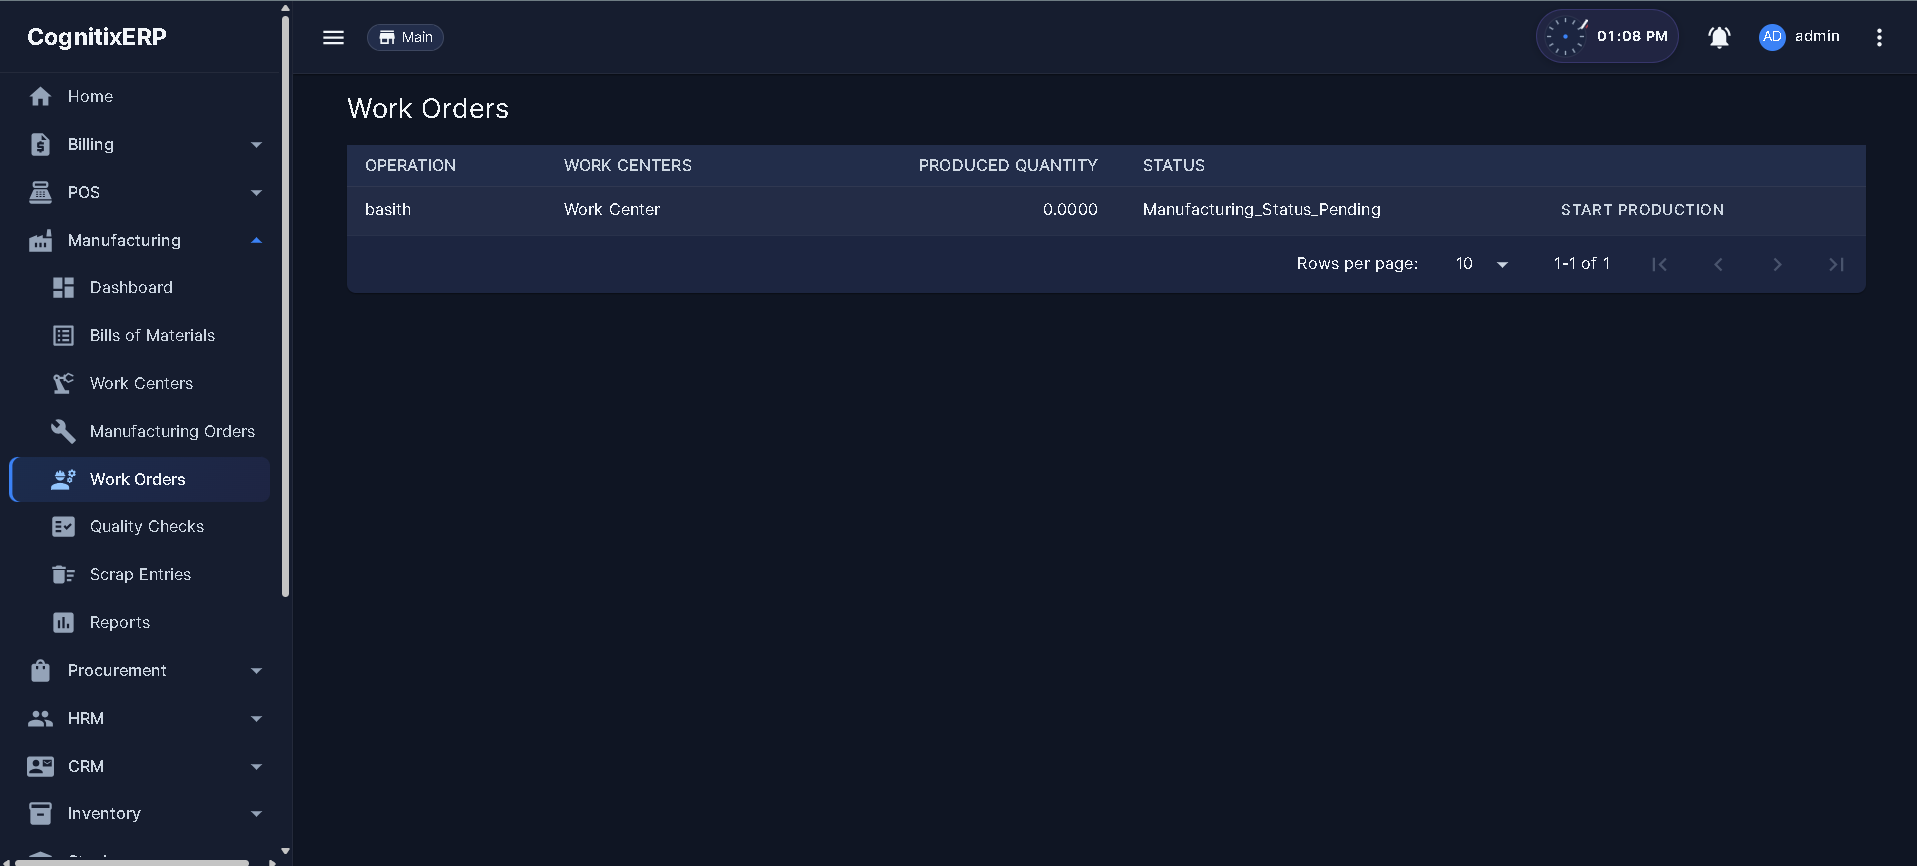
Example — Run an operation
- Open Work Orders, filter by the manufacturing order.
- Start the operation (In Progress), then mark Done when finished.
Result: Operation time accrues to WIP; when all work orders are Done and QC passes, the MO can be completed.
Status workflow
| Status | Meaning |
|---|---|
| Pending | Generated, not started. |
| In Progress | Operation is running on the work center. |
| Done | Operation complete — contributes to MO completion readiness. |
| Cancelled | Voided (e.g. when the MO is cancelled). |
FAQ — Work orders
Work orders come from BOM routing. If the BOM has no routing operations, no work orders are generated — production can still complete without them.
Work orders are driven by routing. Add the operation to the BOM routing (before confirm) rather than creating ad-hoc work orders.
Part 3 — Quality, scrap & costing
Step 5 — Quality checks
Menu: Manufacturing → Quality Checks | Route: /manufacturing/quality-checks
Inspection records against a manufacturing order's output. When a check fails, the rejected quantity is auto-routed to scrap (stock and GL adjusted, MO scrapped quantity rolled up). Manufacturing orders that require quality checks cannot be completed until inspection passes.
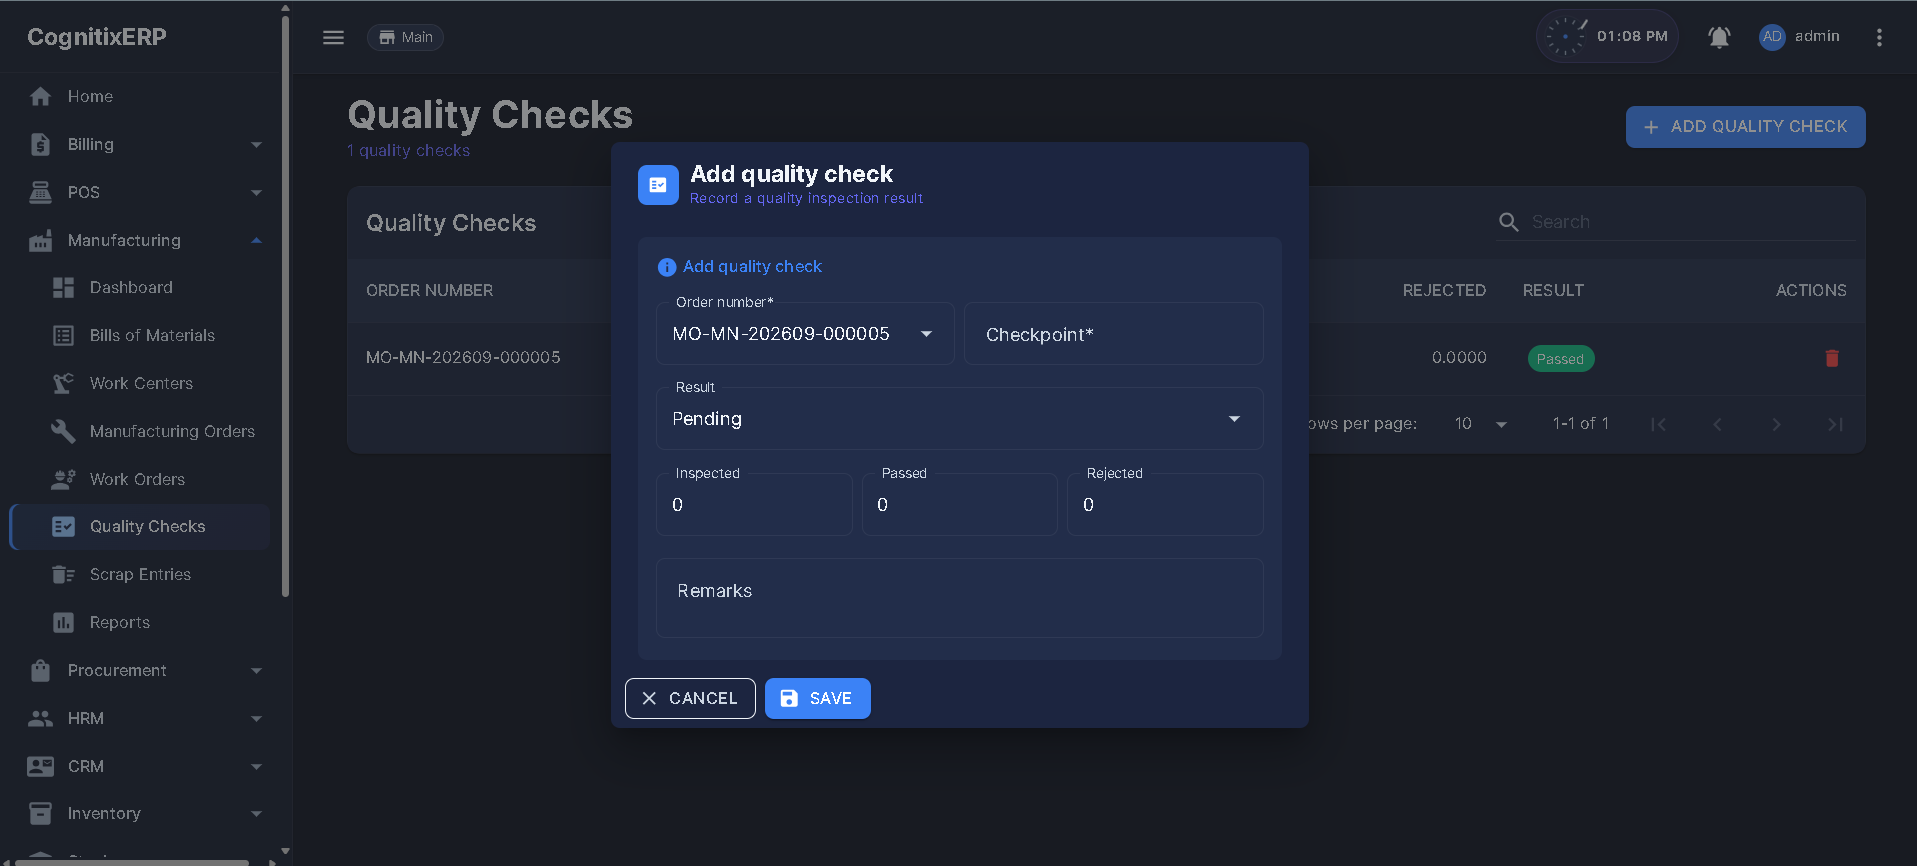
Example — Inspect and reject part of a batch
- Open Quality Checks for the manufacturing order.
- Record inspected quantity, mark accepted vs rejected, and save.
Result: Rejected units auto-create a scrap entry (stock + GL adjusted); the MO's scrapped quantity increases; passed quantity unlocks completion.
Fields
| Field | Required | Description |
|---|---|---|
| Manufacturing Order | Yes | The MO whose output is inspected. |
| Inspected Quantity | Yes | Units checked. |
| Accepted / Rejected Quantity | Yes | Split of inspected units — rejected auto-routes to scrap. |
| Result | Yes | Pass / Fail — gates MO completion. |
| Notes | No | Inspection remarks / defect codes. |
FAQ — Quality checks
A required quality check is missing or failed. Record a passing check (or scrap the rejected quantity) to unlock Complete.
No — rejecting quantity on a quality check auto-creates the scrap entry and adjusts stock, GL, and the MO scrapped-quantity rollup.
Step 6 — Scrap entries
Menu: Manufacturing → Scrap Entries | Route: /manufacturing/scrap-entries
Records material or output lost during production. A scrap entry reduces stock, posts the scrap GL journal, and rolls up into the manufacturing order's Scrapped Quantity. Scrap can be created directly or automatically from a failed quality check.
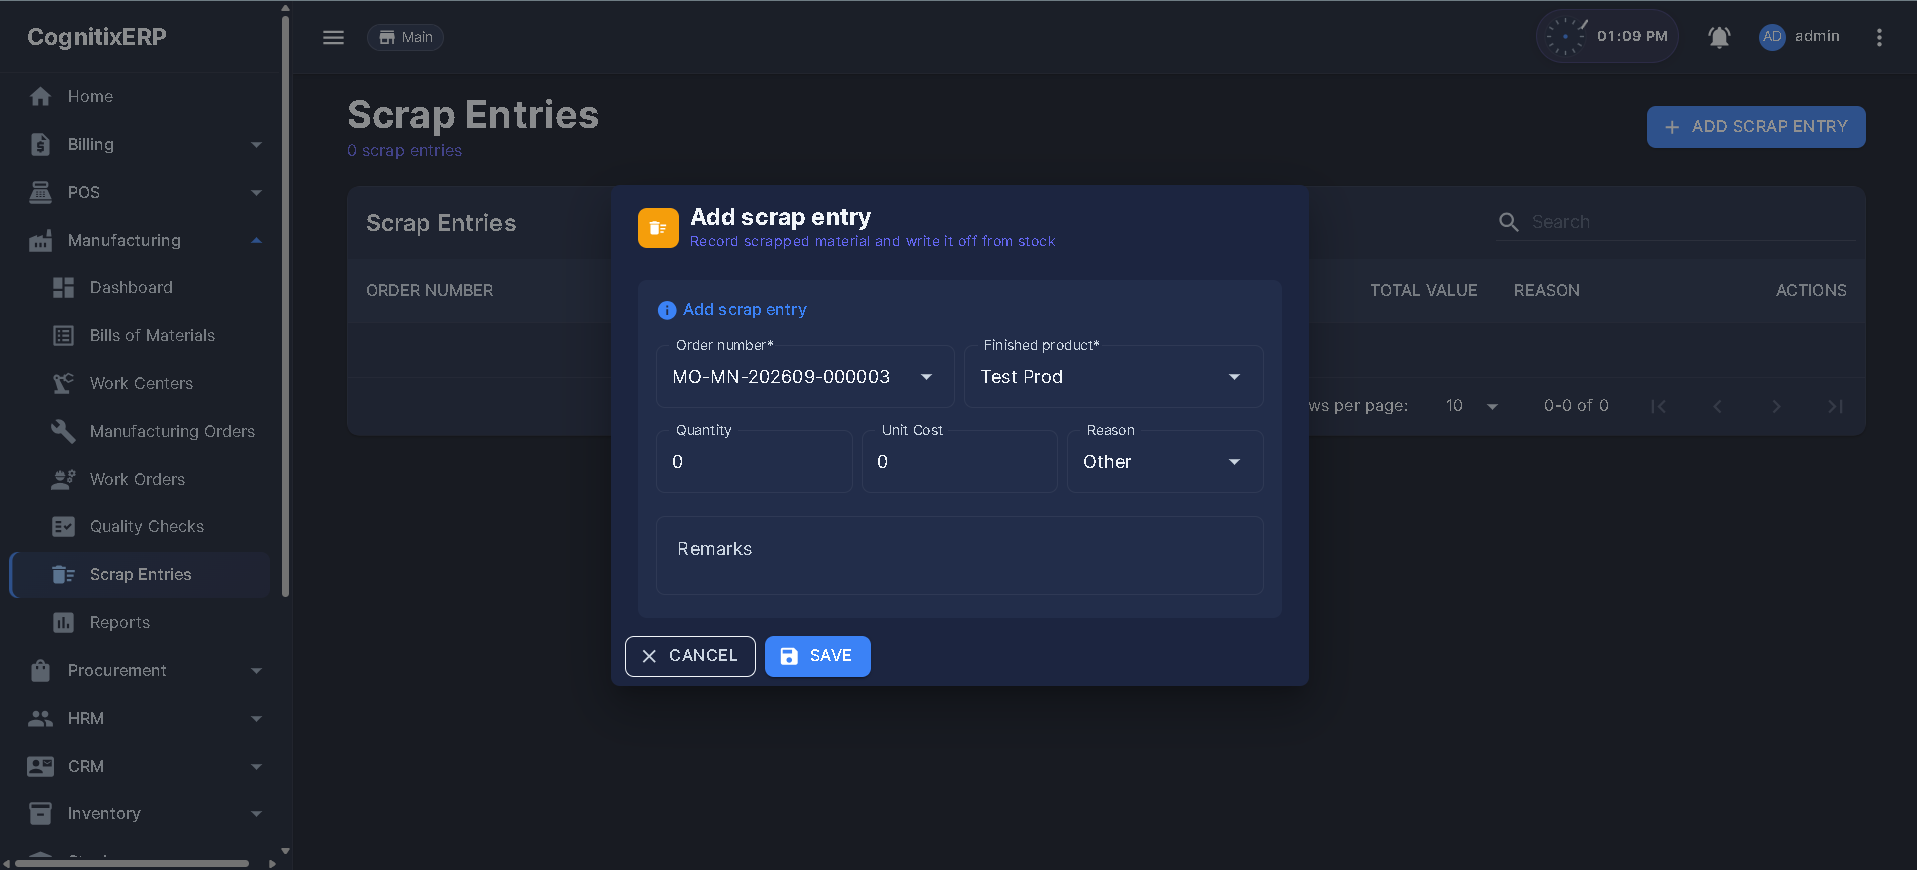
Example — Record damaged output
- Open Scrap Entries → New, select the manufacturing order and product.
- Enter scrapped quantity and reason, then save.
Result: Stock decreases, the scrap journal posts, and the MO scrapped quantity increases.
Fields
| Field | Required | Description |
|---|---|---|
| Manufacturing Order | Yes | The MO the scrap belongs to (drives rollup). |
| Product | Yes | Component or finished good being scrapped. |
| Quantity | Yes | Units scrapped — reduces stock. |
| Reason | No | Defect / loss reason for reporting. |
FAQ — Scrap entries
Ensure the scrap entry is linked to the correct manufacturing order — the Scrapped Quantity rollup is per MO.
Step 7 — Production cost sheets
Menu: Manufacturing → Cost Sheets | Route: /manufacturing/cost-sheets
The costing summary generated when a manufacturing order completes. It totals material cost (issued components), operation cost (work-center time × rate), and overhead, then compares planned vs actual to report quantity variance and yield percentage.
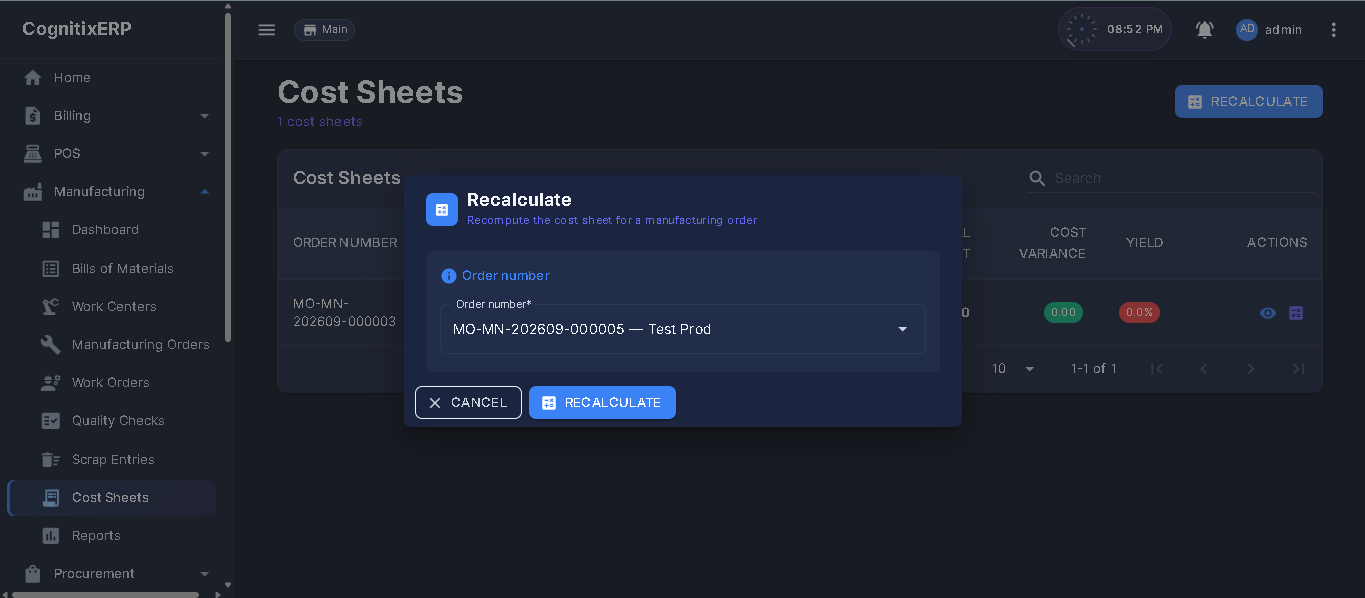
What it reports
| Line | Description |
|---|---|
| Material cost | Value of components issued to the order (at costing method). |
| Operation cost | Work-center time × cost/hour across routing operations. |
| Overhead | Applied indirect production cost. |
| Quantity variance | Planned output minus actual good output (excludes scrap). |
| Yield % | Good output ÷ planned output — production efficiency indicator. |
FAQ — Cost sheets
Scrap and rejected quality quantity reduce good output. Yield = good output ÷ planned output, so scrap lowers the percentage.
Automatically when the manufacturing order is completed (status Done). It captures rates and quantities at that moment.
Step 8 — Reports
Menu: Manufacturing → Reports | Route: /manufacturing/reports
Production analytics — order throughput, work-center utilization, quality pass/fail, scrap totals, and cost variance/yield trends. Each report honours its own permission in addition to the reports hub.
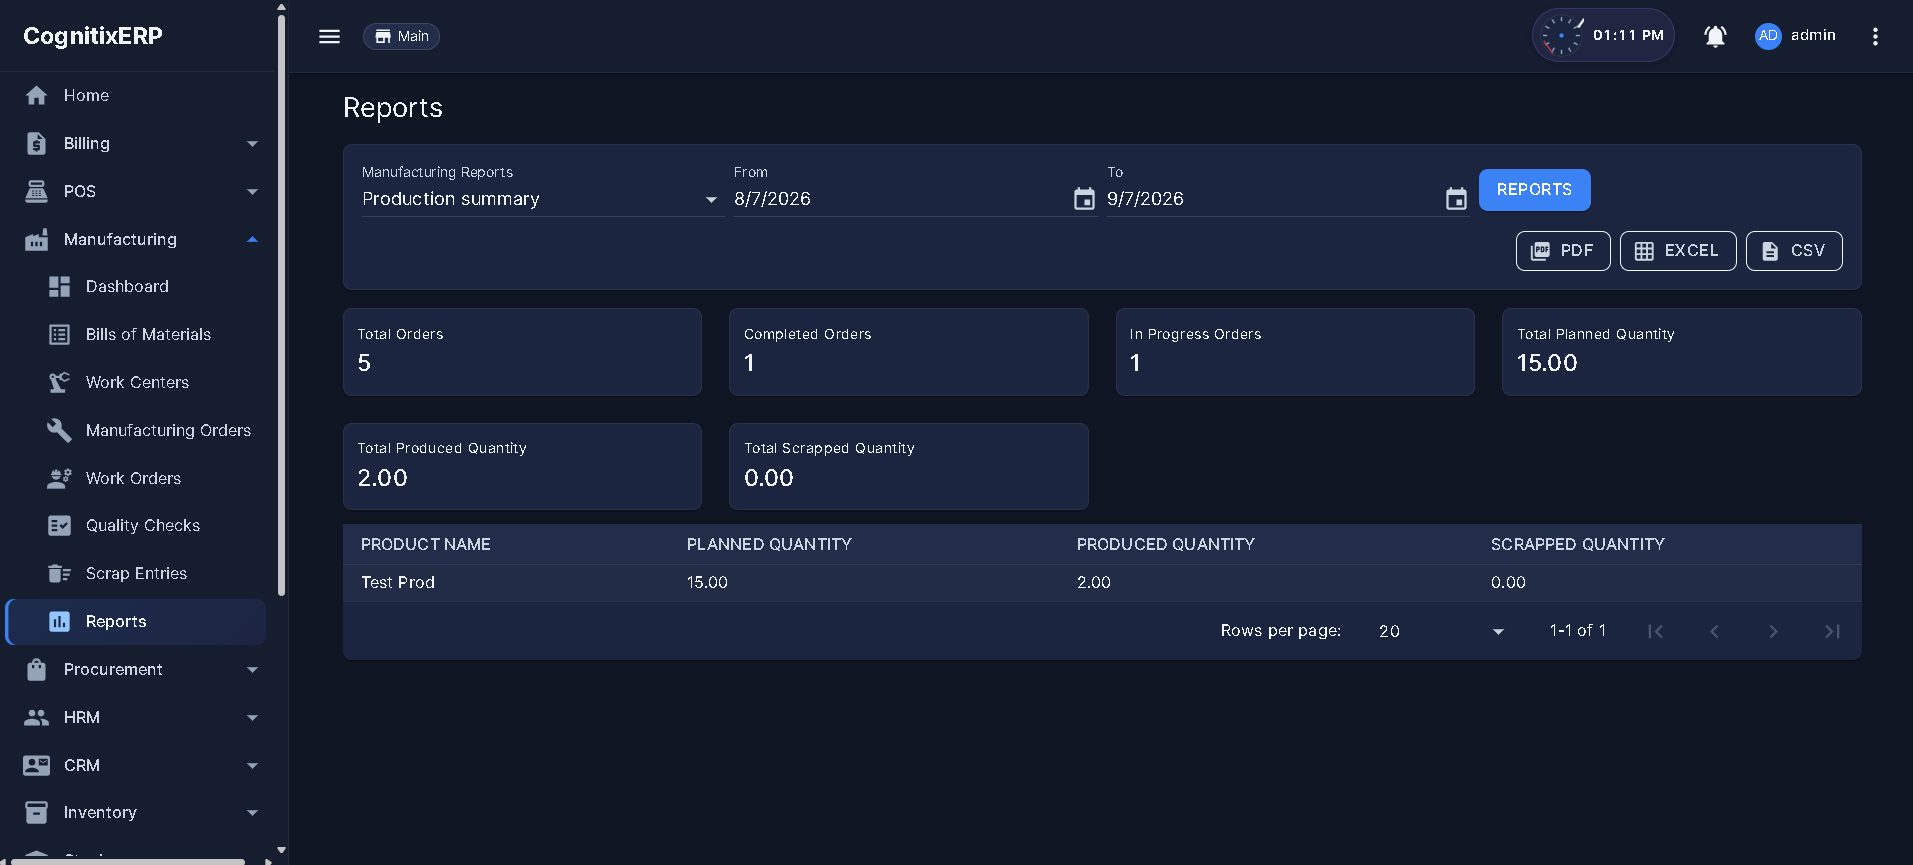
Cross-module integration
| Trigger | Module | Effect |
|---|---|---|
| MO Confirm (component issue) | Stock / Inventory | Production issue reduces component on-hand at the producing branch. |
| MO Complete (finished goods) | Stock | Production receipt increases finished-goods on-hand. |
| MO Confirm / Complete | Financials | WIP recognition and WIP → finished-goods journal via the manufacturing completion event. |
| Quality reject / Scrap | Financials / Stock | Scrap reduces stock and posts the scrap GL journal. |
| Routing operation cost | HRM (rate) | Work-center cost/hour drives the operation cost line on the cost sheet. |
| Make-to-order demand | Billing (Sales) | Sales demand can drive a manufacturing order for the finished product. |
Before go-live checklist
| Task | Depends on |
|---|---|
| Confirm WIP clearing + manufacturing GL mappings exist | Financials |
| Create work centers with capacity + cost/hour | Work Centers |
| Build and activate BOMs for finished products | Bill of Materials · Products |
| Ensure component stock on hand in producing branch | Stock |
| Grant Manufacturing page permissions per role | Roles |
| Run one test MO end-to-end (confirm → work orders → QC → complete) | All of the above |
Recruitment
Recruitment manages the hire-to-offer pipeline: job requisitions, public career postings, candidate records, applications, interviews, offers, and hiring analytics. Hired candidates can be converted into HRM employees. The public Careers page does not require a login.
Recommended setup order
Routes at a glance
Navigation & permissions
| Menu path (Recruitment) | Route | Permission page |
|---|---|---|
| Recruitment → Requisitions | /recruitment/requisitions | Recruitment |
| Recruitment → Postings | /recruitment/postings | Recruitment |
| Recruitment → Candidates | /recruitment/candidates | Recruitment |
| Recruitment → Applications | /recruitment/applications | Recruitment |
| Recruitment → Careers | /careers | Recruitment (public apply) |
| Recruitment → Reports | /recruitment/reports | RecruitmentReports |
Step 1 — Job requisitions
Menu: Recruitment → Requisitions | Route: /recruitment/requisitions
A requisition is the internal request to hire. Capture title, headcount, department, employment type, and stage. Submit for approval when your workflow requires it.
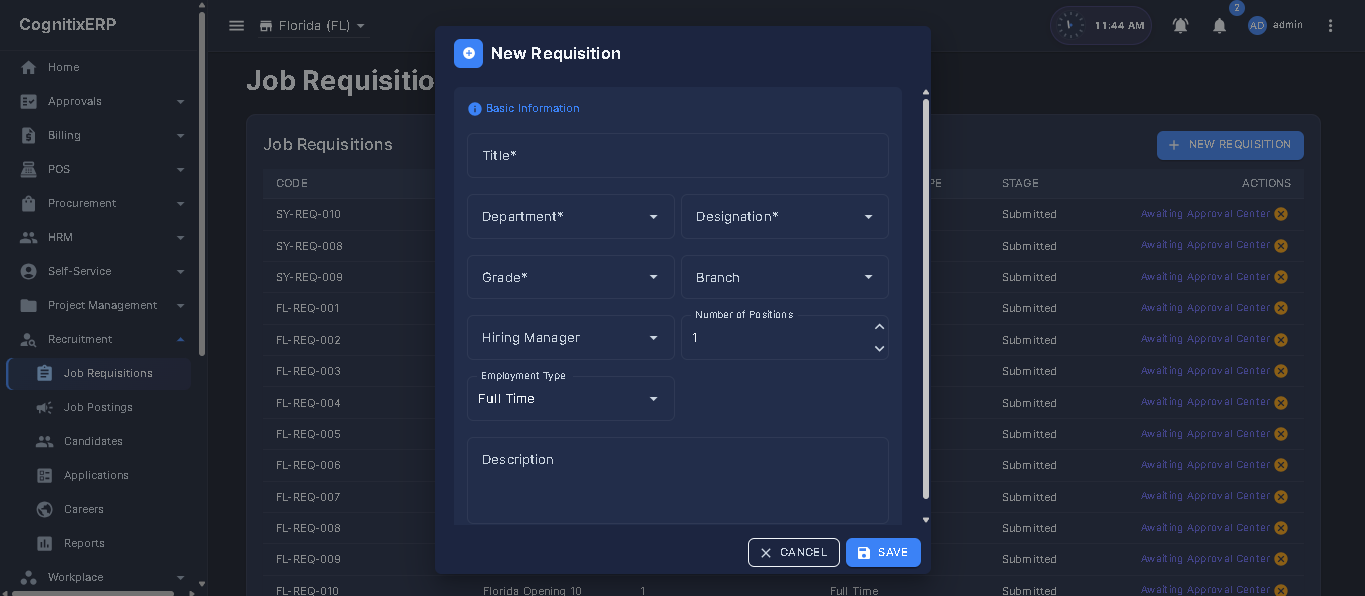
Example — Open two sales-executive seats
- Click New requisition.
- Title:
Sales Executive, Positions:2, Employment type: Full-time. - Save, then submit when the request is ready for approval.
Result: Recruiters can attach postings and applications to this requisition.
Step 2 — Job postings
Menu: Recruitment → Postings | Route: /recruitment/postings
Publish a posting from an approved requisition. Set the public description, location, and open/close dates. Only published postings appear on Careers.
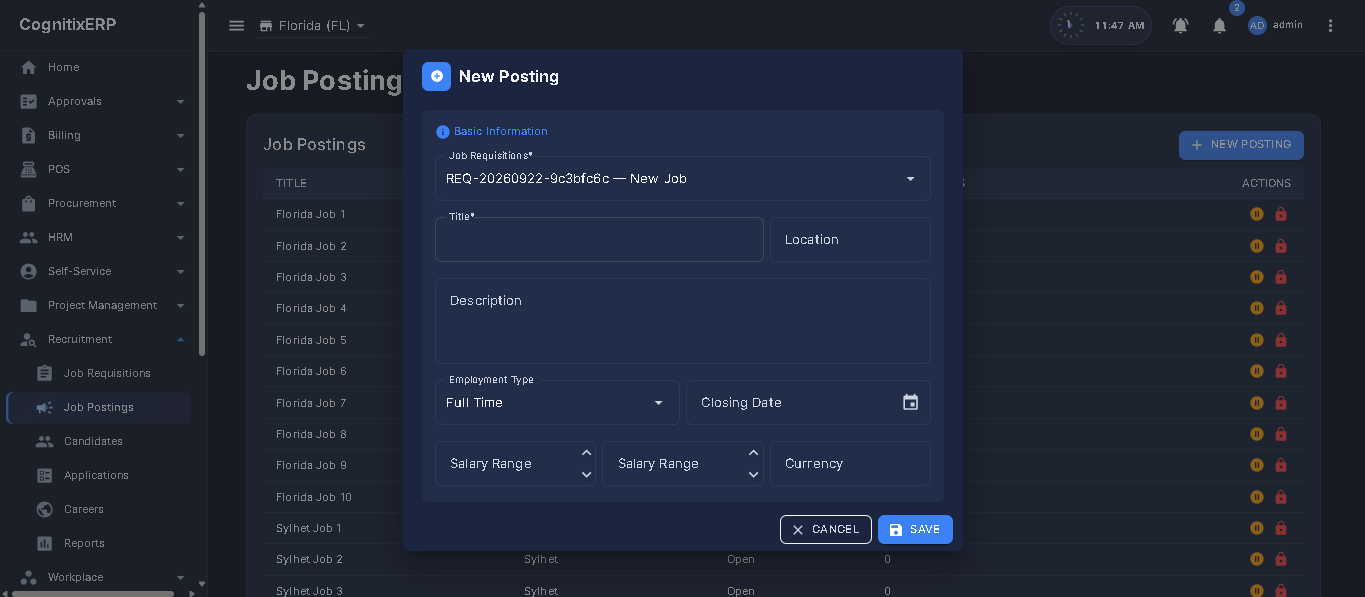
Step 3 — Public careers page
Route: /careers (no login required to browse or apply)
Share this URL on your website. Applicants submit a form; CognitixERP creates the candidate and application records for HR to review.
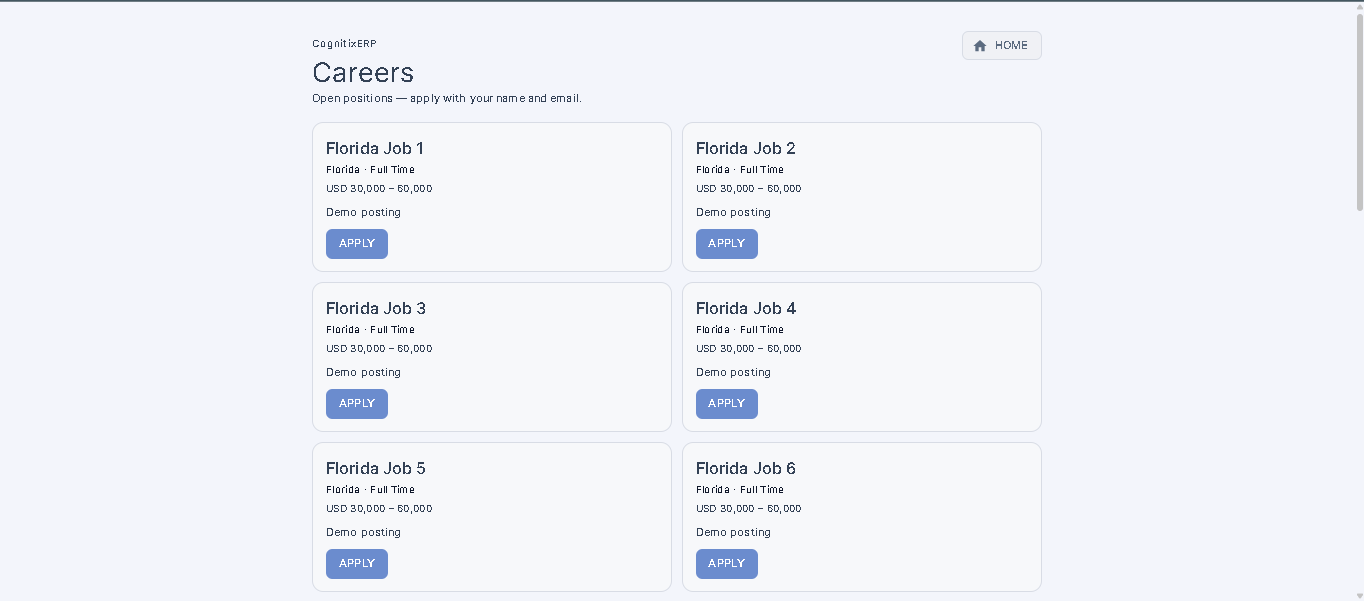
Step 4 — Candidates
Menu: Recruitment → Candidates | Route: /recruitment/candidates
Maintain the talent pool: name, contact, source, and notes. Applications from Careers attach automatically.
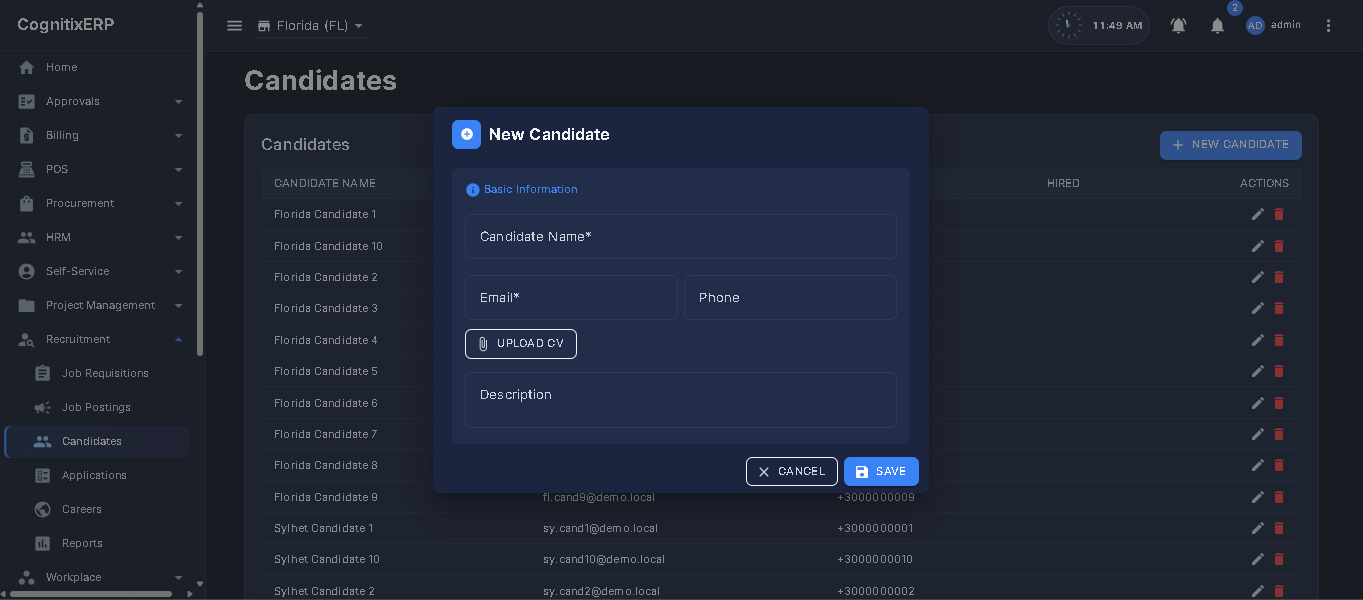
Step 5 — Applications, interviews, and offers
Menu: Recruitment → Applications | Route: /recruitment/applications
Move each application through screening, interview stages, disposition, and offer. Record interview results and offer acceptance from the application row actions. Backend rules prevent invalid stage jumps.
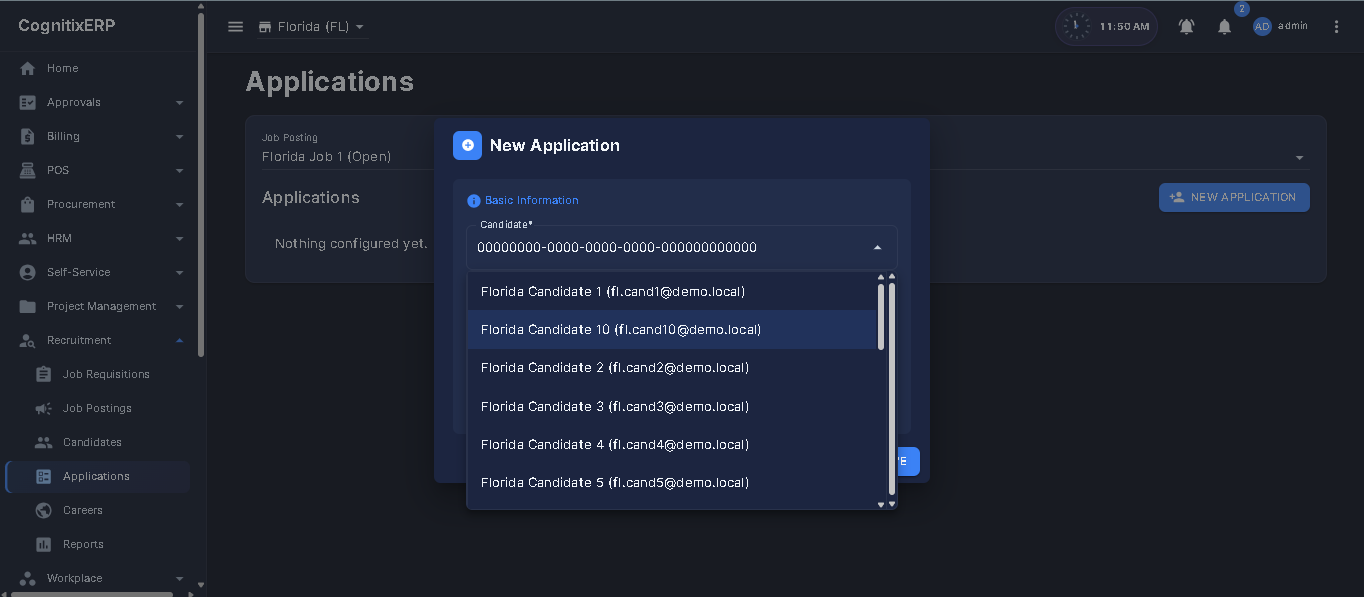
Example — Interview then offer
- Open an application and add an interview stage (date, interviewer).
- Record the result (pass / fail).
- Create an offer (salary, start date) and mark accepted or declined.
Result: Time-to-hire and offer-acceptance reports pick up the dates automatically.
Step 6 — Recruitment reports
Menu: Recruitment → Reports | Route: /recruitment/reports
Manufacturing-style hub. Each report exports PDF, Excel, and CSV.
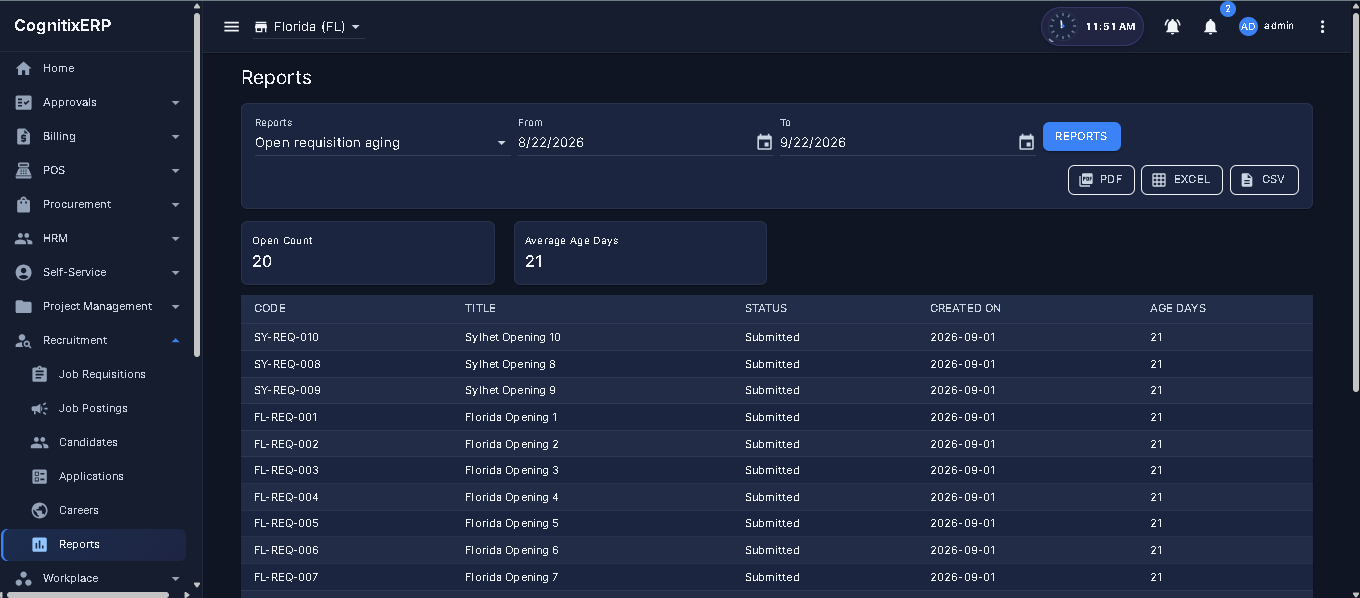
| Report | Use it for |
|---|---|
| Pipeline summary | Counts by application stage. |
| Time to hire | Days from requisition to accepted offer. |
| Source effectiveness | Which candidate sources convert. |
| Requisition / application / offer registers | Line-level operational lists. |
| Interview outcome | Pass vs fail by stage. |
| Offer acceptance | Accepted vs declined offers. |
| Open requisition aging | Unfilled seats waiting too long. |
Employee Self Service (ESS)
ESS is the employee-facing workspace. Staff who are linked to an HRM employee record can view their dashboard, attendance, shift swaps, expense and travel requests, document requests, policies, announcements, and workplace training/assets. Managers with approve rights act on submitted requests from the same screens and from the Approval Center.
Recommended flow
Routes at a glance
Navigation & permissions
| Menu path (Self Service) | Route | Permission page |
|---|---|---|
| Self Service → Dashboard | /ess/dashboard | EssDashboard |
| Self Service → My Attendance | /hrm/my-attendance | EssDashboard / DailyAttendance |
| Self Service → Kiosk | /hrm/kiosk | DailyAttendance |
| Self Service → Shift Swap | /hrm/shift-swap | EssRequests |
| Self Service → Requests | /ess/requests | EssRequests |
| Self Service → My Records | /ess/my-records | EssRequests |
| Self Service → Workplace | /ess/workplace | EssRequests |
| Self Service → Policies | /ess/policies | EssPolicies |
| Self Service → Announcements | /ess/announcements | EssAnnouncements |
| Self Service → Reports | /ess/reports | EssReports |
When the ESS module is visible, My Attendance, Kiosk, and Shift Swap move under Self Service so HR-only users still keep those links under HRM.
Step 1 — ESS Dashboard
Leave balance, present days, pending requests, and unread policies. Quick actions jump to attendance and requests.
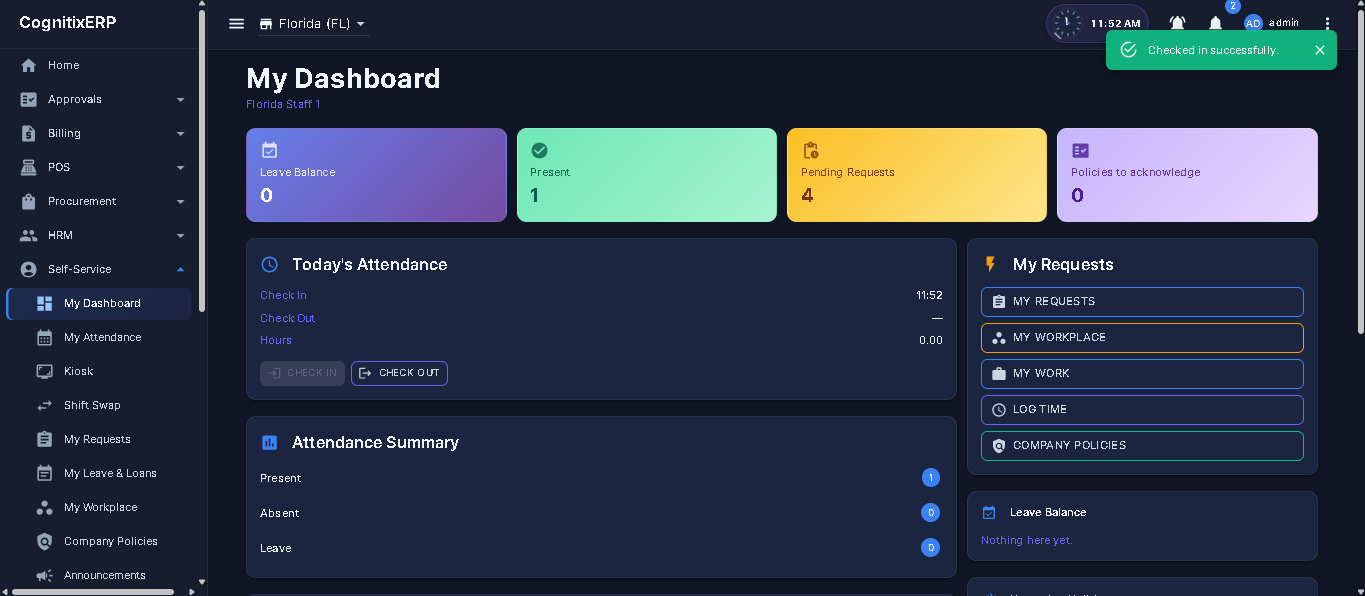
Step 2 — My attendance
Personal calendar of present / absent / leave. Punch in/out follows HRM attendance policy (grace, week-off, cut-off).
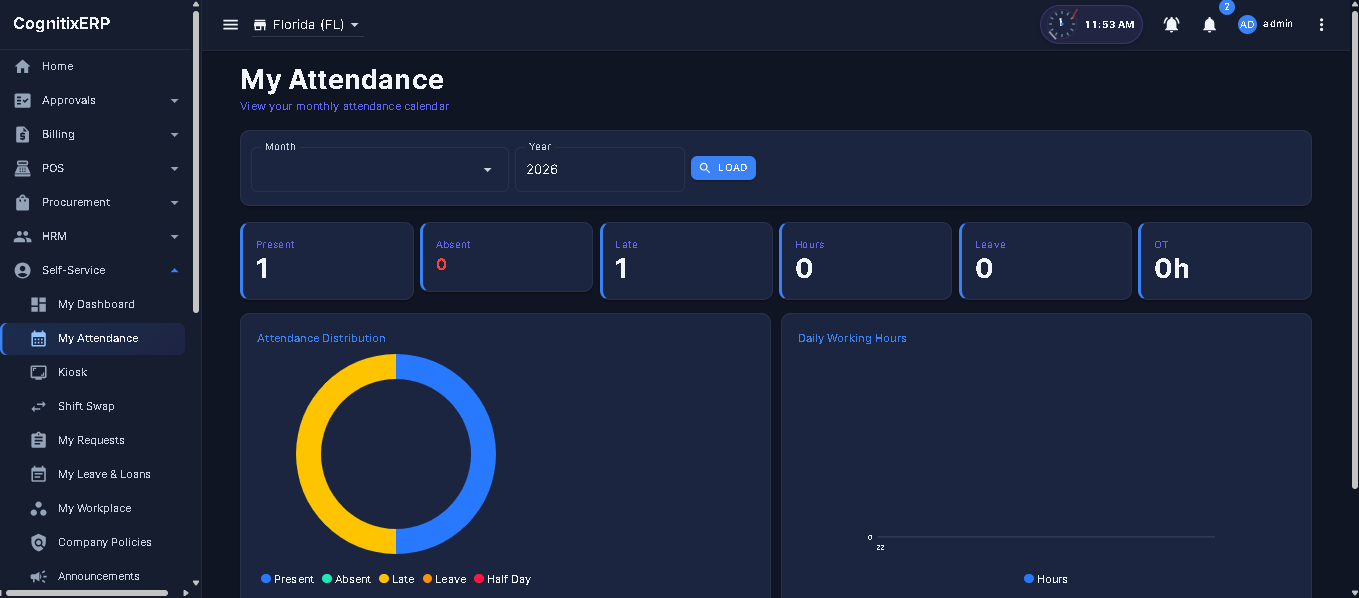
Step 3 — Attendance kiosk
Shared terminal for clock-in. Useful on the shop floor or reception. The same HRM attendance rules apply.
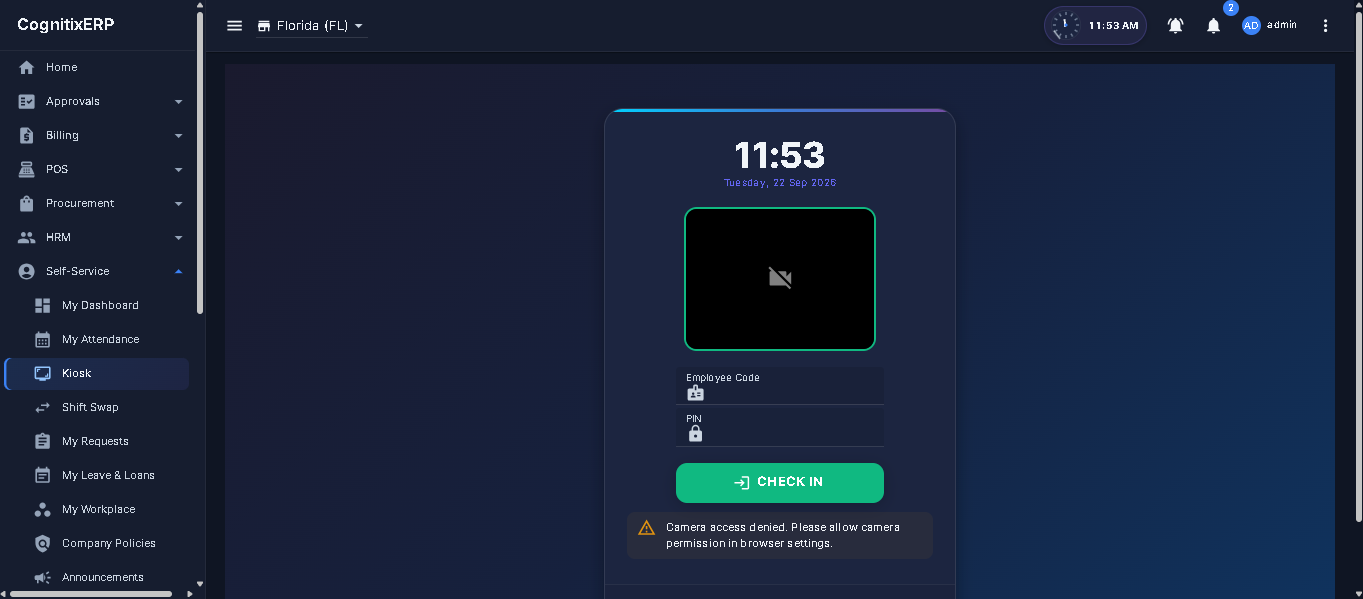
Step 4 — Shift swap
Request to swap a scheduled shift with a colleague. The other employee and a supervisor confirm before HRM assignments change.
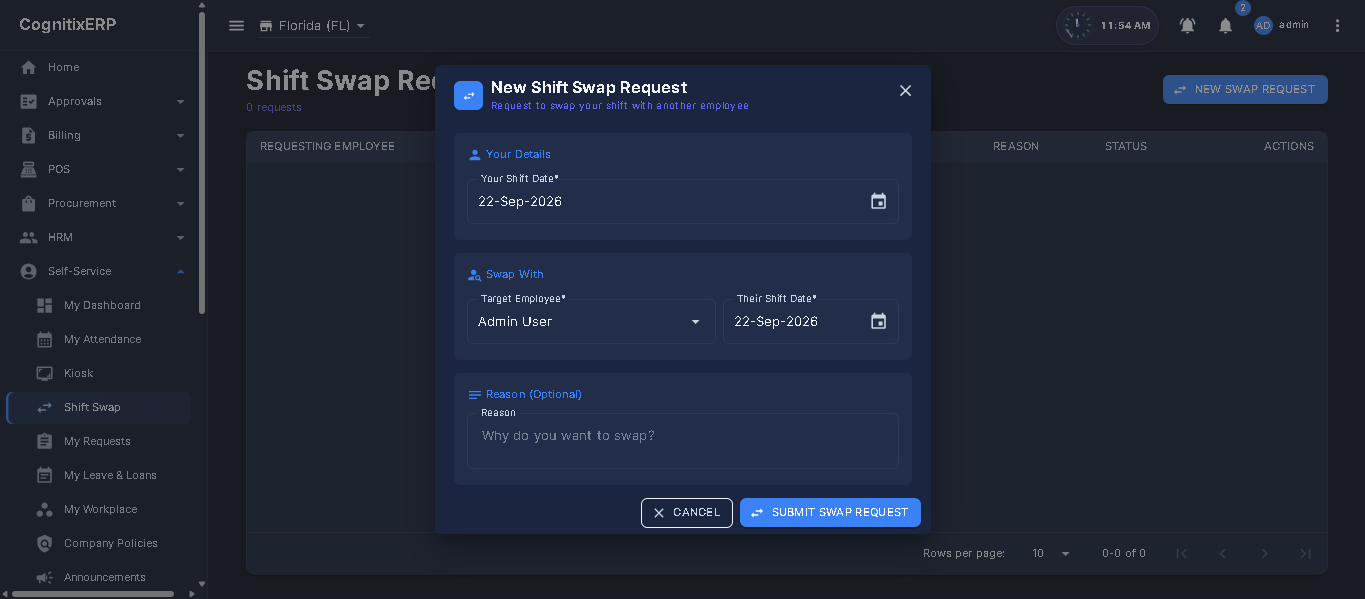
Step 5 — Requests (expense, reimbursement, travel, documents, self-appraisal)
One page with tabs. Draft → Submit → Approve / Reject. Attach receipts where required. Document requests can be issued as a file by an approver.
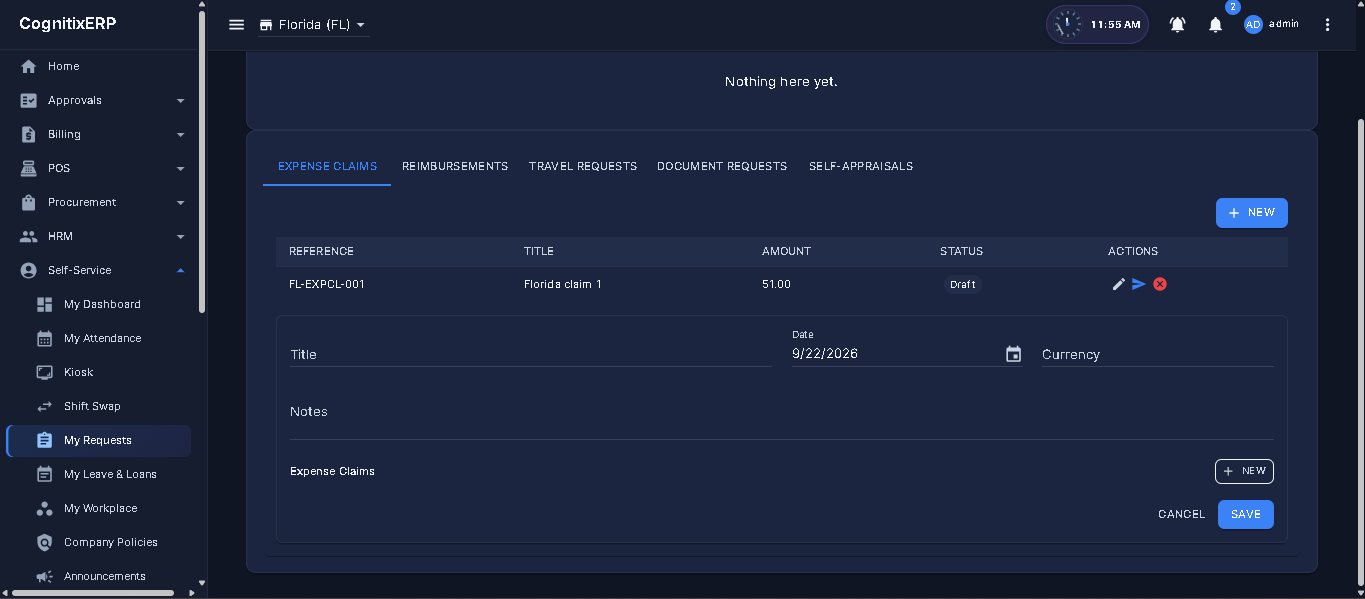
Example — Submit a taxi expense
- Open Requests → Expense and click New.
- Add a Travel line for the taxi amount and save as draft.
- Submit. Your manager approves from the same page or Approval Center.
Result: The claim appears on ESS expense-register reports after approval.
Step 6 — My records
Read-only history of the employee’s own submitted requests and outcomes.
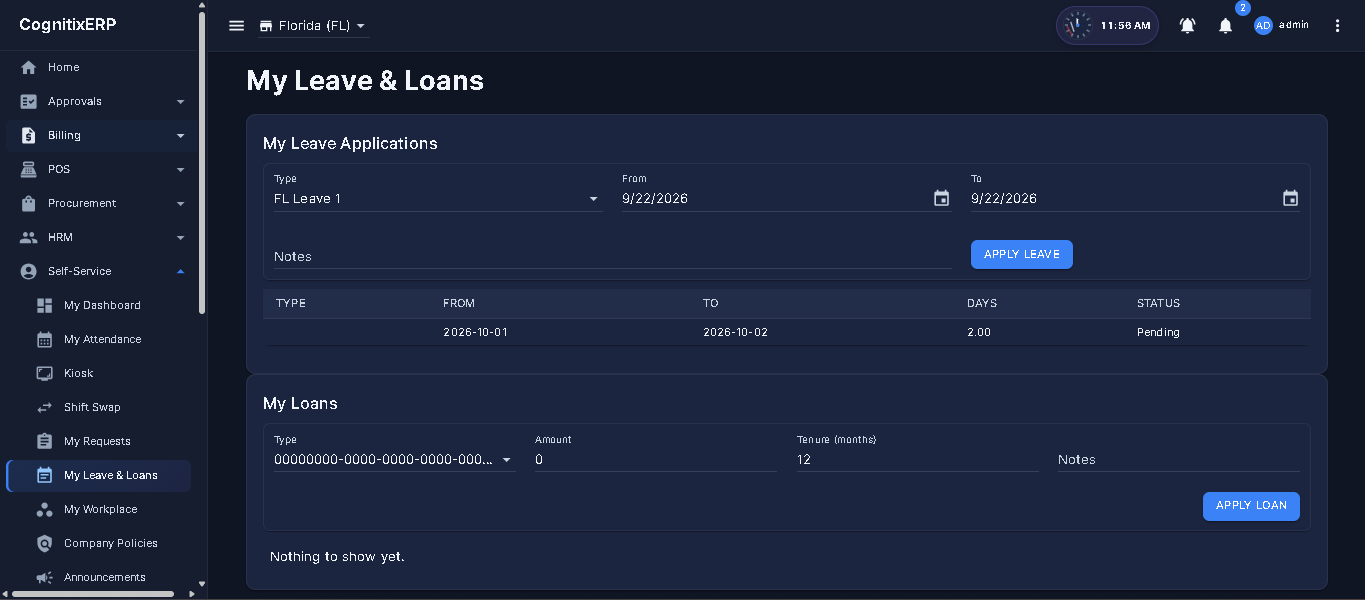
Step 7 — ESS Workplace
Training enrollments and allocated company assets for the logged-in employee. HR manages the catalog in the Workplace module.
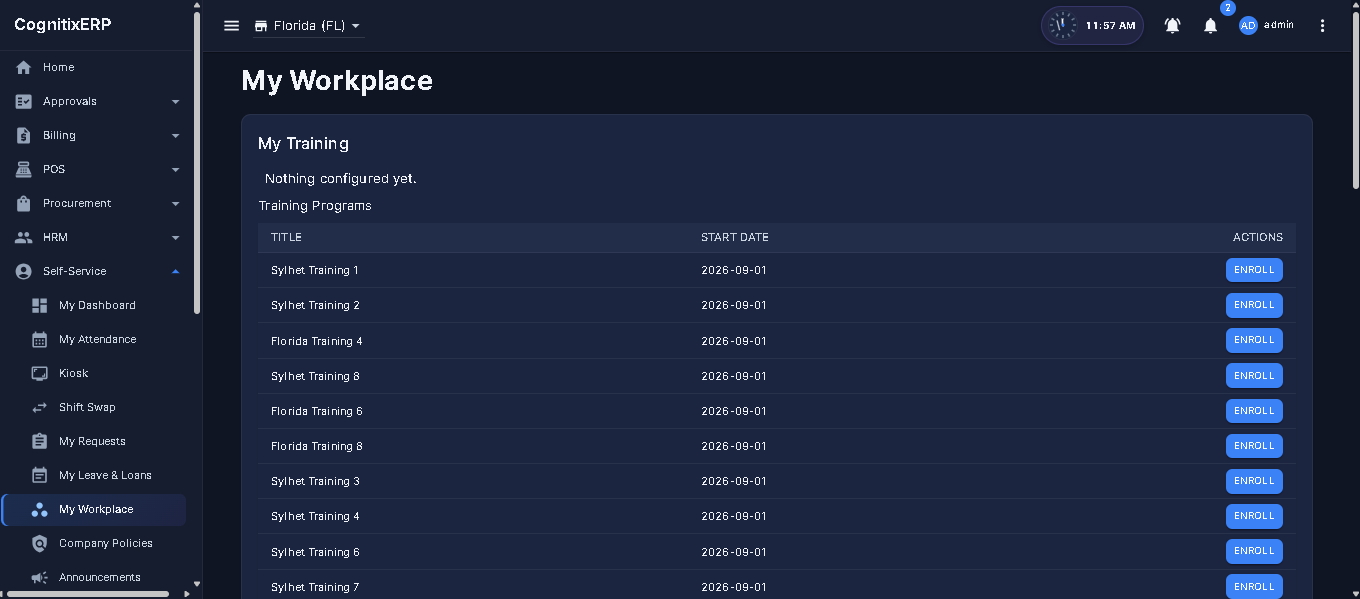
Step 8 — Policies
HR publishes company policies. Employees acknowledge them. Pending acknowledgements appear on the dashboard.
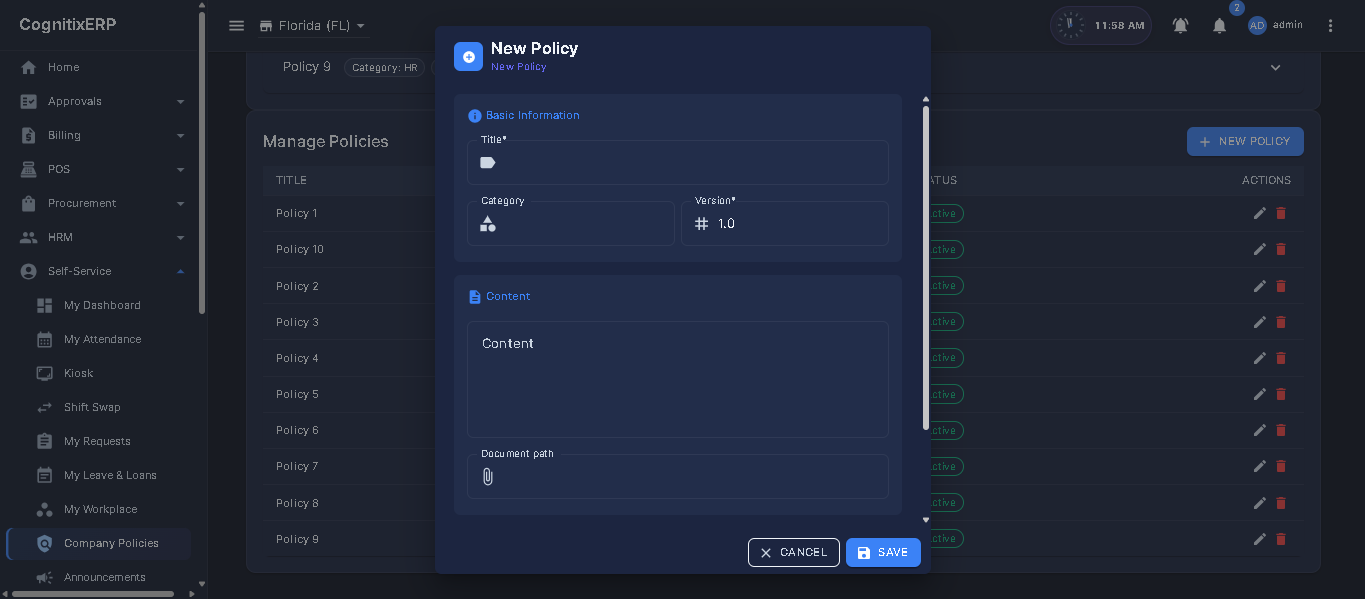
Step 9 — Announcements
Company-wide or audience-targeted notices. Editors need EssAnnouncements Create/Edit.
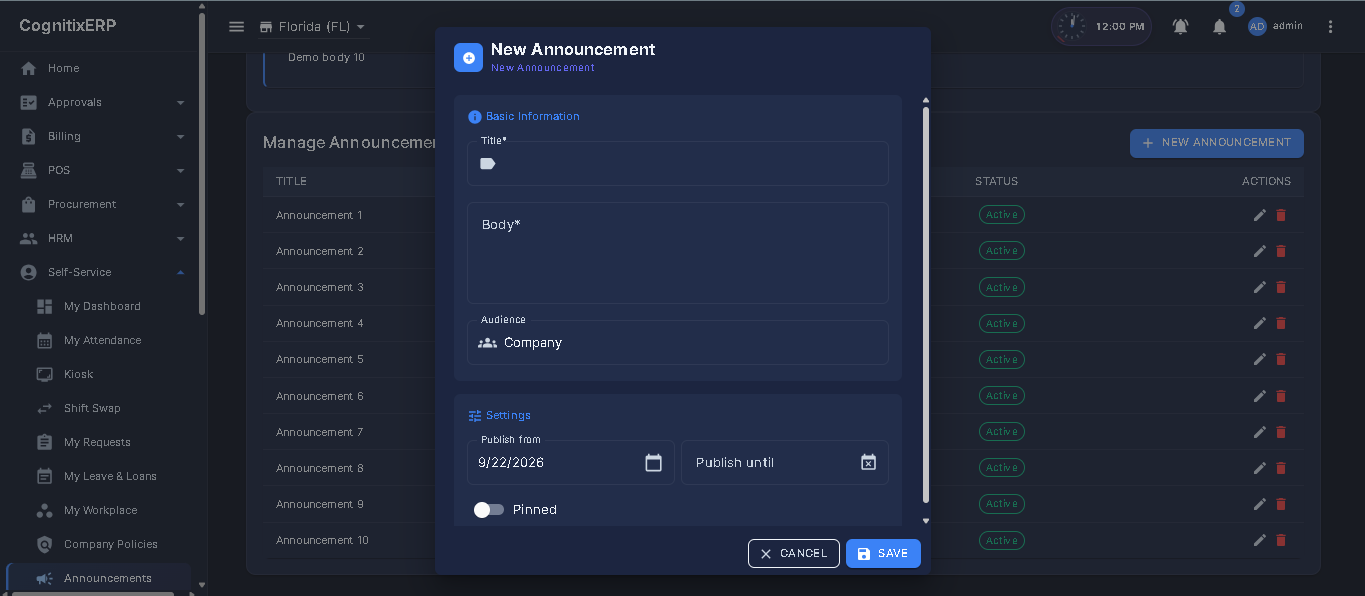
Step 10 — ESS reports
Same hub as Manufacturing. Export PDF, Excel, and CSV.
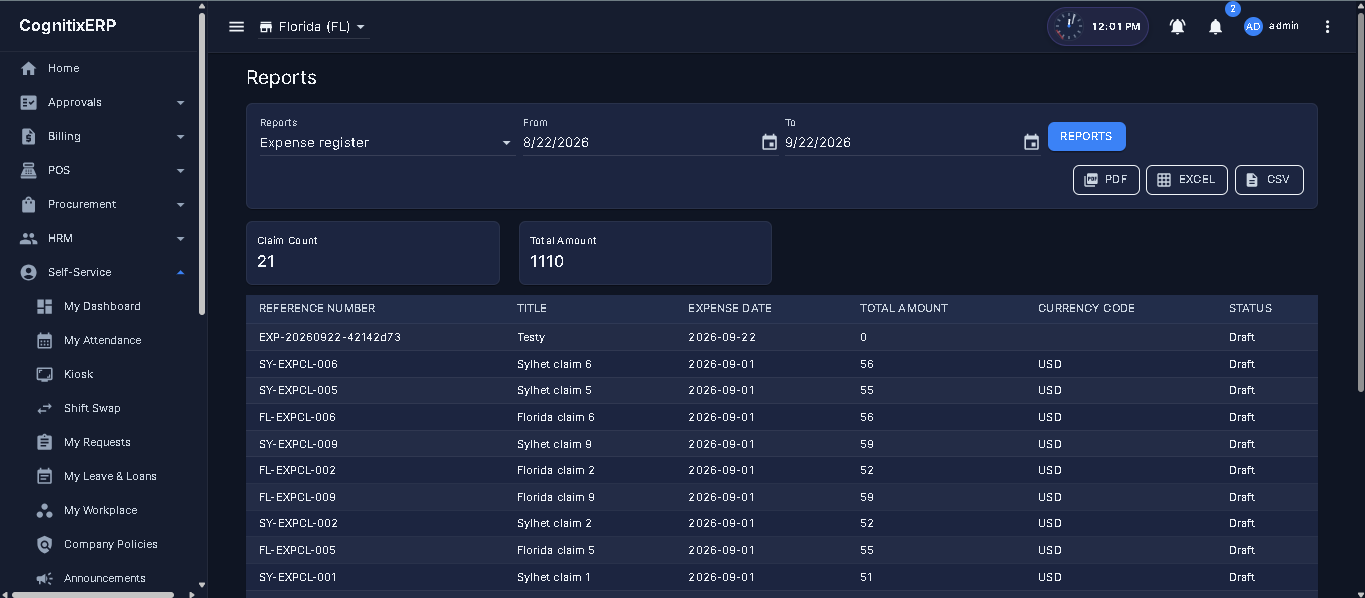
| Report | Use it for |
|---|---|
| Expense register | All expense claims. |
| Travel register | Travel requests and dates. |
| Document register | Letter / certificate requests. |
| Reimbursement register | Receipt-backed reimbursements. |
| Self-appraisal completion | Who finished self-appraisals. |
| Pending ESS approvals | Queue waiting on managers. |
Workplace
Workplace covers internal enablement: training programs (sessions, enrollment, scores), company assets (allocate, return, loss/damage), and surveys. Employees consume training and assets from ESS Workplace; HR and facilities staff manage the catalogs here.
Recommended setup order
Routes at a glance
Navigation & permissions
| Menu path (Workplace) | Route | Permission page |
|---|---|---|
| Workplace → Training | /workplace/training | Training |
| Workplace → Assets | /workplace/assets | Assets |
| Workplace → Surveys | /workplace/surveys | Surveys |
| Workplace → Reports | /workplace/reports | WorkplaceReports |
| Workplace → ESS Workplace | /ess/workplace | EssRequests |
Step 1 — Training programs
A training program is the container for a learning activity (for example New-Hire Onboarding or Fire Safety 2026). Each program owns its sessions (the actual classes) and its enrollments (the employees taking part). You build a program through four stages: Program → Sessions → Enrollment → Completion. All business rules run on the backend, so the status guards described below are enforced on the server, not just in the UI.
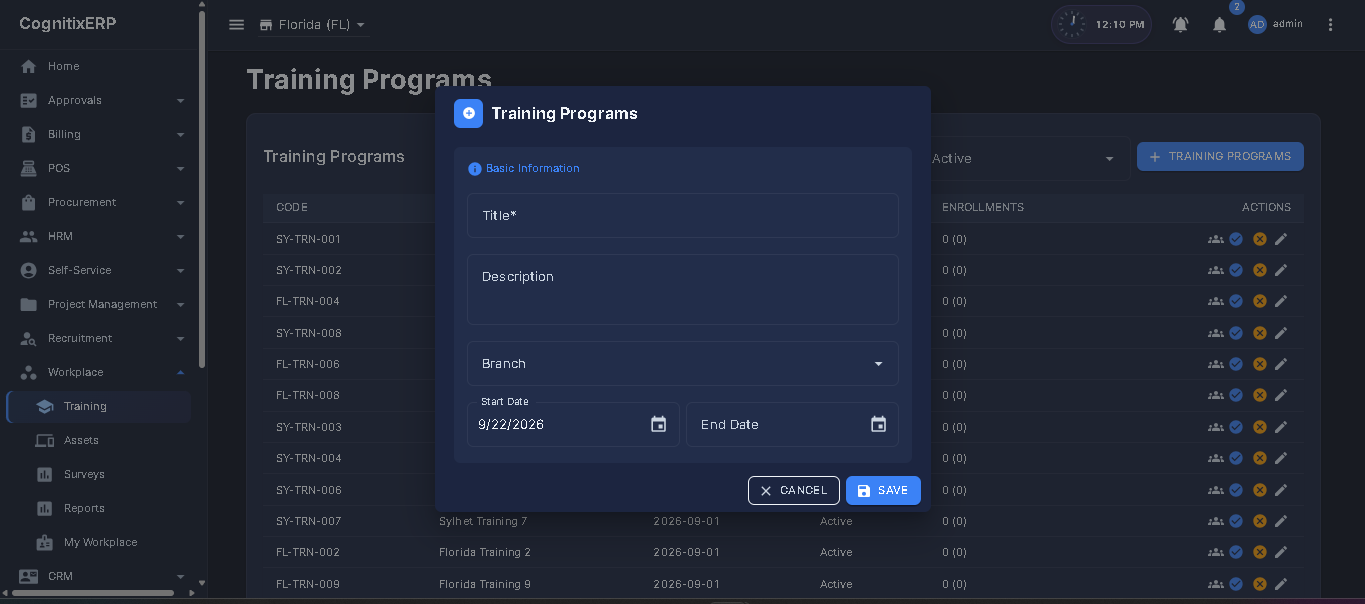
Program lifecycle
Every program moves through a controlled lifecycle. The status decides what you can do with it:
| Status | Meaning | What you can do |
|---|---|---|
| Draft | Newly created, not yet published. | Edit header fields, add sessions, delete the program. No enrollment yet. |
| Active | Published and running. | Enroll employees, add sessions, record completion/scores. This is the only status that accepts enrollment. |
| Completed | Finished. | Read-only. No further edits, sessions, or status changes. |
| Cancelled | Abandoned. | Read-only. No further edits, sessions, or status changes. |
1 · Create the program (Draft)
Click New on Workplace → Training and fill the program header:
| Field | What to enter |
|---|---|
| Code | A human-readable reference (e.g. TRN-2026-0001). Leave blank and the system generates one automatically, such as TRN-20260131-a1b2c3d4. |
| Title required | The program name — e.g. Fire Safety 2026. |
| Description | Objectives or an outline of what will be covered (optional). |
| Branch | Owning branch, so program lists can be branch-scoped like the rest of the ERP (optional). |
| Start Date | Planned start of the program. |
| End Date | Planned end (optional). Must not be earlier than the start date. |
Save. The program is created in Draft.
2 · Add sessions
A session is a single scheduled class within the program; a program can have one or many. Open the program and click Add Session:
| Field | What to enter |
|---|---|
| Title required | Session topic — e.g. Using a fire extinguisher. |
| Scheduled On | Date and time of the session. |
| Duration (hours) | Planned length. If supplied, it must be greater than zero (optional). |
| Trainer | The employee delivering the session (optional). |
| Location | Room, venue, or an online meeting link (optional). |
3 · Activate & enroll employees
Change the program status to Active (sessions can be added in Draft, but enrollment requires Active). Then click Enroll Employee and pick the staff who should attend. Enrollment rules:
- The same employee cannot be enrolled twice in the same program.
- An employee who was previously Dropped may be re-enrolled.
- Each new enrollment records an in-app Workplace notification.
4 · Track completion & scores
Each enrollment carries its own status through the training:
| Enrollment status | Meaning |
|---|---|
| Enrolled | Signed up, not yet started. |
| In Progress | Currently taking the training. |
| Completed | Finished, with an optional final score and completion date. |
| Dropped | Withdrew or was removed before finishing. |
- Complete: enter a final Score (0–100) and mark the enrollment complete. The status becomes Completed and the completion date is stamped. A score outside 0–100 is rejected.
- Drop: withdraw an employee who will not finish. A record that is already Completed cannot be dropped.
Employee view (ESS)
Employees do not manage programs. From ESS Workplace they can browse the catalog of Active programs and view only their own enrollments, status, and scores — one employee never sees another employee's enrollment data.
Example — Fire-safety course end to end
- New program
Fire Safety 2026(saved as Draft). - Add a session
Extinguisher drillwith its date, room, and trainer. - Change status to Active.
- Enroll the warehouse team.
- After the drill, mark each enrollment Completed and enter a score (0–100).
Result: Training coverage, enrollment, attendance, and score pass/fail reports update, and each enrolled employee can see their own result in ESS.
Step 2 — Company assets
Register laptops, phones, keys, and other items. Allocate to an employee, record returns, and log loss or damage. Overdue returns appear on the reports hub.
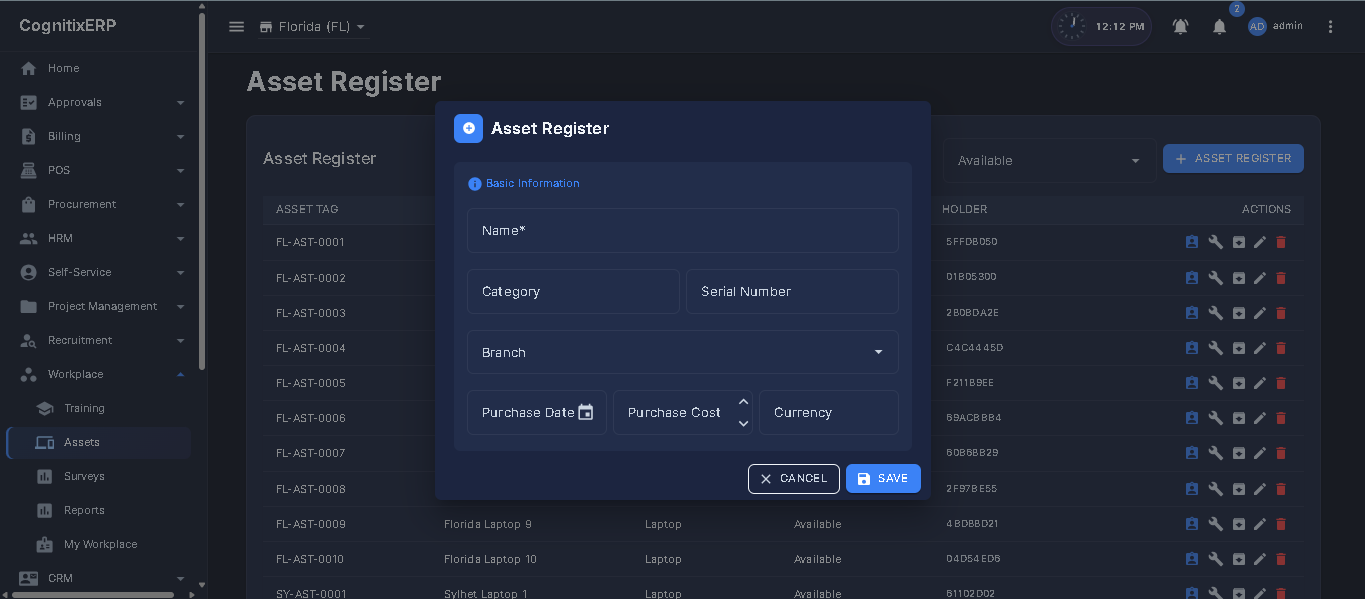
Step 3 — Surveys
Build questions, open the survey, collect responses, and review summaries. Employees can take assigned surveys from ESS where enabled.
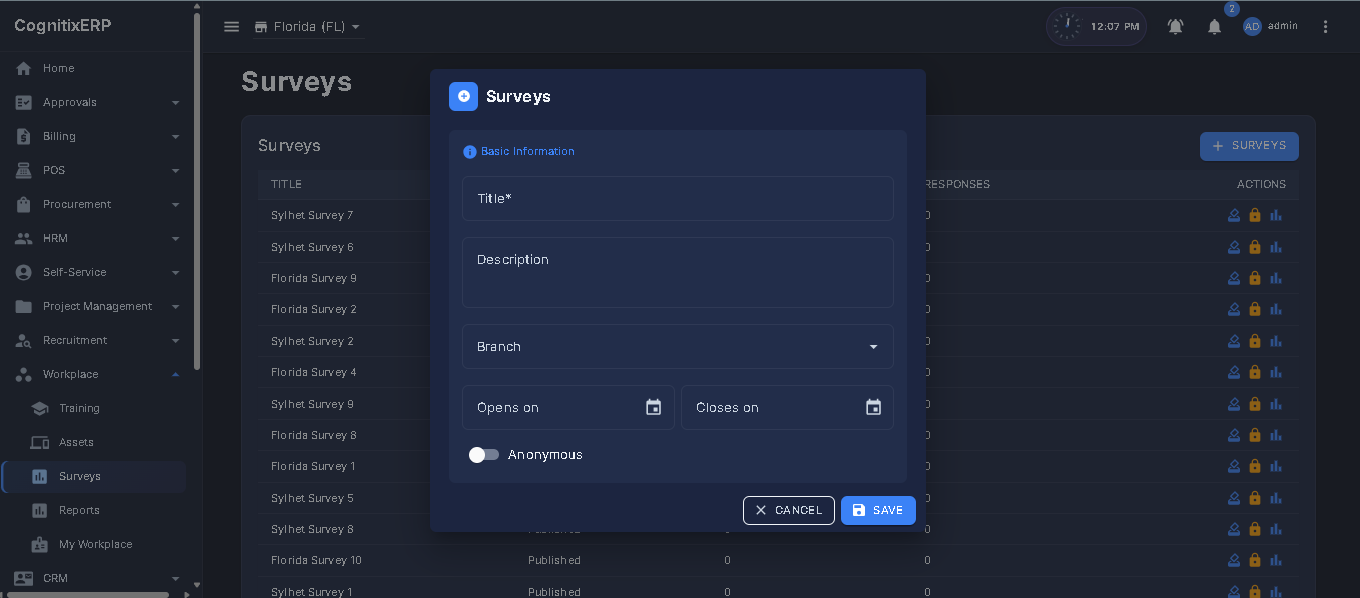
Step 4 — Workplace reports
PDF, Excel, and CSV from the same hub layout as Manufacturing.
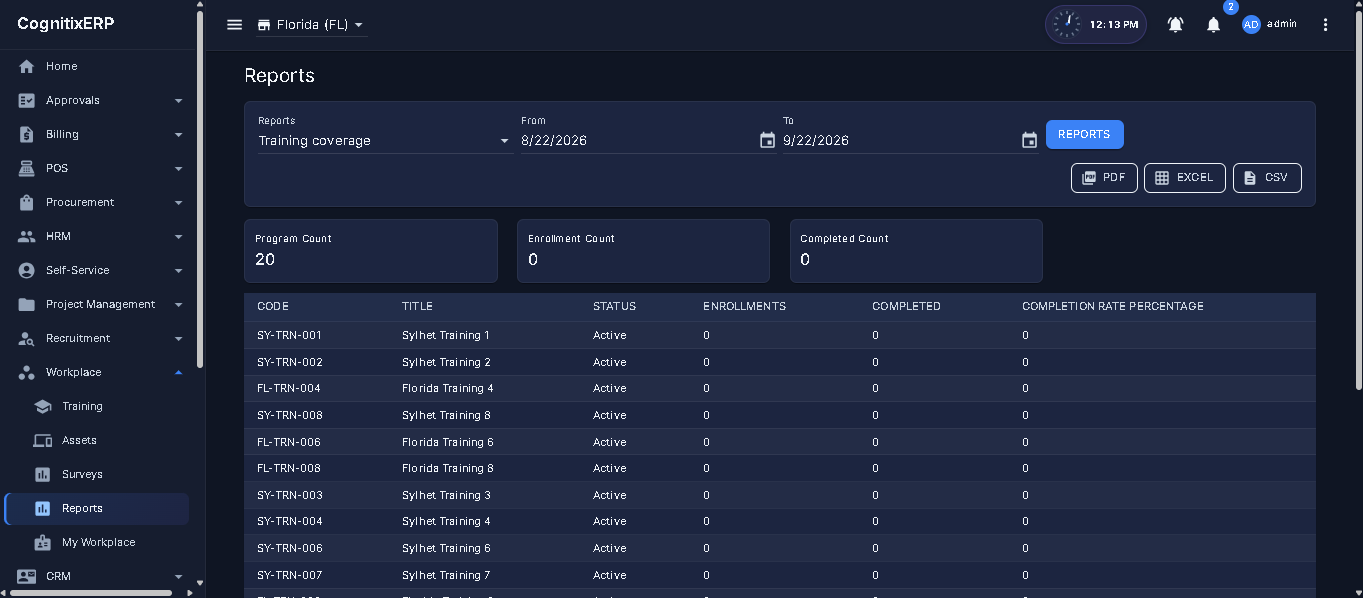
| Report | Use it for |
|---|---|
| Training coverage / enrollment / attendance / scores / calendar | Learning operations. |
| Asset register / allocation / overdue return / loss-damage | Facilities control. |
| Survey response rate / summary / open vs closed | Engagement tracking. |
Project Management
Project Management tracks delivery work: projects, tasks and dependencies, milestones, team allocations, role rates, budget versions, cost lines, WIP, change requests, timesheets, period lock, and a read-only client portal. Costing stays on the backend; the web app drives the workflow.
Recommended setup order
Routes at a glance
Navigation & permissions
| Menu path (Projects) | Route | Permission page |
|---|---|---|
| Projects → Projects | /project/projects | Projects |
| Projects → My Work | /project/mywork | MyWork |
| Projects → Timesheets | /project/timesheets | Timesheets |
| Projects → Timesheet Periods | /project/timesheet-periods | ProjectReports |
| Projects → Portal | /project/portal | ProjectPortal |
| Projects → Reports | /project/reports | ProjectReports |
Step 1 — Projects list
Create a project with code, name, dates, and status. Open a row to reach the full project workspace.
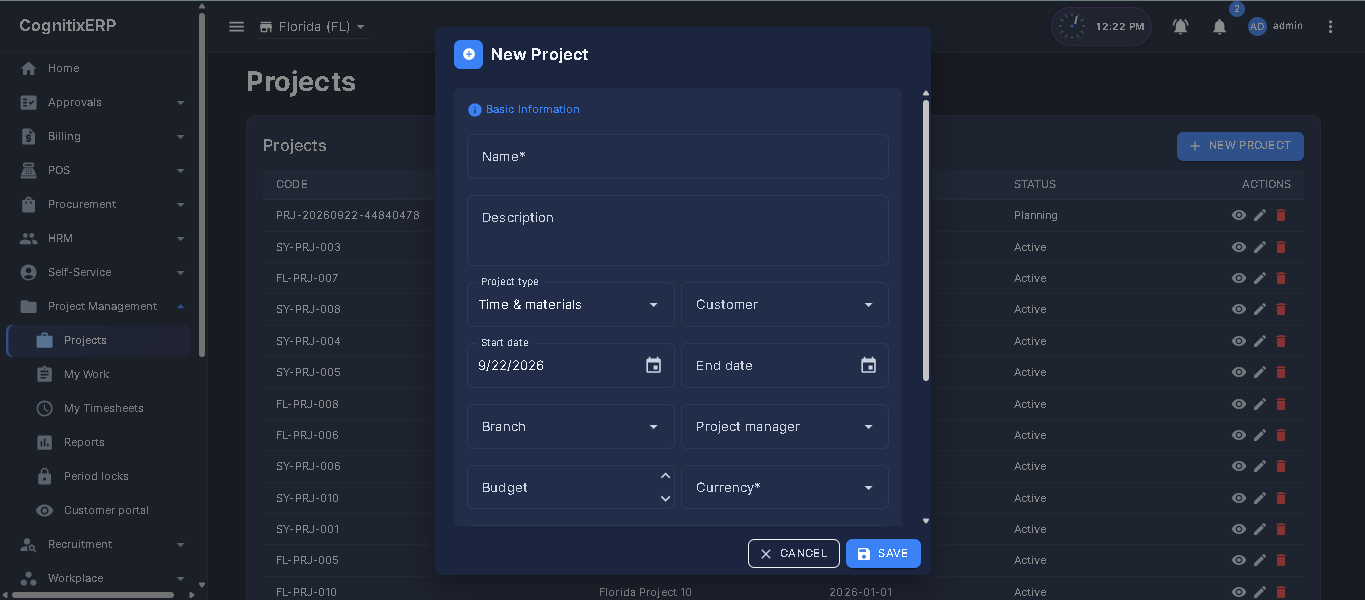
Step 2 — Project detail (tasks, budget, WIP, change requests)
Inside a project you maintain tasks (with dependencies), milestones, allocations, role rates, budget versions, cost lines, WIP, and change requests. Completing tasks feeds My Work and overdue-task reports.
Example — Website redesign project
- New project
WEB-26Website Redesign. - Add tasks Design → Build → QA with dependencies.
- Add a milestone
Go liveand a budget version for the quarter. - Allocate designers and developers with role rates.
Result: Timesheets post against those tasks; budget vs actual reports compare cost lines to the version.
Step 3 — My work
Personal task list for the signed-in user. Use it for daily execution without opening every project.
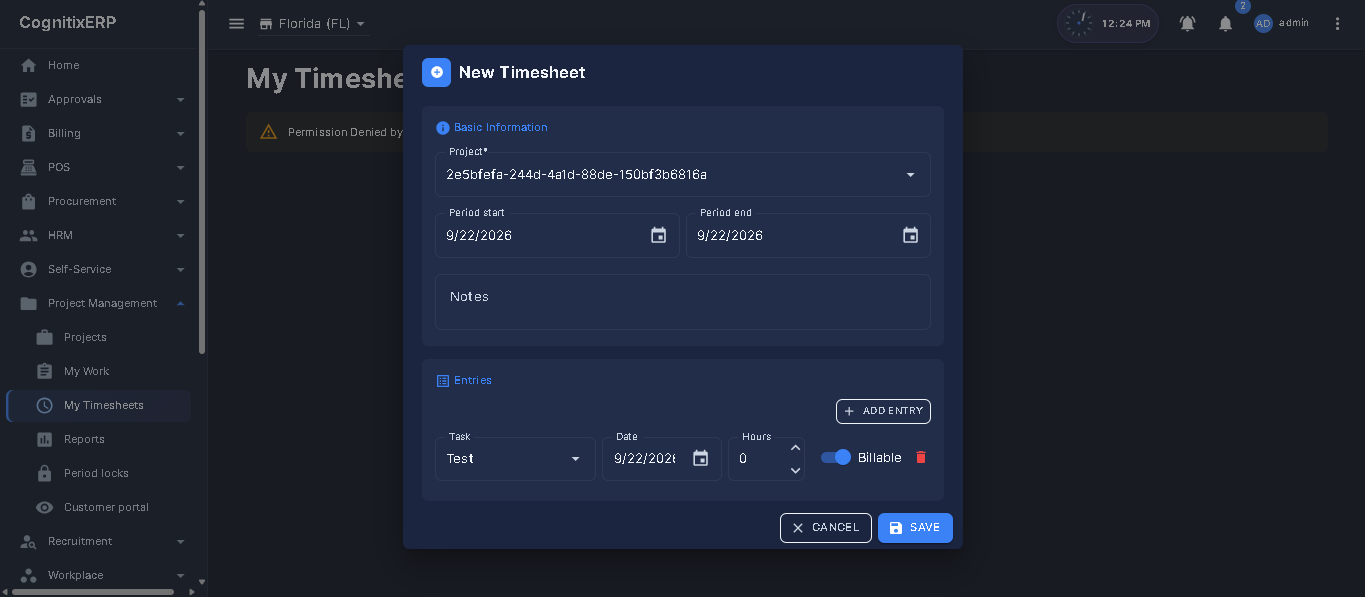
Step 4 — Timesheets
Enter hours against a project/task. Submit for approval. Rejected sheets return to draft. Locked periods cannot accept new entries.
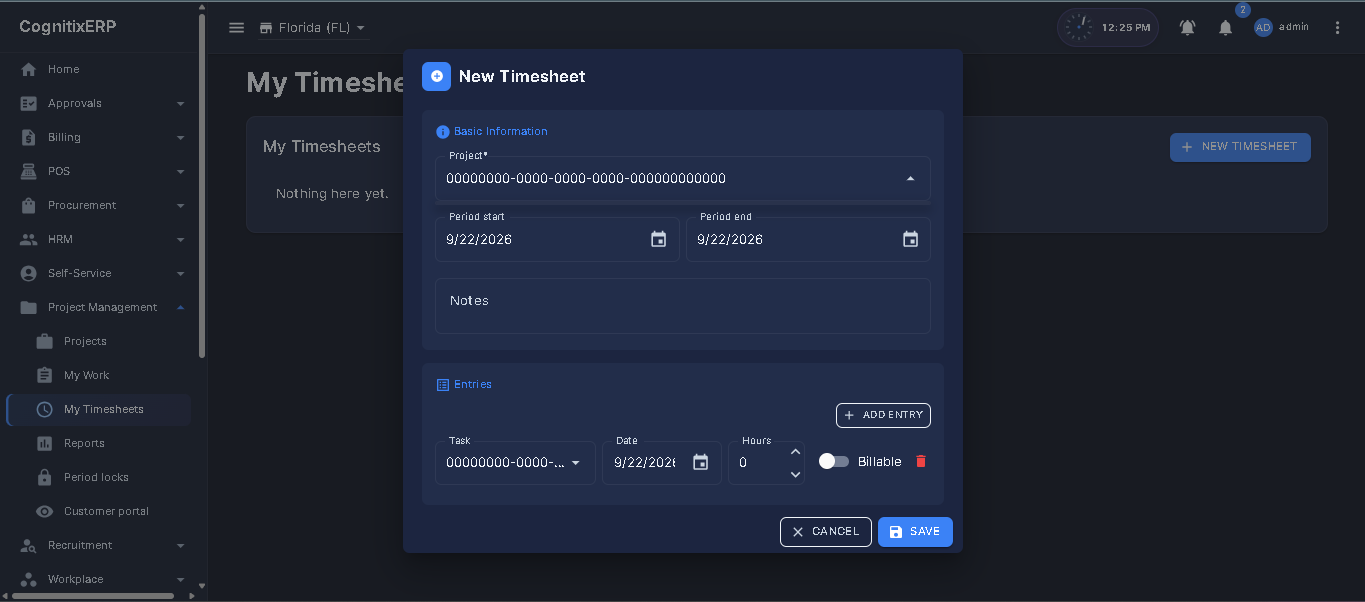
Step 5 — Timesheet periods
Open or lock a week/month so finance can freeze time before invoicing or payroll.
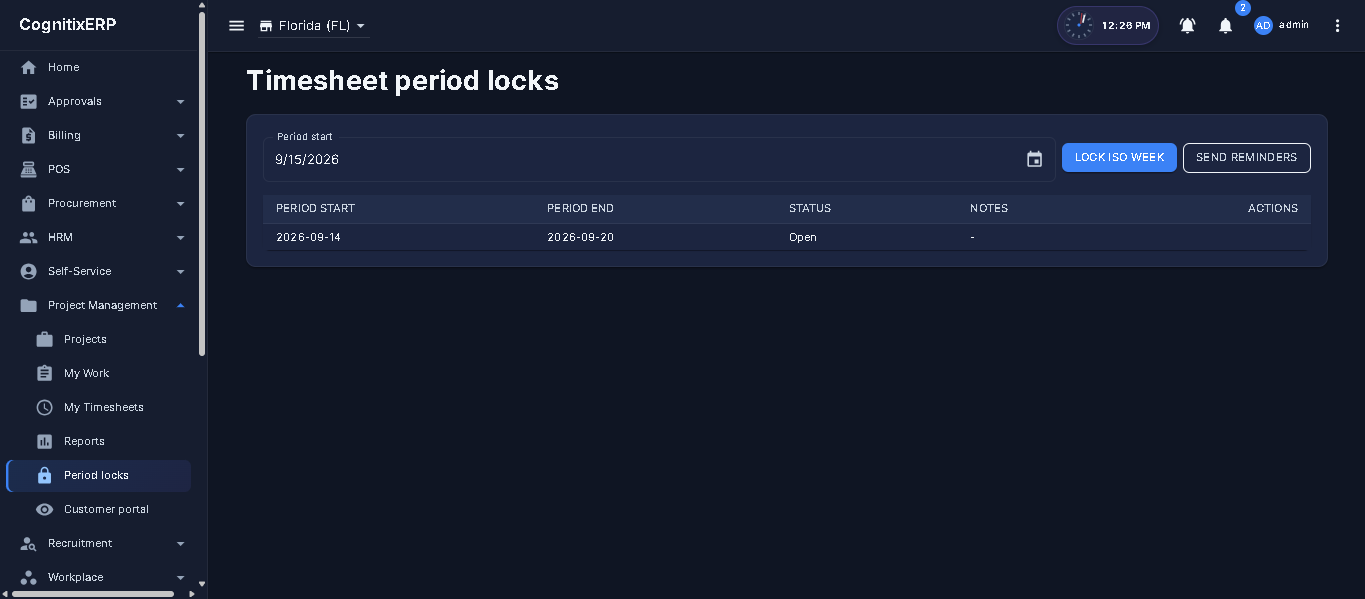
Step 6 — Client portal
Read-only view of selected project progress for stakeholders who should not see internal cost rates.
Step 7 — Project reports
PDF, Excel, and CSV — same hub design as Manufacturing.
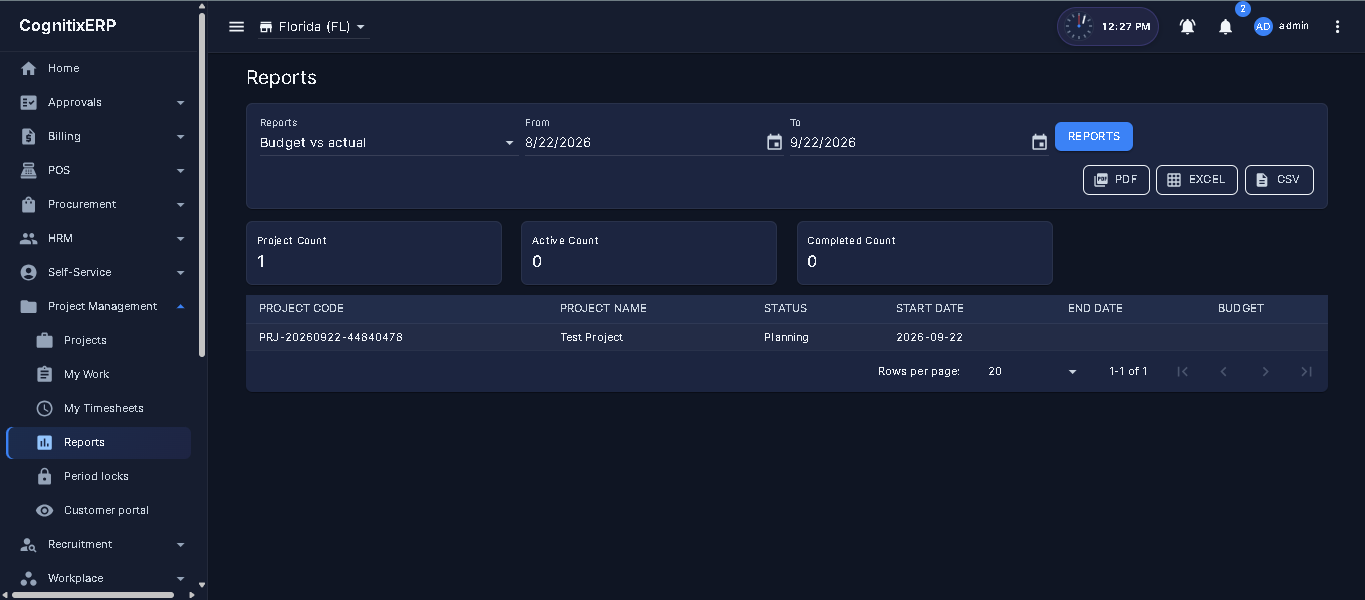
| Report | Use it for |
|---|---|
| Portfolio snapshot | Status of all projects. |
| Budget vs actual | Budget version compared with cost/WIP. |
| Timesheet register / overdue timesheets | Time entry compliance. |
| Overdue tasks / milestone register | Delivery risk. |
| Change-request register | Scope changes. |
Users & Security
Users & Security controls who can sign in, what they can see and change, and what actions are recorded. CognitixERP uses JWT authentication with refresh tokens, role-based page permissions (View / Create / Edit / Delete per screen), branch-scoped data access, forced password change for new accounts, temporary login lockout, and a searchable audit log.
Recommended setup order
Security flow
- Authenticate — user signs in at /users/login; JWT access token issued (default 60 minutes).
- Authorize — each route checked against role permissions; denied users see Access Denied.
- Scope — branch middleware filters transactional data to the user’s branch (or active branch for Admin).
- Audit — login, user/role changes, and security events written to audit log.
Routes at a glance
Navigation & permissions
| Menu path (User Management) | Route | Permission page |
|---|---|---|
| User Management → Users | /users/management | UserManagement |
| User Management → Roles | /users/roles | RoleManagement |
| User Management → Audit Logs | /users/audit | AuditViewer |
| App bar → Profile avatar | /users/profile | UserProfile |
| Login (public) | /users/login | None — anonymous |
| Force password change | /users/change-password-force | Authenticated only |
Part 1 — Authentication
Step 1 — Login & session
Route: /users/login | Access: Public (redirects to Setup Wizard if not complete)
Primary sign-in screen. Displays company branding (logo, favicon, tagline) from Company Management. Already-authenticated users with a valid token are redirected to the dashboard.
Example — Sign in as Sales user
- Open /users/login.
- Enter the Sales user’s username (or email) and password.
- Click Sign in.
Result: Menu items match the Sales role permissions; branch data is limited to the user’s assigned branch.
Login form — fields
| Field | Required | Description |
|---|---|---|
| Username or email | Yes | Accepts either username or registered email address. |
| Password | Yes | Hashed server-side; visibility toggle on the field. |
| Sign in | — | Submits credentials; shows progress while authenticating. |
Session behaviour
| Mechanism | Detail |
|---|---|
| Access token (JWT) | Default lifetime 60 minutes (Jwt:AccessTokenMinutes in API config). |
| Refresh token | Valid 7 days; stored in browser session storage; rotated on refresh. |
| Must change password | When flag set, user is redirected to /users/change-password-force before any other page. |
| License lock | Expired/invalid license redirects all users to /settings/license except login. |
| Logout | From User Profile — revokes refresh token and clears local session. |
Login lockout
After 5 failed attempts within a 15-minute window for the same username/email, the account is temporarily locked for 15 minutes. Failed attempts and lockouts are recorded in Audit Logs. Successful login resets the counter.
Login error messages
| Message | Cause |
|---|---|
| Invalid username or password | Wrong credentials, inactive account, or user not found. |
| Too many login attempts | Temporary lockout active — wait 15 minutes. |
| Unable to sign in | Server or network error. |
Step 2 — Force password change
Route: /users/change-password-force |
Trigger: Admin-created users (default MustChangePassword = true) or admin reset

Example — First login after admin create
- Sign in with the temporary password from User Management.
- On the force-change screen, enter Old Password, New Password, and Confirm.
- Submit, then sign in again with the new password.
Result: Must-change flag clears; user can open the dashboard with the new credentials.
| Field | Required | Description |
|---|---|---|
| Old Password | Yes | Current (temporary) password. |
| New Password | Yes | Must meet password policy (Setup Wizard uses same validator). |
| Confirm New Password | Yes | Must match New Password. |
On success the session is cleared and user must sign in again with the new password.
Part 2 — User & role administration
Step 3 — User Management
Menu: User Management → Users | Route: /users/management | Permissions: View list · Create (from employee) · Update · Delete

Example — Create a Purchase user from an employee
- Go to User Management → Users.
- Click Create User from Employee.
- Select the employee’s Branch, choose role Purchase, set Username and Password.
- Click Submit.
- Ask the user to sign in; they may be prompted to change password on first login.
Result: The new username appears in the User Management list and can access Purchase-related screens only.
User list — columns
| Column | Description |
|---|---|
| Username | Unique login identifier — cannot change after create. |
| Contact email; also accepted at login. | |
| Full Name | Display name from linked employee or profile. |
| Actions | Edit (dialog) · Delete (confirmation). |
Create User from Employee dialog — fields
Primary workflow: link an HRM employee who does not yet have a login.
| Field | Required | Description |
|---|---|---|
| Branch | Yes | ERP branch — scopes data access; locked on edit. |
| Employee | Create only | Lists employees in selected branch without an existing user account. |
| Role | Yes | Single role assignment (Admin, Manager, Sales, Purchase, or custom). |
| Username | Yes | Unique login name — read-only after create. |
| Password | Create: yes | Initial password; user typically forced to change on first login. |
Edit User dialog — additional fields
| Field | Required | Description |
|---|---|---|
| Employee Name | Read-only | Linked employee display name. |
| Role | Yes | Change assigned role — takes effect on next permission load. |
| New Password | No | Leave blank to keep current password; fill to reset. |
| Yes | Update contact email. | |
| Phone Number | No | Optional contact phone. |
| Is Active | Yes | Inactive users cannot sign in (attempts logged as failed login). |
Step 4 — Roles & Permissions
Menu: User Management → Roles | Route: /users/roles | Permissions: View · Create role · Update permissions · Delete role

Example — Grant Banking View to Manager
- Open User Management → Roles.
- Select the Manager role.
- Open the BANKING module tab.
- Tick View for the pages this manager should see (or click Grant All for that module).
- Click Save.
Result: Manager users see Banking menu items allowed by those permissions on next login / permission refresh.
Built-in roles (seeded at install)
| Role | Description | Default access summary |
|---|---|---|
| Admin | Super-user — full access to all modules and reports. | Bypasses permission matrix; can switch branches; marked “Super” in UI. |
| Manager | Supervisory cross-module access. | Inherits Purchase + Sales operational pages; adds Financials read reports, Banking read, HRM manager pages, Compliance read. |
| Sales | Sales team. | Full Billing, CRM, POS; product/stock read for quoting and POS. |
| Purchase | Procurement team. | Full Procurement + Inventory/WMS operational pages and reports. |
| BranchManager (custom) | Multi-branch supervisor — not seeded by default. | Create a role named exactly BranchManager for branch switcher and all-branch data access (does not bypass page permissions like Admin). |
Create custom roles with New Role, set name/description, tick permissions per module tab (including ESS, Recruitment, Workplace, Project, Approvals, and each module’s Reports pages), then Save. Report hubs typically need View only.
Role editor — fields
| Field / control | Description |
|---|---|
| Role Name | Unique identifier shown in user assignment dropdown. |
| Description | Optional internal note. |
| Save | Creates new role or updates name, description, and permission set. |
| Delete | Removes custom role (built-in roles should be edited, not deleted). |
Permission matrix — per page
Organized by module tabs (Dashboard, Users, HRM, ESS, Recruitment, Workplace, Project, Billing, POS, Procurement, Inventory, Manufacturing, Financials, Banking, Compliance, Approvals, Branching, and the rest).
| Action | Controls |
|---|---|
| View | See the page in navigation and open read-only screens. |
| Create | Add new records; shows Create buttons and dialogs. |
| Edit | Modify existing records; enables edit/save actions. |
| Delete | Remove records; shows delete icons and confirmations. |
| Grant All / Revoke All | Batch toggle all four actions for every page in the current module tab. |
Page names in the matrix match permission tags elsewhere in this manual (e.g. BankAccounts, CustomerReceipt). Report pages often have View-only grants.
Part 3 — Self-service & audit
Step 5 — User Profile
Route: /users/profile | Access: App bar avatar (when UserProfile View granted)

Example — Update email and switch to Bengali
- Open Profile from the app bar avatar.
- Update Email / Full Name and Save personal information.
- Under Preferences, set Language to Bengali (or enable Dark Mode).
Result: Contact details update; UI reloads in the selected language/theme.
Sidebar identity panel
| Element | Description |
|---|---|
| Avatar / initials | Profile picture or initials from full name. |
| Branch chip | User’s assigned branch name. |
| Language chip | Current UI language. |
| Theme chip | Light or Dark mode indicator. |
| Upload Profile Picture | Image upload (accepts image/*). |
| Save Picture | Posts to API; persists URL in user preferences. |
| Logout | Ends session and returns to login. |
Personal Information — fields
| Field | Editable | Description |
|---|---|---|
| Username | No | Read-only identifier. |
| Yes | Required; validated as email format. | |
| Full Name | Yes | Display name in app bar and reports. |
| Phone Number | Yes | Optional contact number. |
Change Password — fields
| Field | Required | Description |
|---|---|---|
| Current Password | Yes | Verify identity before change. |
| New Password | Yes | Replacement password. |
| Confirm New Password | Yes | Must match New Password. |
Preferences
| Setting | Options | Behaviour |
|---|---|---|
| Language | English (en-US) · Bengali (bn-BD) · Arabic (ar-SA) · French (fr-FR) | Saves preference and reloads UI with RTL for Arabic. |
| Dark Mode | On / Off toggle | Applies instantly; persisted per user. |
Step 6 — Audit Logs
Menu: User Management → Audit Logs | Route: /users/audit | Permission: AuditViewer View

Example — Review failed logins this week
- Open User Management → Audit Logs.
- Filter Module = Security, Action = LoginFailed, From = 7 days ago.
- Open View on a row to inspect full details.
Result: Failed login attempts appear with timestamps for lockout investigation.
Summary KPI cards
| KPI | Description |
|---|---|
| Total | All audit events in current query scope. |
| Today | Events recorded today. |
| Failed Logins (7d) | Failed authentication attempts in last 7 days. |
| Security | Security-classified events count. |
| System | System-classified events count. |
| By Module | Top 4 modules by event volume. |
Filters
| Filter | Description |
|---|---|
| Search | Free-text search across log fields. |
| Module | Security · Banking · Billing · Procurement · CRM · Maintenance · System · General · All. |
| Action | Login · LoginFailed · Logout · UserCreated · UserUpdated · UserDeleted · PasswordChanged · RoleCreated · RoleUpdated · RoleDeleted · RoleAssigned · RoleRevoked · PermissionAssigned · PermissionRevoked · PermissionUpdated · SystemAction · All. |
| From / To | Date range (UTC-normalized on query). |
| Per Page | 25 · 50 · 100 rows. |
| Load / Clear Filters | Apply or reset filter set. |
| Refresh | Reload latest events from header button. |
Audit table — columns
| Column | Description |
|---|---|
| Timestamp | Local date/time of event. |
| User Name | Actor (blank for anonymous failed logins). |
| Module | Module chip (colour-coded). |
| Action | Action chip + severity (Success / Warning / Critical). |
| Details | Human-readable description. |
| Data | Truncated affected-data payload preview. |
| View | Opens detail dialog with full timestamp, severity, and complete Affected Data JSON/text. |
Part 4 — Access control model
Branch access
| Role / behaviour | Branch visibility |
|---|---|
| Admin | Branch switcher dropdown when multiple active branches exist; can view/switch any branch. |
| BranchManager | Same switcher capability as Admin for operational oversight. |
| Other roles | Read-only branch chip — data scoped to assigned branch only; no switcher. |
See Branching guide for branch master setup and multi-branch FAQs.
How permissions enforce UI
- Navigation — menu groups hidden when user lacks module View permission.
- Routes — direct URL access blocked with Access Denied page if View missing.
- Buttons — Create/Edit/Delete wrapped in
CgxPermissionGate; hidden when action not granted. - Cache — permissions cached ~8 minutes (
PermissionsTtlMinutes); reloaded on login and auth state change.
Cross-module integration
| Module | Integration |
|---|---|
| HRM | Users created from employees inherit name/branch; employee profile links user account for self-service. |
| Branching | User BranchId drives data isolation middleware on API. |
| All modules | Every screen registers a page permission — configure via Roles before go-live. |
| Settings → License | License enforcement redirects locked tenants; Admin resolves at /settings/license. |
Before go-live checklist
| Task | Depends on |
|---|---|
| Review built-in roles (Admin, Manager, Sales, Purchase) | Roles |
| Create custom roles if needed (e.g. Cashier, Finance) | Module permission list |
| Create user for each team member from HRM employee | HRM employees · branches |
| Verify branch assignment per user | Branches |
| Test login with non-admin role — confirm menu matches expectations | Role saved |
| Review Audit Logs after first logins | Audit Viewer |
| Configure SMTP for password reset emails (optional) | Settings → Email |
FAQ — Users & Security
Grant View on the page permission in Roles. Remember Admin bypasses checks — test with the user’s actual role. Permissions reload on next login or after cache TTL (~8 min).
The role lacks View on that route’s page permission. Add View (and Create/Edit/Delete as needed) on /users/roles.
Select the correct branch first. Only employees without an existing login appear. Create the employee in HRM first.
Wait 15 minutes or verify credentials. Check Audit Logs for LoginFailed events. Ensure account is Active in User Management.
Only Admin and BranchManager roles get the switcher. Assign BranchManager role or use Admin for multi-branch oversight.
Approval Workflows
The Approval Workflows feature adds configurable, multi-level, role-based approvals to business documents across modules (Sales, Purchase, Payment, Receipt, Billing, Procurement, Expense, Banking). An administrator designs a workflow for a business scope; when a matching document is submitted it is routed level-by-level to the configured approvers. Approvers act from the Approval Center, and levels that sit idle too long can escalate automatically.
End-to-end flow
Routes at a glance
Navigation & permissions
| Menu path (Approvals) | Route | Permission page |
|---|---|---|
| Approvals → Approval Center | /approvals | ApprovalCenter |
| Approvals → History | /approvals/history | ApprovalCenter |
| Approvals → Approval Workflow Designer | /approvals/workflows | WorkflowConfiguration |
| Approvals → Reports | /approvals/reports | ApprovalReports |
1 · Create an approval workflow (Admin / Manager)
Open /approvals/workflows from Approvals → Approval Workflow Designer. If the menu item is hidden, your role lacks the WorkflowConfiguration permission.
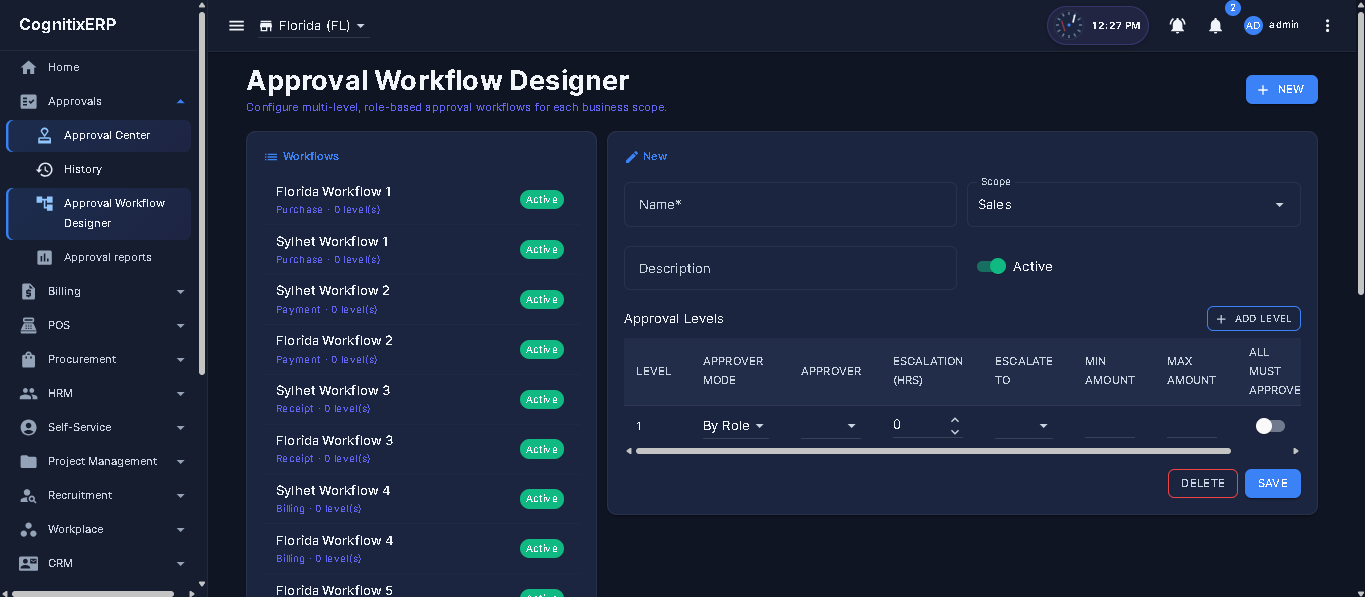
Example — Two-level Sales Invoice approval
- Click New.
- Name:
Sales Invoice Approval. - Scope:
Sales. - Keep Active on. (Only one active workflow per scope is used at runtime.)
- Click Add Level twice:
- Level 1 — Approver Mode
By Role, ApproverSales Manager, Escalation24hrs, Escalate ToFinance Manager. - Level 2 — Approver Mode
By Role, ApproverFinance Manager, Escalation0(no escalation).
- Level 1 — Approver Mode
- Click Save.
Result: new Sales invoices submitted from Billing now require Level 1 then Level 2 approval before they proceed.
- By Role — every user holding the selected role can act at that level.
- Specific User — only the named user.
- Anyone With Permission — any user whose permissions include the given page key (e.g.
ApproveSales).
0 to disable escalation for that level.
2 · Submit a document (any user)
Nothing changes for the submitter. Create and Submit the document as usual — a Sales Invoice, a Purchase Order, or an Expense. If an active workflow exists for that scope, the document automatically enters the workflow at Level 1; if not, the normal approval process applies.
3 · Approve or reject (approvers)
Open /approvals from Approvals → Approval Center. The My Multi-Level Approvals panel at the top lists documents currently waiting for your decision (your level, not yet actioned, not submitted by you).
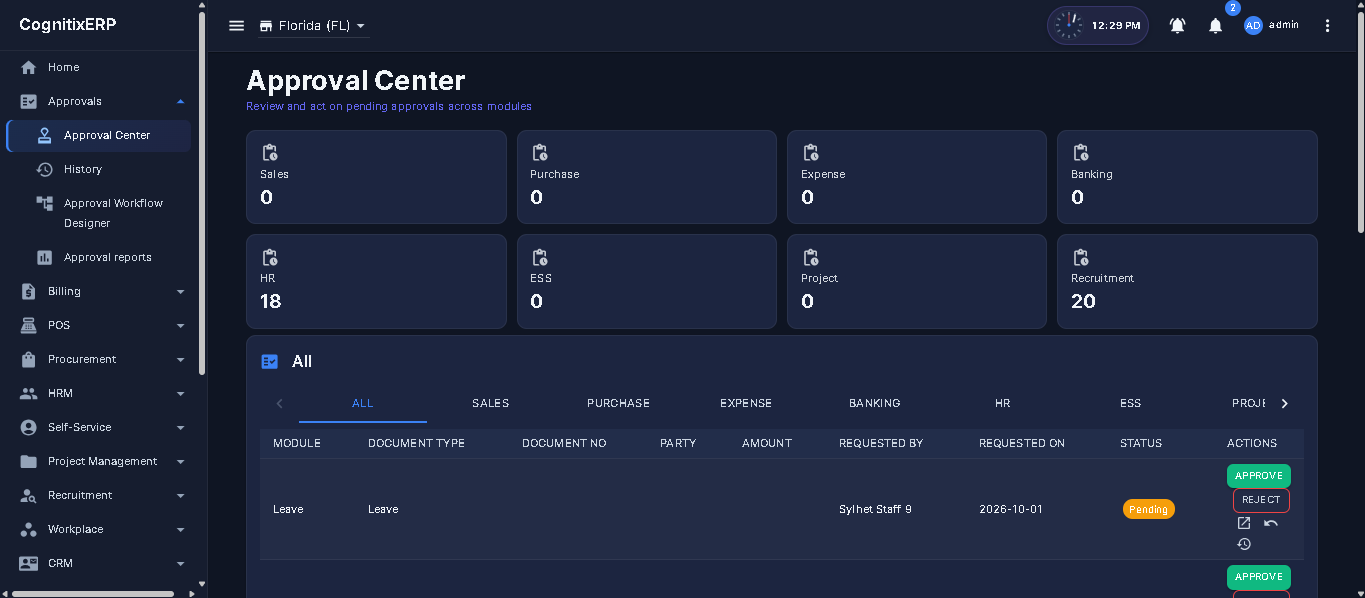
- Approve — confirms your level. If it is the final level the document becomes fully approved; otherwise it advances to the next level's approvers.
- Reject — requires a reason (mandatory) and terminally stops the document.
- History (clock icon) — shows the full multi-level timeline: who acted, when, and comments.
4 · Track progress & automatic escalation
The History dialog shows current level, total levels, overall status (Pending / Approved / Rejected), and a timeline of every action.
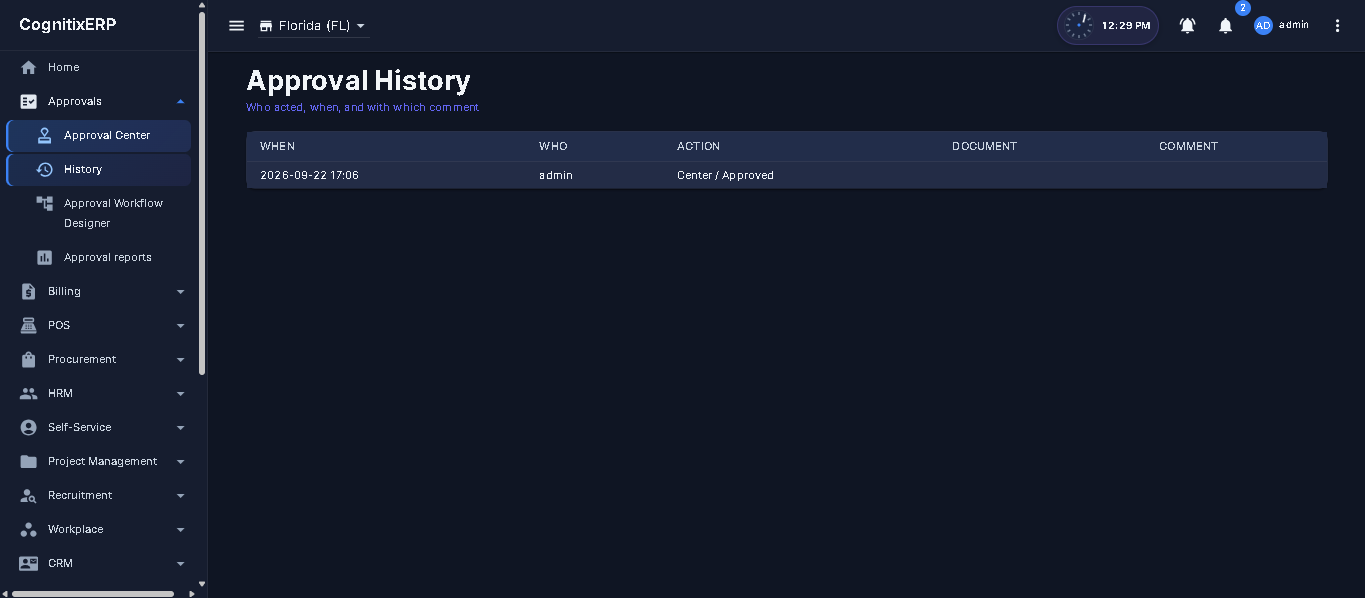
Escalation is automatic. A background process checks pending levels; when a level exceeds
its configured timeout it records an “Escalated” entry and notifies the Escalate To role. No manual
action is required. (Set a level's escalation hours to 0 to disable it.)
5 · Approval History
Menu: Approvals → History | Route: /approvals/history
The History page lists completed and in-flight requests across modules so managers can audit who approved what, when, and with which comments.
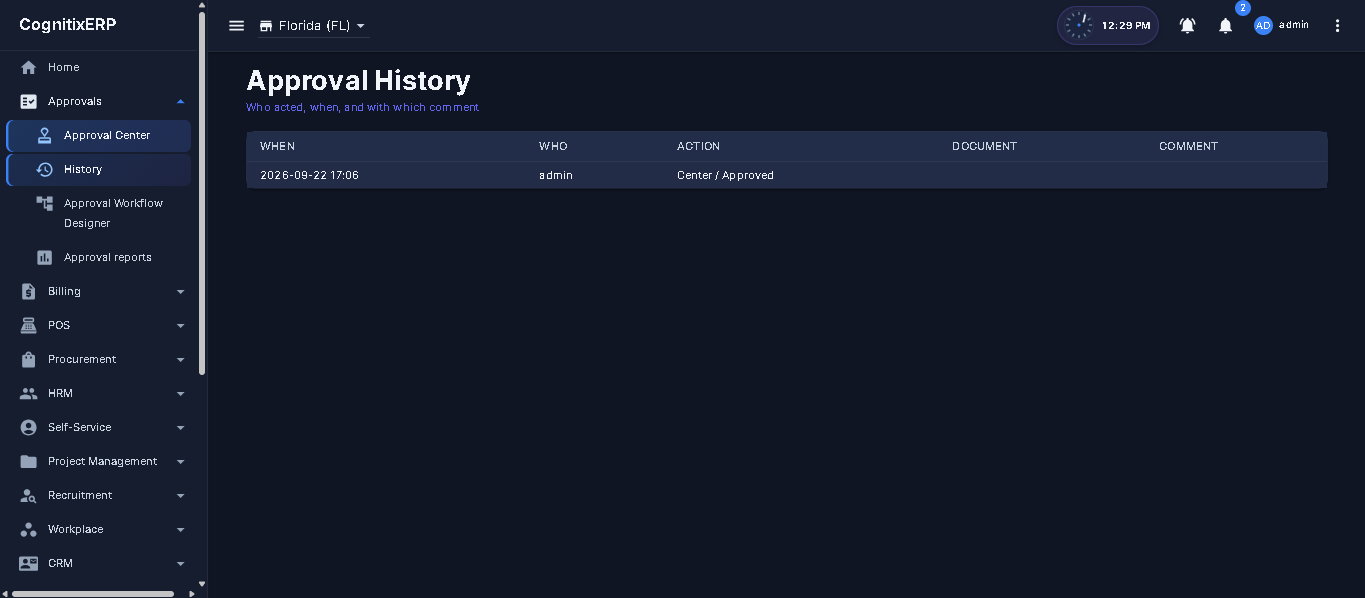
6 · Approval reports
Menu: Approvals → Reports | Route: /approvals/reports | Permission: ApprovalReports
Same hub design as Manufacturing reports. Each card exports PDF, Excel, and CSV.
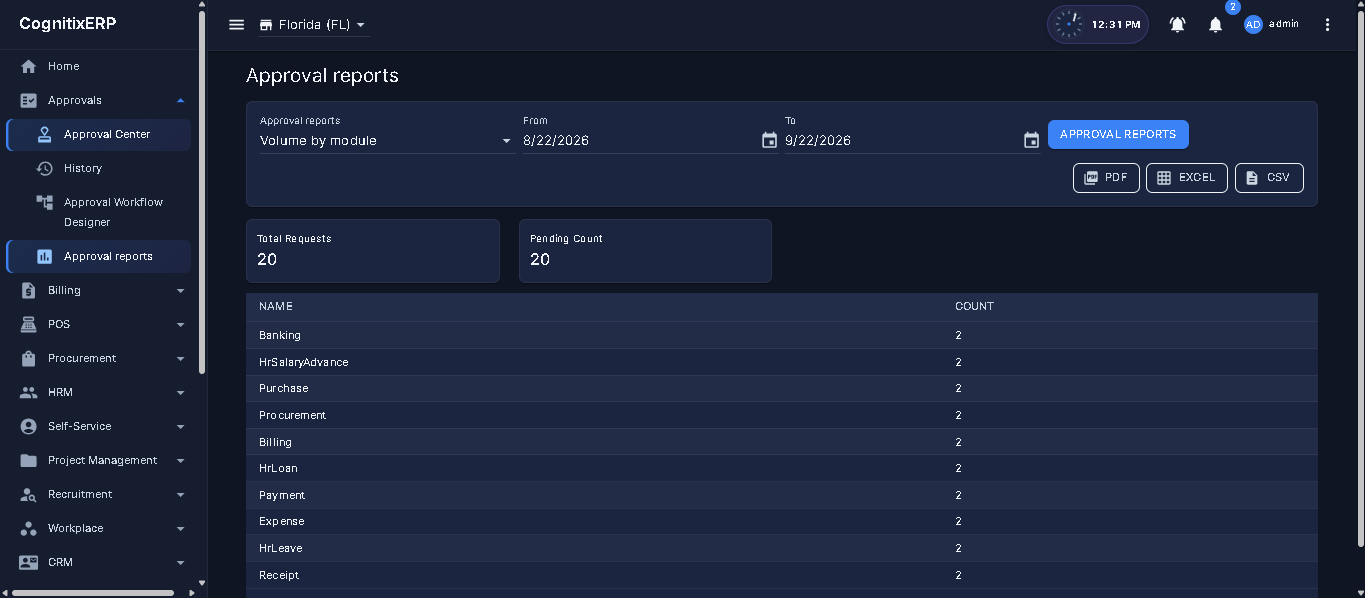
| Report | What it shows |
|---|---|
| Volume by module | How many requests each module submitted. |
| Pending aging | How long requests have waited at the current level. |
| Approver workload | Open items per approver. |
| Action rate | Approve vs reject mix. |
| Cycle time | Submit-to-decision duration. |
| History export | Full timeline export for audit. |
Troubleshooting
| Symptom | Likely cause / fix |
|---|---|
| Document still uses the old approval flow | No Active workflow for that scope, or the wrong scope was chosen. One active workflow per scope is used. |
| Approver sees nothing in “My Multi-Level Approvals” | Their level has not been reached yet, they are not the level's role/user, or they submitted the document (self-approval is blocked). |
| Designer menu item is missing | Role lacks WorkflowConfiguration. Ask an administrator to grant it. |
| No email notifications | Configure SMTP settings; notifications are best-effort and never block approvals. |
Settings
The Settings menu holds tenant-wide configuration that is not tied to a single operational module — company legal profile and branding, branch master, outbound email (SMTP), POS/inventory weight-scale hardware, and CodeCanyon license activation. Most screens require Admin or explicit page permissions under the Settings module group.
Recommended setup order
Routes at a glance
Navigation & permissions
| Menu path (Settings) | Route | Permission page |
|---|---|---|
| Settings → Company Management | /settings/company-management | CompanyManagement |
| Settings → Branches | /settings/branches | Branches |
| Settings → Weight Machine Settings | /settings/weightmachine | WeightMachineSettings |
| Settings → Email Settings | /settings/email | SmtpSettings |
| Settings → License | /settings/license | LicenseSettings |
Part 1 — Company & branches
Step 1 — Company Management
Menu: Settings → Company Management | Route: /settings/company-management
Lists the legal company profile (typically one record per tenant). Drives login branding, document headers, tax ID on e-invoices, and company timezone for all users.
Company list — columns
| Column | Description |
|---|---|
| Official Name | Legal registered name on statutory documents. |
| Display Name | Short name shown in app bar, login, and reports. |
| Official Email | Primary company contact email. |
| Phone Number | Main company phone. |
| Website | Company website URL. |
| Actions | View · Edit · Delete (Create disabled when company exists). |
Step 1b — Company Setup wizard (create / edit)
Routes: new /settings/company-setup · edit /settings/company-setup/{id}
Three-step wizard. Saving updates live branding (logo, favicon, display name) and company timezone.

Example — Update logo and timezone
- Open edit from Company Management or go to /settings/company-setup/{id}.
- Complete Basic and Contact steps, then on Key People & Branding upload logo and set timezone.
- Save.
Result: Login branding and company clock update across the app.
Step 1 — Basic Information
| Field | Required | Description |
|---|---|---|
| Official Name | Yes | Legal entity name. |
| Display Name | Yes | Trading / app display name. |
| Business Type | Yes | Enum — sole proprietorship, partnership, company, etc. |
| Industry Sector | Yes | Industry classification for reporting context. |
| Established Date | No | Company founding date. |
| Company Registration No | No | Trade license / registration number. |
| TIN / VAT / GST Number | No | Tax identifier — required for e-invoicing and compliance. |
Step 2 — Contact Information
| Field | Required | Description |
|---|---|---|
| Head Office Address | Yes | Multi-line registered address. |
| City / State / Country / Zip | Yes | Address components for documents and compliance. |
| Phone Number | No | Landline or main switchboard. |
| Fax Number | No | Fax if printed on letterhead. |
| Official Email | Yes | Validated email format. |
| Website URL | No | Public website. |
Step 3 — Key People & Branding
| Field | Required | Description |
|---|---|---|
| Owner / Founder Name | Yes | Proprietor or founder for statutory forms. |
| CEO / Managing Director | Yes | Senior signatory name. |
| HR Head / Contact Person | Yes | HR primary contact. |
| Emergency Contact | No | After-hours contact. |
| Company Slogan / Tagline | No | Shown on login screen under brand name. |
| Timezone | No | IANA timezone — drives company clock, dates, and fiscal day boundaries. |
| Company Logo | No | Image upload — nav drawer, login, documents. |
| Company Favicon | No | Browser tab icon (.ico or image). |
Step 2 — Branches (Settings menu)
Menu: Settings → Branches | Routes: list /settings/branches · view /settings/branches/{id}
Operational locations for data scoping, stock, banking, and user assignment. Same data as Branching module — opened here from Settings for administrators. Field-level branch dialog reference: Branching guide.

Example — Add a sub-branch
- Open Settings → Branches and click Add/Create.
- Enter name, code, type Sub, parent = HQ, optional manager from HRM.
- Save and keep Active.
Result: Branch appears in the list and can be assigned to users, warehouses, and documents.
List filters
| Filter | Options |
|---|---|
| Status | All · Active · Inactive. |
| Branch Type | All · Base · Sub. |
| Search | Name, code, city text search. |
List columns
| Column | Description |
|---|---|
| Branch Name | Star icon marks base branch. |
| Branch Code | Short unique code (e.g. HQ, WH1). |
| City / Contact / Email | Location and contact details. |
| Parent Branch | For sub-branches in hierarchy. |
| Branch Manager | HRM employee assigned as manager. |
| Status | Active / Inactive chip. |
| Actions | View · Edit · Delete. |
Part 2 — System configuration
Step 3 — Email Settings (SMTP)
Menu: Settings → Email Settings | Route: /settings/email
Configures outbound SMTP for system emails (password reset, notifications). Settings are stored
in the database and override default appsettings.json SMTP placeholders.

Example — Configure Gmail SMTP and test
- Open Settings → Email Settings.
- Set host smtp.gmail.com, port 587, SSL on, username + app password, From Email/Name.
- Enter a Test Recipient and click Send Test, then Save.
Result: Test mail arrives; password-reset and notification emails can send.
SMTP Server section
| Field | Required | Description |
|---|---|---|
| SMTP Host | Yes | Server hostname (e.g. smtp.gmail.com). |
| Port | Yes | 1–65535 — typically 587 (TLS) or 465 (SSL). |
| Enable SSL | No | Toggle TLS/SSL for connection. |
Authentication section
| Field | Required | Description |
|---|---|---|
| Username / Email | Yes | SMTP login username. |
| Password / App Password | Yes | SMTP password; use app-specific password for Gmail. |
Sender Identity section
| Field | Required | Description |
|---|---|---|
| From Email | Yes | Envelope sender address recipients see. |
| From Name | Yes | Display name (e.g. CognitixERP Notifications). |
Test configuration
| Field / action | Description |
|---|---|
| Test Recipient | Email address for test message. |
| Send Test | Saves settings first, then sends test email. |
| Save | Persists SMTP configuration. |
| Reset | Reloads saved values from server. |
Step 4 — License
Menu: Settings → License | Route: /settings/license | Access: Available when license locked; Admin typically
CodeCanyon / Envato purchase verification. When license is inactive or trial expired, the app redirects all routes here until activation succeeds.

Example — Activate with purchase code
- Open Settings → License.
- Enter Envato username, email, and purchase code from CodeCanyon downloads.
- Click Activate (or Re-verify if already stored).
Result: Status becomes Active with bound domain; app unlocks for normal use.
Current Status panel (read-only)
| Field | Description |
|---|---|
| Status | Active, Trial, Locked, PendingEnvatoVerify, etc. |
| License Type | Envato-detected license tier. |
| Product | Item title and Envato item ID. |
| Bound Domain | Domain registered with license server. |
| Trial Ends | Trial expiry UTC timestamp. |
| Last Verified | Last successful Envato check. |
| Pending Envato Since | When verification entered pending state. |
Activate / Re-verify form
| Field | Required | Description |
|---|---|---|
| Envato Username | Activate | Your CodeCanyon/Envato account username. |
| Envato Email | Activate | Email on Envato purchase. |
| Purchase Code | Activate | CodeCanyon purchase code from download page. |
| Activate | — | First-time or changed purchase binding. |
| Re-verify | — | Re-check existing stored license with Envato. |
Trial warning banners appear when ≤7 days remain; error banner when locked.
Step 5 — Weight Machine Settings
Menu: Settings → Weight Machine Settings | Route: /settings/weightmachine
Serial-port profiles for electronic weighing scales used at POS or goods receiving. One active profile per scope (global or branch) supplies live weight readings to inventory/POS screens.

Example — Add an active COM scale profile
- Open Settings → Weight Machine Settings and add a profile.
- Set COM port, baud rate, and branch/global scope; mark Active.
- Test read from POS Scale Read or procurement GRN on a weight-based product.
Result: Live weight fills qty on weight-based SKUs at the terminal or GRN.
Profile list — columns
| Column | Description |
|---|---|
| Name | Profile label (e.g. Front Counter Scale). |
| Port Name | COM port (Windows) or device path. |
| Baud Rate / Data Bits | Serial communication parameters (default 9600 / 8). |
| Branch | Branch scope or Global. |
| Active | Green chip if active profile; Activate button otherwise. |
| Actions | Edit · Delete. |
Add / Edit profile dialog — fields
| Field | Required | Description |
|---|---|---|
| Name | Yes | Profile identifier. |
| Port Name | Yes | Serial port identifier. |
| Baud Rate | Yes | Default 9600 on new profiles. |
| Data Bits | Yes | Default 8 on new profiles. |
| Branch | No | Global (all branches) or specific branch. |
| Set as Active Profile | No | Make this the live reading source on save. |
| Test Connection | — | Reads net weight from scale without saving list. |
Header actions: Test Connection (uses active profile) · Add New Profile.
Audit log table: Date, Profile Name, Action, Field, Old/New Value, Changed By — last 50 changes.
Cross-module integration
| Setting | Used by |
|---|---|
| Company / timezone / logo | Login, nav branding, printed documents, compliance e-invoice issuer details. |
| Branches | All modules — users, stock, banking, billing, HRM branch scoping. |
| SMTP | User password reset, notification emails from API. |
| License | Entire application access — middleware blocks when locked. |
| Weight machine | Inventory/POS weighted product capture via serial port. |
Before go-live checklist
| Task | Depends on |
|---|---|
| Complete company setup wizard with logo, favicon, timezone | Setup Wizard Step 1 |
| Verify TIN/VAT/GST on company if using compliance | Tax & Compliance |
| Register all branches (base + sub) | Branches |
| Configure SMTP and send test email | Valid mail server credentials |
| Activate CodeCanyon license on production domain | Purchase code |
| Calibrate weight scale profile (if used) | Scale connected to server/COM port |
FAQ — Settings
Update Display Name, logo, and favicon in Company Setup wizard. Changes apply on next page load; clear browser cache if favicon persists.
Trial expired or Envato verification failed. Open /settings/license, enter purchase code, and Activate or Re-verify.
Check port/SSL combination (587 + SSL on, or 465). For Gmail use an App Password, not the main account password. Ensure firewall allows outbound SMTP.
Confirm correct COM port, baud rate matches scale manual, profile is Active, and API server has physical access to the serial port. Use Test Connection on the profile dialog.
CognitixERP supports one company profile per tenant — Create is disabled when a company already exists. Edit the existing record instead.
Screenshot file names
Save captures as PNG into Documentation/assets/screenshots/ using the exact file names below
(spaces included). Until a file exists, the manual shows a labelled placeholder with that name.
New modules (add these first)
| File name | Where to capture |
|---|---|
Recruitment Requisitions.png | /recruitment/requisitions |
Recruitment Postings.png | /recruitment/postings |
Recruitment Careers.png | /careers |
Recruitment Candidates.png | /recruitment/candidates |
Recruitment Applications.png | /recruitment/applications |
Recruitment Reports.png | /recruitment/reports |
ESS Dashboard.png | /ess/dashboard |
ESS My Attendance.png | /hrm/my-attendance |
ESS Kiosk.png | /hrm/kiosk |
ESS Shift Swap.png | /hrm/shift-swap |
ESS Requests.png | /ess/requests |
ESS My Records.png | /ess/my-records |
ESS Workplace.png | /ess/workplace |
ESS Policies.png | /ess/policies |
ESS Announcements.png | /ess/announcements |
ESS Reports.png | /ess/reports |
Workplace Training.png | /workplace/training |
Workplace Assets.png | /workplace/assets |
Workplace Surveys.png | /workplace/surveys |
Workplace Reports.png | /workplace/reports |
Project Projects.png | /project/projects |
Project Detail.png | open a project from the list |
Project My Work.png | /project/mywork |
Project Timesheets.png | /project/timesheets |
Project Timesheet Periods.png | /project/timesheet-periods |
Project Portal.png | /project/portal |
Project Reports.png | /project/reports |
Approval History.png | /approvals/history |
Approval Reports.png | /approvals/reports |
CRM Campaigns.png | /crm/campaigns |
Inventory Masters Hub.png | /inventory/masters |
HRM Masters Hub.png | /hrm/masters |
Financials Masters Hub.png | /financials/masters |
CRM Masters Hub.png | /crm/masters |
HRM Biometric Device Config.png | /hrm/attendance/biometric-settings — Device Configuration tab |
HRM Biometric Device Mapping.png | /hrm/attendance/biometric-settings — Employee ↔ Device Mapping tab |
HRM Biometric Integration Guide.png | /hrm/attendance/biometric-settings — Integration Guide tab |
Existing names already referenced (rename to match if you recapture)
Login, Dashboard, Setup Wizard steps, Company Setup, Branches, Financials, Banking, Compliance, HRM,
CRM, Inventory, Stock, WMS, Billing, POS, Procurement, Manufacturing, Users, and Settings shots keep
their current names (for example Login.png, Manufacturing Reports.png).
Missing files also show a placeholder with that exact name.
Please Contact us
- Sign up at https://cognitivebd.com
- Create a Support Ticket.
- Within 48hr we will reply.
- WhatsApp: +18632279760
Or email support@cognitivebd.com with your purchase code, version, and screenshots/logs.